CS248 Assignment 1: Overview of Paint Program Development
This session provides a comprehensive overview of Assignment 1 for CS248, focusing on building a paint program. Participants will learn about essential topics such as overpainting and tinting brushes, brush visualization, and grading criteria. The session emphasizes understanding the assignment details, utilizing resources like the Sweet Hall lab, and seeking TA support. Key components include implementing 2D raster graphics concepts and developing creative solutions for extra credit. Attend to clarify any questions and gain insights into the project execution.

CS248 Assignment 1: Overview of Paint Program Development
E N D
Presentation Transcript
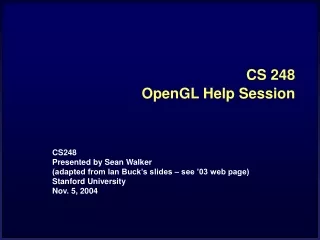
CS 248 Assignment 1Paint Program CS248 Help Session #1 Original slides by Georg Petschnigg Modified by: Sean Walker, Rene Patnode Stanford University October 6, 2004
Session Overview • Getting Started • Assignment Discussion • Overpainting Brush • Tinting Brush • Brush Visualization • Grading Details • Extra Credit • Questions
Getting Started • Read assignment carefully and pay attention to the details. • Go to help session • Familiarize yourself with Raptor/Firebird Lab Located in the Basement of Sweet Hall
Development Environment • Ways to work with TA Support • Go to Sweet Hall (Best Way – 5 Minutes) • Work Remotely (Good Way – 5 Minutes) • Ways to work without TA support • Reproduce Sweet Hall Lab development environment on you own Machine (1 Hour) • Your code still has to work on the Sweet Hall machines (more risk for you)
Sweet Hall • Pick a free computer, Log on • Copy assignment from /usr/class/cs248/assignments/assignment1/to local directory • Run ‘make’ • Run ‘./paint.i386-linux’
Working Remotely • ssh to firebird, raptor or leland (make sure X-tunneling is enabled) • Export the display (using e.g. Exceed3D) • Follow instructions on previous slide >ssh raptor.stanford.edu>setenv DISPLAY yourIP:0.0>xterm &
Assignment Discussion • You are going to write a paint program • Teaches you 2D Raster Graphics • Visualize concepts learned in Class (Brushes, HSV) • Be creative with extra credit • The next slides follow the Assignment (Handout #3) step by step • Reminder: Read the assignment
Paint Program 1973 Source: Dick Shoup “SuperPaint: An Early Frame Buffer Graphics System” IEEE Annals of the History of Computing, Vol 23, No 2, Apr-Jun 2001
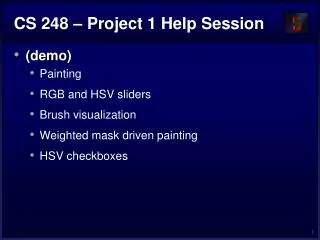
Part 1: Over Painting Brush • Rectangular Overpainting Brush • Like Microsoft Paint or “Pencil Tool” in PhotoShop • Color Picker for RGB, HSV • See http://java.sun.com/docs/books/tutorial/uiswing/ components/colorchooser.html or any commercial paint program • Value (1.0 bright, 0.0 black) • Saturation (1.0 strong hue, 0.0 faded hue) • Size Control for BrushDemo: Painting, Picking Colors in PaintShop Pro 7
Part 1: Basic Painting Loop Brush region
Part 1: Over Painting Brush • Once you are done with Part 1 you should be able to draw some basic images • Notice the hard edges and jaggies around the stroke… this is what Part 2 will fix
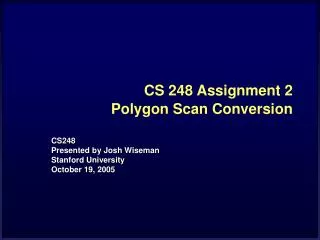
Part 2: Tinting Brush • Implement Weighted Mask Driven Brush as described in Handout #4 • Instead of a rectangular brush, have it gently “blend” to its surroundings. Use HSV interpolation • Checkboxes for interpolating along H,S,V axis • Allow all permutations HSV, HS, HV, SV, H, S, V • Choose a mask function and give user control over it • Make sure it gradually falls off to zero at edges!
Compositing equation Cnew = (1-) Cold + Cpaint Part 2: Weighted Blending Like painting with partially transparent paint. Commonly referred to as “alpha” blending.
Part 2: Mask driven painting Lookup array determines how each pixel in the brush is affected. Paint every pixel in the brush region Paint only some of the pixels
Part 2: Weighted mask driven painting Mask contains alpha/weight for each pixel in brush
Part 2: RGB vs. HSV interpolation RGBinterpolation NewR = (1-) CanvasR + PaintR NewG = (1-) CanvasG + PaintG NewB = (1-) CanvasB + PaintB HSV interpolation NewH = (1-) CanvasH + PaintH NewS = (1-) CanvasS + PaintS NewV = (1-) CanvasV + PaintV
Hue Saturation Part 2: RGB vs. HSV
Hue Saturation Part 2: RGB vs. HSV interpolation HSV RGB
Part 2: Math Example • Interpolating half way between Red and Cyan ( = 0.5) • NewColor = 0.5 Cyan + 0.5 Red 50% Gray Greenish
Part 2: HSV Checkboxes • Choose which HSV components to affect. • Allow for any combination. if (H_check) NewH = (1-) CH + PaintH else NewH = CH; if (S_check) NewS = (1-) CS + PaintS else NewS = CS; if (V_check) NewV = (1-) CV + PaintV else NewV = CV;
Part 2: Sample Images Overpainting #1 vs. Weighted Mask driven painting #2 Image showing H, S, and V Tinting
Part 3: Brush Visualization • Brush Visualization should tell user what its color, falloff and size is • Brush should always be visible regardless of color • Draw 1x (actual size) and 4x (four times larger in x and y) versions of the brush • Make the larger version discretized – that is it should be a choppy/chunky/pixel replicated version of the actual brush (think xmag, snoop) • Make sure this visualization will help you explain to user, TAs, Professor and yourself how the brush weights affect drawing
Requirements • Correctness (40%) • Don’t crash • Implement all required features • (Read the directions like a lawyer) • Efficiency (20 %) • No noticeable lag while using your application • User Interface (20%) • Programming Style (20%) • Copying code (Don’t do it) • Submitting with ‘/usr/class/cs248/bin/submit’
Extra credit example Blurring:
Questions? • Ask now • Come to Office Hours • Email: cs248-aut0405-tas@lists.stanford.edu • Remember: Computer Graphics is fun - if you are not having fun ask TAs for help