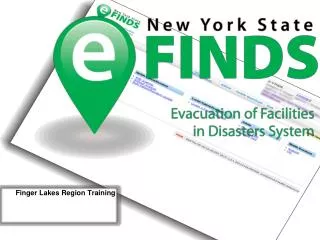
Finger Lakes Region Training
300 likes | 449 Vues
Finger Lakes Region Training. Technical Questions. I cannot log into the HCS. I cannot find or open eFINDS. I do not see my facility listed in eFINDS . I want to add/create a new Evacuation Operation. I need additional training/demo barcodes.

Finger Lakes Region Training
E N D
Presentation Transcript
Technical Questions • I cannot log into the HCS. • I cannot find or open eFINDS. • I do not see my facility listed in eFINDS. • I want to add/create a new Evacuation Operation. • I need additional training/demo barcodes. Contact the Health Commerce System Trainers Usually available Monday—Friday 8:30 a.m. to 4:30 p.m. 518-473-1809 option 2 hcsoutreach@health.state.ny.us Mac-Arthur Louis: mxl22@health.state.ny.us
Non-technical Questions For Non-Technical Issues examples: • Implementation Questions • Regulatory or policy issues/concerns Contact the OHSM Liaison to Public Health Emergency Preparedness Debra L. Sottolano, PhD, MBA Division of Standards and Surveillance NYS Department of Health 518-402-1004 dls20@health.state.ny.us
Agenda Introduction to e-FINDS What is eFINDS Accessing eFINDS The NYSDOH package Training Exercises Evacuate a single patient or resident Register multiple patients or residents through the web page (admins only) Release a batch of patients or residents from the evac. Facility Create a fillable spreadsheet (admins only), fill it in and upload Create a paper log Receive a single patient or resident Check in a batch of patients or residents at the receiving facility SEARCH: eFINDS patients by original location eFINDS patients at current location Identified incoming eFINDS patients Patient Location/Quick Search Functions
Log into HCSOpen Evacuation of Facilities in Disasters System DemoSelect your current location from drop down listclick SUBMITpair up with another facilityYou will be evacuating and receiving7 patients/residents TRAINING EXERCISES
Training Exercise 1 Evacuating Facility - Register Single Patient/Resident 1. Scan a barcode OR click Register Patient/Resident > With Scanner ORtype the barcode number into the field 2. Confirm message: Barcode is located. You can register a new Patient/Resident with it. 3. If time allows, enter first name, last name, date of birth (mm/dd/yyyy), gender, etc. 4. Verify the Evacuation Operation (required field input) 5. Verify the patient/resident current location is correct. 6. Select the Intended Destination Organization type (HO, NH, ACF) 7. Select the Intended Destination (this is your partner’s organization). 8. Enter the Bulk Group; such as bus no. or transportation description. 9. Click Register. If the required fields are not complete, you will receive an error message. Click Override to bypass the error. 10. Confirm message: Patient/Resident info is updated. REGISTER 2 PATIENTS/RESIDENTS USING THIS PROCESS At the very minimum, the evacuating facilities will only need to place the barcoded wristbands on their patient/residents and send them to a safe location. The receiving locations can scan wristbands, and update the location information when they arrive.
Training Exercise 2 Evacuating Facility: Register Multiple e-FINDS Administrator Role Only 1. Click Register Patient/Resident > Multi Patient/Resident Input. 2. Verify/Change Evacuation Operation and Current Location. 3. Select Intended Destination. 4. Enter the number of barcodes to be assigned. 5. Click Generate Fillable Spreadsheet. 6. Enter known information, such as first name, last name, date of birth (mm/dd/yyyy), and gender. 7. Click Save all Patient/Resident. 8. Verify message: Successfully saved {correct # being evacuated} Patient/Resident and click barcode to view or update the patient or resident information. REGISTER 3 PATIENTS/RESIDENTS USING THIS PROCESS
Training Exercise 3a Evacuating Facility: Generate a Fillable Spreadsheet for Upload e-FINDS Administrator Role Only 1. Click Manage Barcodes > Generate Barcodes Spreadsheet. 2. Select or verify the current location. 3. Enter Start and End barcode numbers, e.g., 4—13 for ten patient/residents to be relocated OR leave it blank for a list of all available barcodes 4. Select the PDF if you want a scannable barcode log OR select EXCEL for the upload patient/resident option. 5. Click Generate. 6. Print the PDF OR save the Excel spreadsheet to your computer. Note: PDF files cannot be uploaded, but could be sent with transport. The Excel file can be updated with patient/resident information and uploaded to e-FINDS. See upload instructions on next slide.
Training Exercise 3b Evacuating Facility: Update the Fillable Spreadsheet for Upload 1. Open the spreadsheet from your desktop 2. Enable editing 3. Register 2 patients by entering data onto spreadsheet. 4. Click Save
Training Exercise 3c Evacuating Facility: Upload the Fillable Spreadsheet 1. Select or verify location 2. Click Register Patient/Resident from the main menu bar 3. Select Patient/Resident File upload 4. Verify Evacuation Operation and current location 5. Click Open Filebutton 6. Locate Excel file with saved patient/resident information (nys_eFINDSfile name with facility id, date and time) Note: PDF files cannot be upload 7. Click Open to add file 8. Click Upload button 9. Verify Patient/Resident Info is updated below 10. Edit information if needed 11. Click Save All Patients/Residents
Exercise 4 Evacuating Facility: Updates Multiple Patient/Resident e-FINDS Administrator Role Only 1. Click Update Patient/Resident > Multi Patient/Resident Update. 2. Verify your location. 3. Select the Action Type: Releasing Patient/Resident From this Location 4. Select the Intended Destination. 5. Enter the Bulk Group, for example transport via bus. 6. Click Load All Patient/Resident. 7. Select All OR select Update for each patient/resident. 8. Click Release Selected Patient/Residents. 9. Verify Successfully updated {#} Patient/Resident. UPDATE the 2 PATIENTS/RESIDENTS
Training Exercise 5 Evacuating Facility: Generate a Paper Log PDF 1. Click Manage Barcodes > Generate Barcodes Spreadsheet. 2. Select or verify the current location. • Enter Start and End barcode numbers, e.g., 4—13 for ten patient/residents to be relocated. • Select the PDF if you want a scannable barcode log OR select EXCEL for the upload patient/resident option. 5. Click Generate. 6. Print the PDF OR save the Excel spreadsheet to your computer.
Prepare to Evacuate/Receive Exchange 7 patients/residents with your partner facility
Training Exercise 6 Receiving Facility: Update Single Patient/Resident 1. Click Update Patient/Resident > With Scanner 2. Scan barcode and click Submit, if necessary. 3. Enter or confirm information, including Evacuation Operation and the current patient/resident location. • Click Update or Override. • Confirm message: Patient/Resident info is updated RECEIVE/UPDATE 2PATIENTS/RESIDENTS USING THIS PROCESS
Training Exercise 7 Receiving Facility: Receive a Group of Patients e-FINDS Administrator Role Only 1. Click Update Patient/Resident > Multi Patient/Resident Update. 2. Verify your location. 3. Select Checking in Patients/Residents into this location. 4. Verify the patient or resident is correct. 5. Click Select All OR Update for each patient or resident being received. 6. Click Check in Selected Patient/Resident. • Confirm Message: Successfully updated {correct #} of Patient/Resident. RECEIVE/CHECK-IN 5 PATIENTS/RESIDENTS USING THIS PROCESS
Training Exercise 8 Update File OR Redirect to Another Facility/Home/Shelter 1. Click Update Patient/Resident > With Scanner 2. Scan a barcode and click Submit, if necessary. 3. Change the patient or resident’s intended destination. 4. Click Register, Update, or Override. 5. Confirm message: Patient/Resident info is updated. .
Training Exercise 9 View All Patients by Original Location 1. Click Update Patient/Resident > Without Scanner • Verify Correct Location • Click Search barcode by Original Location list contains all “ORIGINAL” patients from any evacuation operation your facility was involved in and their current location
Training Exercise 10 View All Patients at YOUR Location 1. Click Multi Patient/Resident Updates • Verify Correct Location • Select Releasing Patient/Resident from this location • Click Load All Patients/Residents Provides a list of all eFINDS registered patients/residents currently within your facility – either registered by your facility for evacuation (not yet received by accepting facility) or accepted into your facility by an evacuating facility
Training Exercise 11 View Incoming Patients 1. Click Update Patient/Resident > Multi Patient/Resident Update. • Verify your location. • Select Checking in Patients/Residents into this location. • Click Load All Patients/Residents Do not check-in patients/residents until they actually arrive to your facility!
Training Exercise 12 Quick Search 1. Click Home on the e-FINDS menu bar. 2. Scan a barcode, enter a barcode number, OR enter first or last name in Quick Search (located top right). If necessary click Quick Search. 3. Locate the correct patient/resident record. 4. If you search by name, Click the Barcode (Serial ID) link. 5. Verify: Patient/Resident is found. You can update the information. 6. View, Add, or change the necessary information. 7. Click Update Patient/Resident. If a person has never been to your facility, you will NOT be able to search for them.
REVIEW – True or False If I have technical questions about eFINDS I will contact The Health Commerce System Trainers. True eFINDS includes a complete medical history for each person tracked in the system. False Extended lead times are required for eFINDS because it significantly increases the amount of time required for an evacuation. False I can verify my role assignments and contact information using the HCS My Account features. True eFINDS Data Reporter and eFINDS Reporting Administrator are the only two healthcare facility roles that can access eFINDS. True
REVIEW – True or False The eFINDS Reporting Administrator can assign others to the eFINDS Data Reporter role. False HCS Coordinators have access to eFINDS. False Each eFINDS users at my facility will receive a barcode scanner form NYSDOH. False The number of wristbands I receive will be equal to the number of beds my facility is licensed to operate. True Training wristbands are distinctive in that the word training is printed on the band, and the barcode number ends with the letter ‘D’. True
REVIEW – True or False An official NYSDOH barcode scanner is required to use eFINDS. False Official NYSDOH pre-printed wristbands are required to use eFINDS. False The eFINDS Data Reporter can register multiple patient/resident without barcoded wristbands or a barcode sheet. False The operation is the official name given to the reason to evacuate. True The operation is the minimum amount of data required to register a patient or resident. True
REVIEW – True or False Quick Search allows me to find anyone who has been registered into eFINDS. False You must manually enter the Intended Destination on line after uploading a fillable spreadsheet. True I can change the name of the fillable spreadsheet to meet my needs. False Only the eFINDS Reporting Administrator can create the fillable spreadsheet. True Any eFINDS user can upload the fillable spreadsheet. True
Commerce Trainers 518-473-1809 hcsoutreach@health.state.ny.us Account Issue CAMU 1-866-529-1890
CONTACT & WEBSITE INFO FLRTC Anne D’Angelo 585-758-7640 anne_dangelo@urmc.rochester.edu wrhepc.urmc.edu - preparedness and response tools/resources -eFINDS