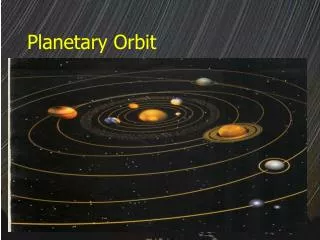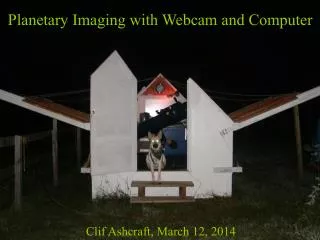
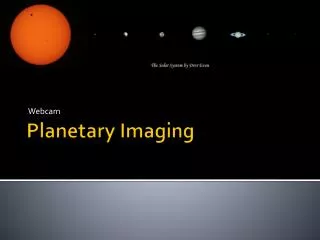
Planetary Imaging
Webcam. Planetary Imaging. Agenda. Why Planetary Imaging ? Planetary Webcams Webcam Modification Taking a Planetary Image Taking Planetary Video Processing The Video Animations. Why Planetary Imaging?. It can be done from every location It can be done almost all month

Planetary Imaging
E N D
Presentation Transcript
Webcam Planetary Imaging
Agenda • Why Planetary Imaging? • Planetary Webcams • Webcam Modification • Taking a Planetary Image • Taking Planetary Video • Processing The Video • Animations
Why Planetary Imaging? • It can be done from every location • It can be done almost all month • During one night changes can be seen • It is easy • It is cheap • It is beautiful
Planetary Webcams • Favorite webcam is the Philips SPC900/880 • Other possibilities: • Philips ToUCam series • Microsoft Lifecam • More possibilities can be found at: • http://www.pmdo.com/wwhich.htm
Webcam Modification • Physical Modifications • Removal of the webcam lens • Attaching a nose piece • Attaching an IR/UV cutoff filter (optional) • SW/Middleware modification • Restore factory defaults • Optimize colors (for dark environment) • Set Color RAW mode • Detail tutorial available here: • http://www.astronomyshed.co.uk/forum/viewtopic.php?f=19&t=2724 • You have to be registered to this forum to access
Taking Planetary Video • Things to consider: • F length - with most webcams the best results will be achieved at f/25-f/30 • f = (Telescope F X Barlow)/aperture • Thus recommended barlow for you scope is? • Length of the video • What is the planet rotation period? • How many details are visible on the planet? • How large is the planet in the FoV? • Camera FPS?
Taking Planetary Video • Planning • Moons locations • Jupiter moons location calculator • Features location • GRS calculator • Mars emulation • WinJUPOS • FoV simulation • FoV calculator
Taking Planetary Video • Getting the planet into the FoV • Start with a larger FoV eyepiece get the planet centered • Move to a lower eyepiece – re-center the planet • Align the red-dot or finder scope • Add the barlow to the eyepiece and re-center the planet and align the red-dot or finder scope • Switch to the Webcam • Make sure the Webcam exposure and gain are at max • Try to play with the focus till an image comes in to view • Note: we are trying to find in the best scenario an object of ~50 arcsec
Taking Planetary Video • Focus – Bathinov mask • Creating a Bmask • http://astrojargon.net/MaskGenerator.aspx • Using a BMask – point to a bright star • using the finder scope only • get the 3 lines to meet at a single point • Using the finder scope move back to the planet • Return to the planet using the finder only
Taking Planetary Video • Settings (different webcams have different settings): • Exposure and gain should be: • Gain over 80% • Exposure should be the highest that still shows details but not burning the image • Gamma should be zero • Trial and error is the best way to learn your webcam best settings
Taking Planetary Video • 3 main considerations: • Seeing & transparency • Collimation • Focus • 3 tips: • Do focus and then collimation X2 • Lower the blue channel to about half the exposure of the others • Get more than 1500 frames
Taking Planetary Video • Capture SW: • Free • SharpCap • FireCapture • wxAstroCapture • License • BackyardEOS
Taking Planetary Video • Sample video:
Processing The Video • Sample processing:
Processing The Video • Processing Steps: • Centering the images or Aligning the frames • Stacking • Wavelets • Post-processing • Color alignment • RGB balance • Brightness • Contrast • Gamma
Processing Video • Centering the images or Aligning the frames • Centering the frames will result in a video without moves where all frames are aligned. • This might result in omitting moons from the FoV • Possible processing tools: • Castrator or AutoStakkert v2.1 • PIPP • Registax (v5.1 or v6.0)
Processing The Video • Stacking • Stacking takes all frames and performs statistical image improvement • Possible processing tools: • AutoStakkert v2.1 • Registax (v5.1 or v6.0)
Processing The Video • Wavelets • Using the statistical information collected during the stacking to increase the details in the image • Possible processing tools: • Registax (v5.1 or v6.0)
Processing The Video • Post-processing • Color alignment • RGB balance • Brightness • Contrast • Gamma • Possible processing tools: • Registax (v5.1 or v6.0) • GIMP • Image Analyzer • Photoshop (not a freeware)
Processing The Video • My way for processing: • Start with PIPP for alignment • Use AutoStakkert for stacking • Then apply wavelets with Registax 6.0 • Post processing • Registax • GIMP
Animations • Sample:
Animations • Sample:
Animations • Sample:
Animations • Sample:
Animations • Sample:
Animations • Planning • Mainly using WinJUPOS • Capture large amount of consecutive videos • Process each video as discussed • Combine the results using: • GIMP / Photoshop • Output is GIF • PIPP / Registax • Output is AVI