Download
1 / 2
20 likes | 38 Vues
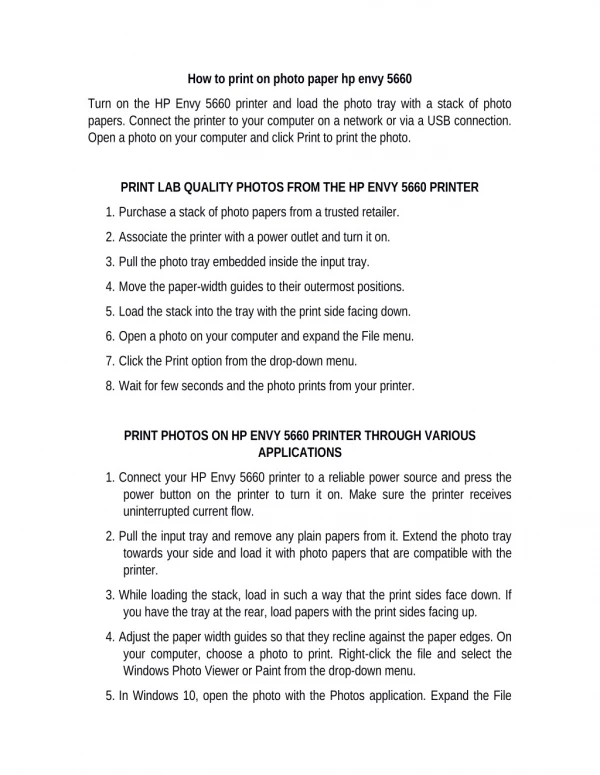
Turn on the HP Envy 5660 printer and load the photo tray with a stack of photo papers. Connect the printer to your computer on a network or via a USB connection. Open a photo on your computer and click Print to print the photo.<br><br>https://123-hp-com.com/

E N D
How to print on photo paper hp envy 5660 Turn on the HP Envy 5660 printer and load the photo tray with a stack of photo papers. Connect the printer to your computer on a network or via a USB connection. Open a photo on your computer and click Print to print the photo. PRINT LAB QUALITY PHOTOS FROM THE HP ENVY 5660 PRINTER 1.Purchase a stack of photo papers from a trusted retailer. 2.Associate the printer with a power outlet and turn it on. 3.Pull the photo tray embedded inside the input tray. 4.Move the paper-width guides to their outermost positions. 5.Load the stack into the tray with the print side facing down. 6.Open a photo on your computer and expand the File menu. 7.Click the Print option from the drop-down menu. 8.Wait for few seconds and the photo prints from your printer. PRINT PHOTOS ON HP ENVY 5660 PRINTER THROUGH VARIOUS APPLICATIONS 1.Connect your HP Envy 5660 printer to a reliable power source and press the power button on the printer to turn it on. Make sure the printer receives uninterrupted current flow. 2.Pull the input tray and remove any plain papers from it. Extend the photo tray towards your side and load it with photo papers that are compatible with the printer. 3.While loading the stack, load in such a way that the print sides face down. If you have the tray at the rear, load papers with the print sides facing up. 4.Adjust the paper width guides so that they recline against the paper edges. On your computer, choose a photo to print. Right-click the file and select the Windows Photo Viewer or Paint from the drop-down menu. 5.In Windows 10, open the photo with the Photos application. Expand the File
menu, click the Print option or Menu icon, and click OK. The Print Pictures window opens. 6.The General Print Job Settings displays on the screen. Open the Printer Document Properties window pops up. Click Options under the Print Pictures window and select the Printer Properties menu. 7.Use the print job settings to customize the photos in the Document Properties window. If a Printing Shortcut tab is available, choose a shortcut with your preferred settings. 8.Change the color and quality settings of the photo to achieve crisp and brilliant quality photos. Make sure to select the desired color format (black or color). 9.Refer to the printer’s manual to change the afore-mentioned settings. After making the essential changes, click OK and then Print. Check the output tray for the photo that is printed. 10.Once the printing completes, remove the plain photo papers from the input tray and store it in a plastic bag to avoid paper curls or wrinkles. For more details, make a visit to 123.hp.com and get lot of solutions from tech assistance.