Bulk Email Server Guide
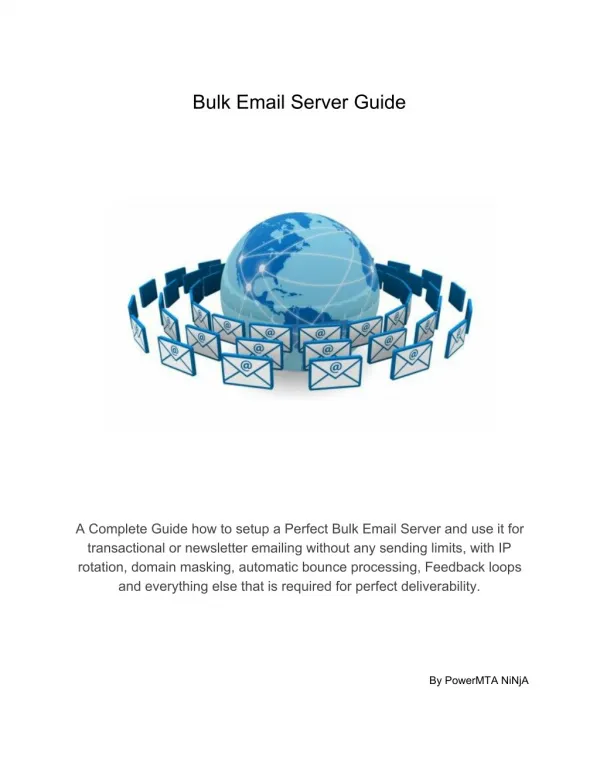
<br>https://powermta.ninja<br>A Complete Guide how to setup a Perfect Bulk Email Server and use it for transactional or newsletter emailing without any sending limits, with IP rotation, domain masking, automatic bounce processing, Feedback loops and everything else that is required for perfect deliverability.<br>

Bulk Email Server Guide
E N D
Presentation Transcript
BulkEmailServerGuide ACompleteGuidehowtosetupaPerfectBulkEmailServeranduseitfor transactionalornewsletteremailingwithoutanysendinglimits,withIP rotation,domainmasking,automaticbounceprocessing,Feedbackloops andeverythingelsethatisrequiredforperfectdeliverability. ByPowerMTANiNjA
Thisguideismeantforthosethatwouldlikeatostartwithemailmarketingorthosethat alreadydoitbutwanttoimprovetheircurrentsystemsetup. Itcanbeusedwithyourdoubleopt-inlist,alistyouboughtonline,alistyouscrapedoff somesite,etc.Thisreallydoesn'tmatter. WhydidIdecidetopublishit? Mostlytohelpmycustomerswiththeirsystemsetupandconfiguration.Nowtheycan savetheirmoneyandmytimebyfollowingthisguidetoaddnewIPs,domains,SMTPs, ortoevensetupanewbulkemailsystem. Anotherreasonistohelpnewcomerstostartwithaperfectsystemsetup.Ittookme yearstogeteverythingtothepointwhereit'sworkinghowIwant. Isn'tthatnicefromme?Yesandno.Iknowfromexperiencethatalotofthosethatwill followmyguidewillneedmyhelp.Eventhoyouwillfollowastepbystepguideit doesn'tmeanitwillbeeasy.Ifyoudomanagetogetittowork(evenifit'sonyourfifth try)Isaluteyou.Youobviouslyhaveenoughskillsandaniceworkethictodoeven biggerthings.Ifyouareinterestedcontactme.Iamalwayslookingforbrightpeopleto helpmewithmyprojects. Ifyoudodecidetofollowmyguidepleasereadeverythingbeforeyoustart. Havefunanddon'tsendmeanemailfromyournewbulkemailsystem.
BeforeWeBegin Letusmakeonethingclearfirst.Eventhothisisastepbystepguideyoustillhaveto thinkonyourownandwhatisevenmoreimportant.YouMUSThavemorethanbasic knowledgeof: ● Linux ● Howemailworks ● Howtheinternetworks Icannotwriteaguidethatwillbecopy/pastefromstarttofinish.Wearen'tsettingupan emailaccountinOutlook.WearesettingupaPERFECTbulkemailserverandeven thoyouarefollowingaguideyouwillhavetoadjustsomepartssoeverythingwillwork withyourdomainsandIPs. Ihavetosayisthis ● Don'trushoryouwillendupwithasystemthatisfulloferrorsandyouwon't comeclosetoperfect10/10scoreonmailtester. ● Readeverythingfromstarttofinishanddon'tjustblindlyfollowthisguidewithout knowingwhatiscominginnextsteps. ● StarttheguidewithyourheadclearandrestedasIcan'tdothethinkingforyou. Ifyoumessupyouremailsmightnotgetdelivered. Wehaveallbeenthere.Atsomepoint,itwasmyfirsttimeandIknowitwasamess.I didn'tknowwhatIwasdoing,Iwassweatinglikecrazy,Iwastiredbutfullofadrenaline soIcouldn'tstoporevenleavemycomputerjusttomakemeacupofcoffee. Beforeyoubegin,getyourself: ● Somesnacks ● Abottleofwater ● Acupofcoffeeoranenergydrink Don'tdrinkbeer.We'llcometothatduringthisguidesomakesureyouhavesome.Or maybeyouprefersomethingelseasIdo.
Thisoneisabittrickysinceyouareanadult,butthinkaboutyourhealthandgotothe toiletbeforeyoustart.Ifyouarelikemeyou'llforgetabouttheworldaroundyouonce youbegin. Oh,ifyouhavekidswaitforthemtogotosleep.Ittookmesometimetomaster everythingtothepointthatIwasabletodoeverythingasitshouldbewhilethelittle oneswererunningaround. Remember Read,Think...,Do Anddon'tblamemeifyoufail
BulkEmailServerGuide:Ready?Set…GO! Beforewebeginyouneedaserverfirst.Iamsureyoumustbethrilledyou arefollowingaguidewithsuchusefultips.Andmoreareontheway! No,seriouslyyouneedaserverbeforewecanstart.Andalmostanythingwilldothat meetminimumsystemrequirements.Ifyou’llsearcharoundyoucanfindVPSoffers withmorethanenoughtoruneverythingweneedfortestingpurposesforaslowas 1,5€.Aserverlikethisisn’trecommendedforproductionserverasitusuallycomeswith noSLA,butitcouldeasilybeusedasanexternalMTA/SMTP,butmoreaboutthislater. ForyourproductionserverpickaVPSordedicatedserverwithyourpreferredhosting provider.Inourtestsandallyearsofdoinge-mailmarketing(readsettingupservers) wedidn’thaveanymajorproblemswithprovidersasfarassystemconfigurationgoes. Thereareafewthatwouldnotallowfornecessarychangestobedone,butyoujust movetothenextoneifthathappens.Mostmajorhostingproviderswillbejustfinefor yourperfectemailserver. LocalorexternalMTAs/SMTPs? Thereisonemorethingweneedtogooverbeforewestart.Therearethreedifferent scenarios. LocalMTAs/SMTPs MumaraandPowerMTAwillrunonthesameserver. Pros:Easyadministration,Cheapest Cons:HostingproviderswillusuallyassignIPsinarangetoyourserversoif blacklistingoccurtheycouldaffectallyourIPs.Ifyourproviderdecidestoshutyou downyourcompleteoperationwillstop. ExternalMTAs/SMTPs MumarawillrunononeserverandPowerMTAwillrunononeormoreservers.
Pros:InacaseofblacklistingsonlyoneserverorIPwillbeaffected.Inacaseof problemswithprovideronlyonesendingserveristakendownsosendingwillcontinue. TheserverwhereMumaraisinstalleddoesnosendingatallsoyouwillneverhave problems. Cons:Moreexpensive,moreserverstoconfigure Hybrid Amixofeverything.MumaraandPowerMTAonthesameserverwithintegrated externalserverswithPowerMTA. Thebestlongrunscenario,ofcourse,isusingexternalMTAs/SMPTs. Minimumrequirements Let'sgooverthisagainnowthatweknowouroptions.Howwillyoursystembesetup? WillituselocalorexternalPowerMTA? LocalPowerMTA Everythingwillrunonthesameserversoourservermusthaveenoughpower.Here areourrecommendations: 5-19IPs/domains ● VPSorDedicatedserver ● 2cores ● 8GBRAM ● 20GBSSD 20-99IPs/domains ● VPSorDedicatedserver ● 4cores ● 16GBRAM ● 40GBSSD 100+IPs/domains ● VPSorDedicatedserver ● 8cores ● 32GBRAM
● 100GBSSD HereasayingweallknowfromJeremyClarksonwouldcomeinhandy,POWER!!!!And morepowerwehavethebetter. ExternalPowerMTA Inthiscase,MumarawillrunononemorepowerfulserverandPowerMTAwillbe installedonmanycheaperservers.Hereareourrecommendations: Mainserver–Mumara ● 4cores ● 16GBRAM ● 40GBSSD ● 1IP MTAs–PowerMTA ● 1core ● 1GBRAM ● 10GBHDD ● 1IP Thistutorialcoversbothscenarios. Buyaserver Seriously,weareatthestagewhereyouneedyourserversoifyouhaven’talready nowisthetimetopickwhichscenarioyou’lluseandthenbuy1ormoreservers. LikeIalreadysaid.Almostanythingthatmeetsminimumsystemrequirementswilldoso pickahostingproviderandgetyourserversupandrunning. IMPORTANT Allyourserversnomatterwhatscenarioyou’llgowithmusthaveCentOS6x64 minimalinstalled.Ifyou’llpickadifferentversionordistrochancesarethistutorialwill notbemuchhelptoyou.
BulkEmailServerGuide:MainServerInstall InthisguideIamtalkingaboutMAINserverandMTAserver,sotoavoid anyunnecessaryconfusionletmeclarifythis. TheMainserveristheserverwhereyourEmailMarketingSoftware(EMS)suchas Mumara,MailWizz,InterspireEmailMarketer,...isinstalled.Sincewearegettingready tosetupabulkemailserverwithanoptiontoscaleitupifneededIrecommendyou pickabitmorepowerfulVPSforit. MTAserverisaserverwherePowerMTAisinstalled.Theseserversaredoingallthe sending.ThisisjustonelayerofprotectiontokeepyourMTAserversawayfromyour Mainserver.Incasethereiseveraproblemyourmainserverwillneverbetakendown sinceit'snotdoinganysendingatall.MTAservercanbeanybudgetVPSwithatleast 1GBRAM. Nowlet'sgetbacktoourMainserver.FormyownpersonaluseIhave: ● SixcoreCPU(Intel®Xeon®E5-2620v3) ● 24GBRAM(guaranteed) ● 600GBSSD ● UNLIMITEDtraffic
● 1IPv4+IPv6 ThepriceIampayingformymainserveris14.99€(around$18)permonth.Andsince itisnotdoinganythingwrongandthereisnoreasonformyVPSprovidertoshutit downIcanpayforitfor1yearandgetanevenlowerprice. Ofcourse,IneverpayformyMTAserversupfront.Theyarethebadguysandcould betakenofflineatanytime.ButeveniftheydoIstillhaveenoughleftandcanadda newoneinabout30minutes.ThepriceI'mpayingforMTAserversisfrom1,5€-5€ foreachserverpermonth,butmoreaboutthislaterwhenwe'lllookattheprocessof settingupMTA/sendingserver. Inthisstepyouwillneed: ● AbitmorePowerfulVPS(Isuggestatleast8GBRAM,16GBrecommended). Don'thaveaserveronlineyet?Getitonlineinlessthanaminute. ● CleaninstallofCentOS6/7x64(minimalrecommended) ● SSHclient(IsuggestBitvise) Nowloginasrootandfollowthissteps: First,checkyourhostname hostname-f Itshouldbeinformathostname.domain.tld.Wherehostnameissomethingrandomlike server,main,box,...Sincewewantthatit'sobviousthisisabulkmailserverI recommendyoustayawayfromwordslikemail,email,newsletter,...Inmycasethisis henry.powermtaninja.science Ifyoudidn'tsetyourhostnameduringyourVPSsetuportheprovideryouareusing doesnothavethisoptionfollow"Howtosetuphostname". Installrequiredpackages yum-yinstallwget Serverupdate yum-yupdate Reboot reboot
NowdependingonyourCentOSversionusetheappropriatelines. CentOS6 cd/usr/local/src wgethttp://centos-webpanel.com/cwp-latest shcwp-latest CentOS7 cd/usr/local/src wgethttp://centos-webpanel.com/cwp-el7-latest shcwp-el7-latest Theinstallprocesscantakefrom5-20minutesdependingonyourVPSspecifications, sogetacupofcoffeeandrelax. Whentheinstallfinishescopylogininformationandpasteittoasafeplace.Ialways createanewtextfileandsavealllogindetailsinit.Ofcourse,Isaveitinasafeplace (checkTools). Reboot reboot Theinstallationisnowcompleteandyoucanlogintocontrolpanelandstartwithbasic configuration.
BulkEmailServerGuide:Basiccontrolpanelconfigurations Nowthatwehaveacontrolpanelinstalledwecandoall(wellmost)of configurationinauser-friendlyuserinterfaceyoucanaccessinyour browser. Youalreadyhaveallnecessarylogininformation(didyousaveit?)fromtheprevious step.Socopy/pastetheURLyougotandlogin.Itlookssomethinglikethis NO-SSL http://MAIN_SERVER_IPv4:2030 SSL https://MAIN_SERVER_IPv4:2031 Where"MAIN_SERVER_IPv4"isobviouslytheIPv4ofyourmainserversobesureto changeitoryouwillgetanerror(doh!).IsuggestyouuseSSL.Youwillgetawarning sinceit'sself-signed.
LoginwithuserrootandpasswordyouusetologinoverSSH.Youwillseesomething likethis.
Youwillseeabitdifferentscreen.Thisismyfullyconfiguredserver. Thefirstthingyouwanttodoissetyouremailaddresstogetridoftheannoying messagethatshowsafterlogin.Youcandothisin"CWPSettings>EditSettings" whereallyouhavetodoisenteryour/someemailandclick"Savechanges". ChangeDate&Time Nowmoveto"Serversettings>ChangeDate&Time"andselectthetimezoneyouare inandclick"Changedate&time".IamlocatedinGermanysoIpicked"Europe/Berlin". Iftimestillisn'tcorrectadjustitmanually.
Important! Rememberthetimezoneyousetasyouwillneeditlater! SimplePHP.iniEditor Nowgoto"PHPSettings>PHPSimpleEditor"andchangeeverythinglikeyouseein thepicturebelow.Ofcourse,donotsetthesametimezoneasIhave.Setittowhatyou usedinstepbefore.
Important! Youhavetoclick"Save"nexttoeachfieldtosavethechanges. Makesureyouuncommentthe"date.timezone"optionbyremoving";"inthefront. ChangeSSHPort Tomakeyourserversafefromscript-kiddiesIsuggestyouchangetheSSHport.Goto "ServicesConfig>SSHConfiguration"andsearchfor"Port22".Ifneededuncomment itbyremoving";"andchangeittoanumberbetween10000-60000. Click"Savechanges"atthebottomandgobacktothemainpageofcontrolpanel dashboardandRestartSSHbyclickingon"Restart"nexttoit. Thisisallthebasicconfigurationthathadtobedone.Ofcourse,thereismoretodolike adduseraccounts,createsystememails,enablefirewallandbackups,...butwe'llget tothatinthenextstep.
BulkEmailGuide:DNSRecords Nowit'stimetosetDNSrecordsforthedomainwe'lluseonourMain ServerinourBulkEmailNetwork.Forthesakeofthisguide,weareusing CloudFlare,butyoucanuseanyotherDNShosting. Torefreshyourmemory,themainserveristheserverwhereyourEmailMarketing Software(EMS)isinstalled(Mumara,InterspireEmailMarketer,MailWizz,Mautic,...). ThenwealsohaveMTAserverswherePowerMTAisinstalled.Theseserversaredoing allthesending.ThisisjustonelayerofprotectiontokeepyourMTAserversawayfrom yourMainserver.Incasethereiseveraproblemyourmainserverwillneverbetaken downsinceit'snotdoinganysendingatall.MTAservercanbeanybudgetVPSwithat least1GBRAMandyoucanaddasmanyasyouwant.Yourmainservershouldbea morepowerfulVPS(16GBRAMrecommended). OurMainserverisupandrunningbutfornow,itonlyhasAandAAAArecords(ifyou haveIPv6)set.TakealookatthetablebelowandsetyourDNSrecordsaccordingly. TYPE A A AAAA AAAA CNAME MX TXT TXT TXT NAME @ HOSTNAME @ HOSTNAME www @ @ @ _dmarc VALUE MAIN_SERVER_IPv4 MAIN_SERVER_IPv4 MAIN_SERVER_IPv6 MAIN_SERVER_IPv6 @ HOSTNAME.EXAMPLE.COM @ v=spf1mxaptr~all v=DMARC1;p=none STATUS OFF OFF OFF OFF OFF OFF OFF OFF OFF Sincethisserverisn'tdoinganysendingatallthereisnoneedtosetDKIMkeys,butif youwantyoucandoitfromcontrolpanel. ● First,logintocontrolpanelasroot ● Goto"Email>MailServerManager"andcheckboxeslikeinthepicturebelow.If youdon'twantAntivirusandrDNScheckerjustselect"InstallsDKIM&SPF,
enablesDKIMforNewAccountsandDomains"andmakesureyourhostname anddomainarecorrect.Thisarecorrectformats: ● Hostname-hostname.example.com ● Domain-example.com ● Wheneverythinglooksfine,clickon"RebuildMailServer".Itwilltakeafew minutestocomplete. ● Nowgoto"Email>DKIMManager"andclickon"EditRecords"foryourmain domain. ● Searchfor"default._domainkey"andcopy/pasteittoyourCLoudFlareaccount likethis TYPE TXT NAME default._domain key VALUE v=DKIM1;k=rsa;p=YOUR_KEY AllemailsyousendfromyourMainserverwillnowbesignedwiththisDKIMkey. Ifyouwanttoaddemailaccountsonyourmaindomangoto"Email>AddEmail Account"andfollowinstructionsthere.It'sreallysimple. NextstepistoInstallEmailMarketingSoftware.Youcanuseanyemailmarketing applicationyouwantInterspireEmailMarketer,MailWizz,Mautic,...Idohowever suggestMumaraforitseasyandfullintegrationwithPowerMTA.Thisissomethingthat noneofotheremailmarketingapplicationshas.Inalongrun,itwillsaveyoutimeand moneywhenyouwillsetupmoreMTAservers.Mumaraalsohassomeuniquefeatures andsomeyouwillonlyfindwithotherEMSonlyifyouuseexpensiveadd-ons. ContinuewithMainserversetuponmysite. Additionsstepsavailableonlineare: ● Adduser,domainandcreateFreeSSL ● InstallingEmailMarketingSoftware ● InstallPowerMTAManagementConsole ● TightenSecurity
BulkEmailServerGuide:Sending/MTAServerSetup Yes,it'stimetostartwithMTAserversetupandconfiguration.These serverswillbeusedtodotheactualsending.Thisareourbadboys. Let'srecapwhatwealreadylearnedinthisguide WecanusealmostanybudgetVPSasourMTAserver.Iusecheapserversfrom$2- $6andcouldn'tbehappierwiththeresults.TheonlyrealrequirementisthattheVPS haveatleast1GBRAM. WhatmakesmysetupdifferentfromwhatmostotherpeopleuseisthatIalwaysuse VPSwith1IPformyMTAserver. Hereiswhy I'vebeeninthisbusinessforalmost15yearsandsaweverypossiblescenario.Since thelists,Isenttoaren'tactuallymineitisnormalthatfromtimetotimemysending serversaretakendownduetospamcomplaints. Let'stakealookatwhathappenswhenyouhave: Everythingononeserver YouboughtasuperexpensiveVPSwith128GBRAMand256IPs.Incasethereisa problemyouwillloseeverythingandifyoudon'thaveabackupandlet'sbehonest, mostdon't,youwillbeforcedtostartfromscratch.Canyouimagineallthosehoursof worklost?Andguesswhat,allemailsyoualreadysentoutandlinksinthemwill becomeuseless.Maybeit'sbettertobuyagun,eh? Anotherbadthingwithsetupslikethisisthatusually,yourIPswillcomeinarange. Whyisthisbad?Whenblacklistingswillstartrollingintheywillsimplyblacklistyour wholeIPrangeandyouaredone.Bye,byeinbox! Multi-ServerInstall Nowlet'stakealookwhatwillhappeninthesamescenario,butthistimewithmysetup. YougotsomanyspamcomplaintsthatyourVPSproviderdecidesit'stimetotakeyou offline.SinceallcomplaintsareregardingoneMTAonlythatserverwillbetakenoffline.
YourMainserverandotherMTAs(whichshouldbehostedonotheraccount/providers) willkeepworkingandcontinuesendingemails. Youwillhavetosetupanewsendingserverbutbyusingmyguidethisshouldn'ttake youmorethan30minutesonceyougetusedtotheprocess. Doyouseethedifference? Withsinglesetup,weweretalkingaboutbuyingagun.Withmysetup,thisisjustafew clicksandanewsendingserverwillbereadytostartsending. Ofcourse,itisalotmorework,butbelieveme,itisworthit.Afteryourwholebulkemail systemistakenofflineyouwillneversleepagain.Forme,meh,doesn'treallyaffectme, afewclicksandit'sback. Howtobegin? Youwillneed: ● VPSwith1GBRAMand1IP ● CentOS6x64(minimalrecommended) ConnecttoyourVPSviaSSHusingBitviseandrunthefollowingcommands: curl-Ohttp://vestacp.com/pub/vst-install.sh bashvst-install.sh--nginxno--apacheyes--phpfpmno--namedno--remi no--vsftpdno--proftpdno--iptablesyes--fail2banyes--quotano --eximyes--dovecotyes--spamassassinno--clamavno--mysqlyes --postgresqlno--hostnamehostname.example.com--emailyour@email.com --passwordYOUR_STRONG_PASSWORD Besuretoreplacehostname.example.com,your@email.comand YOUR_STRONG_PASSWORD.Forhostname,thesamerulesapplyasforourMain Server.
AnswerYeswith"Y"andpressEnter. TheinstallationprocessofVestaCPwilltakeabout15minutes.Afterit'sdoneyouwill getalllogininformationyou'llneed.Besuretosavethemtothatsamefile! RaisingtheLimits Toavoindanotherrebootlaterletsrasethelimitsasthisisneededforwhenwe'llinstall PowerMTA.Edit/etc/security/limits.conf nano/etc/security/limits.conf Andaddatthebottomofthefile *softnofile65535 *hardnofile65535 SaveitwithCtrl+Xandrebootyourserverwith reboot Nowit'stimetodosomebasicconfigurationsofourMTA/Sendingserverandafterthat, we'llinstallPowerMTA.Whenyouaredonewiththissendingserversetupasmanyas youcan.HostthemondifferentaccountswithdifferentVPSproviders. ContinuewithMTAserversetuponmysite. Additionsstepsavailableonlineare: ● BasicMTAserverconfiguration ● InstallPowerMTA
BulkEmailServerGuide:BasicEMSConfig First,IwouldsuggestyoulookaroundandgetfamiliarwithMumara.Ifyou workedwithInterspireandcoyouwillnothaveanyproblems.Ifyouare familiarwithWordPressstyleadminandlikeitasmuchasIdo,navigating willbeabreeze. ThenextthingyouwillprobablyrealiseisthatMumaracomeswitheverythingyouever wantedandneedforsuccessfulemailmarketing. Nowthatyoulookedaroundabitandyouknowwherewhatislet'sbeginwiththebasic configurationthatisrequiredforeverythingtowork. Setyourtimezone Youmightthink,meh,Idon'tcareifthetimeIseeinMumaraiscorrect,butsettingup thetimetoyourcorrecttimezone(thesameyousetincontrolpanel)isveryimportant andhereiswhy. Mumarasinternaltimeisusedtosetemailheadersaboutsenttime.Soifyourtimeis incorrectyouremailswillcomefrompastorfuture. Andifyouareplanningtousecampaignscheduleorevergreencampaignsyouwill needyourtimetobecorrectinordertosettimewhenyouwantyouremailstostart sending. First,clickonProfileiconatthetop. Nowselectthesametimezonefromthedrop-downyouselectedincontrolpanel before.Youshouldknowwhattimezoneyourcityislocated.
Nowdothesameunder'Settings>ApplicationSettings'ifyouplanonaddingmore usersorsub-usersjusttomakesuretheirtimeissetupcorrectlyandtheydon'thaveto worryaboutthis. ContinuewithEMSconfigurationonmysite. Additionsstepsavailableonlineare: ● Setcronjobs ● FullEMSGuide
BulkEmailServerGuide:IntegrationwithPowerMTA Idon'tknowwhybutthisiswheremostofthepeoplegetstuck.Itis probablybecausetheyaretiredandalreadyhaveenoughofthingsthey aren'tusedtodo.Maybeit'sagoodideatotakeabreak.Maybeevenstop fortodayandgoout,gowatchamovieorplayagame. Thetruthisthatthisstepisreallysimpleandifitdidn'texistthewholeMumarato PowerMTAconnectionstepwouldneedabout10stepstocovereverything.Since Mumaraissmartenoughitwilldomostofthehardworkforus.Therearesomethings thatneedtobefixedforeverythingtoworkbutnothingharderthancopy/paste. First,goto'Integrations>PowerMTASettings'andclickon+toaddanewPowerMTA server.Nowitdependson,areyouusinglocalorexternal(recommended)PowerMTA. Basically,it'sthesameyoujusthavetochangetheIP.ThepicturebelowshowshowI setuplocalPowerMTA. IfyouareusinglocalPowerMTAyoucanentereverythingapartfromrootpass(another smartone)exactlylikeinthepictureabove.Ifpossiblealwaysuselocalhostandrun everythingonlocalhostonly.Ofcourse,thisisn'tpossibleincaseofexternal PowerMTA.Inthatcase,adjustallIPs.Whendonewitheverythingclick'Next'. Unforgenetlyyouwon'tseetotheverylastintegrationstepifyouenteredeverything correct.
Instep2enteryourIPsanddomainsseparatedbycommastoappropriateboxes.Make suretheareinthesameorderasyouassignedthemincontrolpaneltosavetimeinthe nextstep.Doeverythingelselikeinthepicturebelow.Whendoneclick'Next'. SinceyoufollowedmytipandenteredIPsanddomainsinthesameorderyouassigned themincontrolpaneltheonlythingtodoinstep3istoenterallnecessarydataforeach SMTP.ForgroupIusualjustcopy/pastedomainname.EnterFromname,Fromemail, andReplyemailandleaveeverythingelseasitis.Nopictureheresincethisiseasier thansettingupanaccountinOutlook.Whendoneclick'Next'. InStep4thereisnothingtodosojustclick'Next'. InStep5youwillfinallyseeiftheinfoyouprovidedinstep1wascorrect.Inacaseof errorsgobackandcorrectyourmistakes.Iftheconnectionwassuccessfuljustclick 'Next'.
Ifyoudideverythingcorrectyouwillseesomethingsimilarasonpicturebelowanda filecalledpmta_server.zipwillbedownloaded.Savethisfileasyouwillneeditlater. Hereisitscontent ● Bounce.csv-inforaboutyourbounceaccounts ● DKIM.txt-allyourDKIMrecords ● FDNS.csv-yourreverseDNS ● htaccess.txt-wewillneedthisfordomainmasking ● pmta_config.txt-defoultPowerMTAconfigfilethatMumaracreates. UnforgenetlyPowerMTAwillnotstartwhenusingthisconfig,butwe'llfixthis later. ● SMTP.csv-infoaboutyourSMTPaccounts
Thatisit.YourMumaraisconnectedtoPowerMTA.Youshouldbeabletosendyour firstemailfromMumarabutIdon'trecommendtodoityet.Yourconfigurationisfarfrom perfect.Tomakeitperfecttherearestillthingswemustdo. ContinueIntegrationwithPowerMTAonmysite. Additionsstepsavailableonlineare: ● BounceemailsandFeedbackLoops ● Maskingdomains ● SettingrDNS ● DKIMforsendingdomains
BulkEmailServerGuide:Tipsbeforeyoustartsending Let'sfaceitthewholesetupprocessrequiredalotofworkandIamsure youwanttostayinformedwithwhatsgoingsoyoucanfixlittleproblems beforetheyturnintobigones. Copybackups Thefirstthingyouwillwanttodoafteryourwholesystemisupandrunningismake sureyouhaveacopyofmainserversbackupsonyourlocalcomputer.Ifyoudidn't copythemyetopenBitviseandconnecttoyourmainserver.UseSFTPandnavigateto /backupsandcopyallfilestoyourcomputer.Ifyoudidn'tenablersynctoanotherserver makesureyoucopyallbackupstoyourcomputeratleastoncepermonth. EnableSSHkey ToprotectyourmainserverfromhackersyoumightwanttouseSSHkeysinsteadof passwordwhenyouareloggedin.SSHkeysthesamewayDKIMkeysworkwith emails.Youcopyprivatekeytoyourcomputerandpublickeytoyourserver.Ifkeys don'tmatchyoudon'tgetaccess. ToenableSSHkeysgoto"ServerSettings>SSHKeyGenerator"andfollow instructionsthere. Checkyouropenports Duringsetup,youmighthaveopensomeportsorcompletelydisabledfirewallonyour mainserver.Makesureyourfirewallisturnedonandonlyportsyoureallyneedare opened. Monitoryourblacklists IfyouareusingMumaraitisalreadymonitoringyourIPsanddomains,butevenso,I suggestyouaddallyourdomainsandIPstoandbeinformedbyemailwhenthestatus ofIPsordomainschanges.Thiswayyoucanreactandrequestadelistingbeforeit impactsyourdeliveryrates.Clickhere,createafreeaccountandaddyourIPsand domains.
Createcatch-allemails Createacatch-allemailforallyoursendingdomainsandforwardthemto postmaster@domain. Checksystememailsregularly Makesureyouaddallyoursystememails(postmasterandabuse)toaclientlike OutlookorThunderBird.Someuserswillsendemailswithremovalrequests. CheckSpammynessofyourEmailsregularly YouprobablycheckedthescoreofyouremailonMailtesterduringsetupbutincase youdidn'tcheckitnowandalsocheckitatleastoncepermonth.Thebestthingisto sendallyourcampaignstoMailTesterevenifyoucheckthespamscoreinsideyour EMSsoftware. RegisterforFBL RegisterallyourdomainswithallmajorprovidersthathaveFeedbackLoopsprogram. YoucanfindalistofavailableFBLshere.Don'tforgettoaddyourFBLemailaddresses toMumaraorotherEmailMarketingSoftware. AdddomainstoPostmasterTools SinceGoogle/GmaildoesnothaveaFeedbackLoopsforothersthenESPs,besureto addallyoursendingdomainstoGooglesPostmasterTools.Youwillbeabletomonitor IPanddomainreputation,Spamcomplaintsandsoon.Clickheretostart. Don'tusenewdomainsforsending Idon'tknowwhy,butmostpeopleeventhosethatareinbulksendingforyearsdon't knowthis.Youshouldneveruseanewlyregistereddomainforbulkemailsending.New domainsareaddedtoDayoldBreadlist(DNSRBL).Theysaythatit'sremovedfrom thislistafter5daysbutfrommytests,it'sbestifyouwait20daysbeforeyoustart sendingfromafreshdomain.MailTesterwillshowthisasURIBL_RHS_DOB.
MaskyourIPs IfyouareusingCloudFlareyoucanuseIPmaskingfeatureandhide(tosomedegree) IPsofyourservers.JustclickthecloudicontotherightofeachDNSrecordsoitwill turnorangeandbum.IfyoupingyourdomainCloudFlarewillreplyfromitsIP.Make sureyoudoNOTmaskthesubdomainyouareusingforbulkemailsending.Ifyoudo yourrDNSandSPFwillbecomeinvalid.IusuallymaskIPformyrootdomainand subdomainIamusingfordomainmasking. CLEANYOURLISTS! IfyouboughtyourlistsorscrapedthemofftheInternetmakesureyoucleanthem beforeyoustartsending.It'snotenoughtoprocessbouncesandsendtotherest. BoughtandscrapedlistsarefullofriskyemailaddressescalledSpamTraps.Thisare oldemailsthataren'tusedbytheirownerandemailprovider(forexampleGmail)is monitoringthemfornewemailsthatarrive.Ifanewmarketingemailarrivesintheemail addressthatwasturnedintoaSpamTraptheprovidercanbesurethatthemessageis reallyspam,astheownerabandonedthisaddressyearsago. Cleanyourfirst15100emailaddressesforfree,Registerhere. WARMUPYOURIPS!!! YouputinalotoftimeinsettingupyournewBulkEmailSystem.Nowdon'tbecrazy andstartsendingwithoutlimits.It'sreallyhardtorecoveryourSenderScoreifitdrops below50sofollowmyWarmUpGuideandstartslow. FormoretipvisitPowerMTA.NiNjA