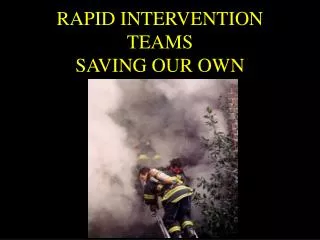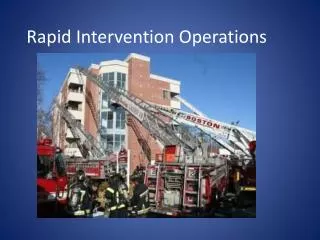
Rapid Intervention Operations Overview
700 likes | 784 Vues
Learn how to prioritize tasks in rapid intervention operations regardless of building size or type. Understand strategies like Prepare, Prevent, Rescue, and essential tasks for preparation, monitoring, and prevention.

Rapid Intervention Operations Overview
E N D
Presentation Transcript
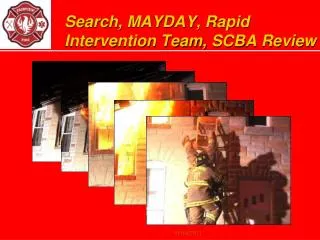
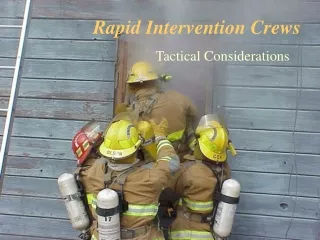
This is an overview of Rapid intervention Operations at every fire. This class does not teach skills but instead reviews what tasks a rapid intervention team or group should consider and how to prioritize those tasks. Further training in technique is needed in order to be proficient at these tasks.
RIT vs RIG • The considerations discussed in this class are applicable regardless of the size or type of building. • RIT and RIG are only different in the regards to the number of personnel to be managed. • The considerations in this class should be made at every fire regardless of RIT or RIG.
RIT vs RIG • The number of personnel needed for rapid intervention is based on the incident. • It is the responsibility of the officer assigned this task to request additional resources or turn away resources based on their need.
Rapid Intervention Strategies • Prepare • Prevent • Rescue The priority of these strategies are based on the incident. They may be done simultaneously or the priority may change as the incident changes.
Strategy Priority Examples Fire Crews are still preparing – Preparing can be the priority. Fire Crews are in hazard area – prevention is done first or in conjunction with preparing. Mayday is called during set up – Rescue moves ahead of preparing and prevention.
Preparing Tasks • Size – Up • Set –up • Plan • Communicate • Monitoring the incident
Size Up – IC Briefing Team Leader/Group Supervisor • Type and use of bldg. • Area of involvement & Fire conditions. • Current location of crews & assignments • Specific hazards • Elapsed time at incident
Size Up – Walk around Search team/RIT members • Building dimensions • Areas of involvement • Location of crews • Irregularities • Potential hazards • Entry points or external openings • Layout of interior hallways
Set up - Equipment • Thermal imager • RIT Pack(s) • 200’ Kevlar search line • Forcible entry • “Irons” or equivalent • Per member: • PPE & SCBA with 60 minute bottles • Box Light (or suitable light)
Set Up - Hose • 13/4” hose (dry) • 200’ with a wye and appropriate nozzle • 21/2” hose (dry) • Enough to reach to the furthest point of the building (180 degrees) • 21/2” (or larger) hose (charged) • From pumping engine to RIT staging location
Plan • Ask – • What can go wrong at THIS incident? • How will we handle it if it does? • Answer these questions based in the intel. you received from your size up. • Make assignments – who will do what if deployed.
Communicate • Fire ground channel – Suppression crew’s channel. • Rescue channel - RI’s channel • Communication between RI members while monitoring the fire incident. • Communication between RI members during a rescue.
Monitoring an Incident • Listen to fire ground channel and monitor interior activities. • Divide RI members to watch 4 sides of building. • Communicate on Rescue Channel significant observations to other RI members: • Crew movements • Fire conditions • Building conditions
Monitoring an Incident • Know what is going on. • Look for changes. • Communicate these changes. • Change Rapid intervention plan accordingly. • Communicate safety issues to safety officer/IC.
Prevention Tasks • Laddering • Forcible Entry (Softening the Structure) • Utilities
Laddering Ladder Package – a set of ladders placed on the building in order to: • Create access for crews to upper floors or roofs. • Perform rescues. • Create egress for crews on upper stories or roofs.
Laddering • Establish a Ladder Package based on: • Building construction • Building Occupancy • Fire Location • Location of crews • Strategy of fire • Rescue situation
Laddering for Roof Operations • Primary ladder - used by roof crew for normal access and egress of roof. • Location: Uninvolved area of building. • Crews should gain access to roof from the uninvolved part of building and travel towards the involved.
Laddering for Roof Operations • Working Set - a single or set of ladders placed for emergency egress from the roof. • Location: As close to where the roof crew is working as possible. • Purpose: If roof weakens, crews should be able to travel 90 degrees from their work area to a secure wall and find their working set. • Number of ladders in a working set: 1 ladder for 1-2 personnel, 2 ladders for 3-4.
Laddering for Roof Operations • Secondary ladder - Ladder placed opposite of where the roof crew is working for egress if they are cut off from primary ladder and working set. • Location: Opposite side of peak on pitched roofs. Opposite corner of primary ladder on flat roof.
Laddering for Upper Floor Egress • First ladder: Fire room • Second ladder: Rooms adjacent to fire room. Where will crews be in the most danger and need the quickest egress if things go wrong?
Laddering for Upper Floor Egress • Location of ladders: Under window sill for easy ladder bail under the heat.
Laddering for Rescue Operations • Conscious Victims: • Communicate with victims. • Extend ladder away from their reach and lower into building. • Do not place ladder until rescuer is ready to climb instantly (Mask, gloves, helmet on ready to climb.) • Communicate
Laddering for Rescue Operations • Unconscious Victims: • Ladder under window sill. • Do not extend tip into window unless window is big enough that it will not impede getting on and off ladder.
Laddering for Rescue Operations • Vent-Enter Search procedures: • Break window • Check floor for victims and stability. • Check for flashover conditions (Bare hand check of smoke temperature) • If a go, Enter room • Locate door and close it (Membrane protection from fire.) • Search and locate victim. • Ask for help if needed. (If not needed keep partner on ladder ready to receive) • Remove victim.
Forcible Entry Softening the Structure: 1. Creating egress points for interior crews. 2. Creating egress points for victims 3. Creating access points for attack crews and Rapid Intervention.
Softening the Structure • Open exterior man doors
Softening the Structure Remove security bars
Softening the Structure Opening roll-up doors
Softening the Structure Removing fences
Softening the Structure • Consider placing lights or glow sticks inside egresses to help lost crew members locate them.
Softening the Structure vs. Ventilation Remember, air currents, (higher pressure air moving to lower pressure) will spread fire and fresh air will intensify fire(Ventilation controlled). DO NOT affect fire spread by creating openings! Create egresses but keep the box closed as much as possible.
Utilities • Electrical • Gas • Water
Gas • Natural Gas meters • Typically on building. • Propane tanks • May be against or away from building. Notify gas companies prior to leaving scene and do not restore gas yourself.
Electric • Look for outside shut offs. • Look for panels in garages or utility rooms. • Interior shut offs can be accessed by inside truck operation crews during searches. Do not pull electric meters! Why? • Safety • PUD Request • WAC
Prevention Ways out.
Prevention • Ways off.
Prevention Open the building.
Prevention • Make it safe.
Prioritizing Tasks • It is up to the team leader to prioritize the tasks associated with Rapid intervention • These priorities must be made based on: • The fire conditions. • The Fire ground strategy. • Location of the Fire • Location of fire crews
Prioritizing • Example 1: Size-Up: 2 story wood frame house. Fire on second floor. Strategy: Offensive attack with Vertical ventilation. Crew locations: E61 – Interior attack 2nd floor. A62 – vertical ventilation on roof. E64 – Primary search. You are assigned RIT. How do you prioritize your tasks?