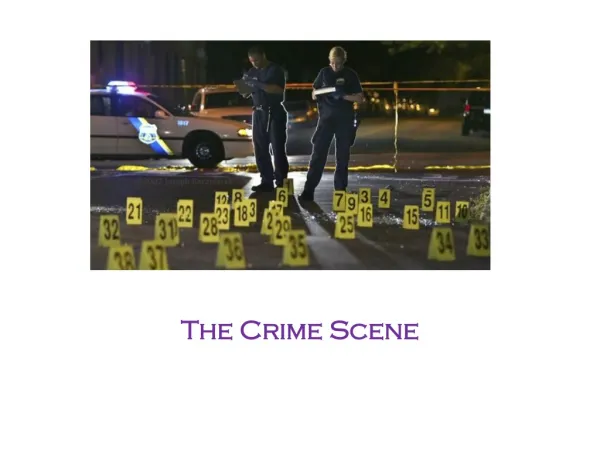
The Crime Scene
The Crime Scene. Investigative Photography. Physical Evidence. Physical evidence is any object that can establish that a crime has been committed or can link a crime and its victim or its perpetrator.

The Crime Scene
E N D
Presentation Transcript
The Crime Scene Investigative Photography
Physical Evidence • Physical evidence is any object that can establish that a crime has been committed or can link a crime and its victim or its perpetrator. • Forensic science begins at the crime scene. The investigator must recognize physical evidence & properly preserve it for laboratory examination. • The evidence must be kept in its original condition as much as possible.
Securing the Crime Scene • Secure & Isolate the Crime Scene • First priority is medical assistance to individuals & arresting the perpetrator. • Ropes or barricades and guards will prevent unauthorized access to the area. • Every person who enters the crime scene has the potential to destroy physical evidence. • The lead investigator evaluates the scene & determines the boundaries. They do an initial walk through & develop a strategy. • All items must be documented & photographed.
Recording the Crime Scene • 3 methods of crime-scene recording: photography, sketches, & notes • Ideally all 3 should be used
Photography • Evidence • Close ups • Perspectives • Multiple angles • Scene • Multiple views • Entrances • Exits • Windows bsapp.com
Photography • The crime scene should be unaltered, unless injured people are involved, objects must not be moved until they have been photographed from all necessary angles. • If things are removed, added, or positions changed the photographs may not be admissible evidence. • Photograph completely • Area where crime took place & adjacent areas • Various angles
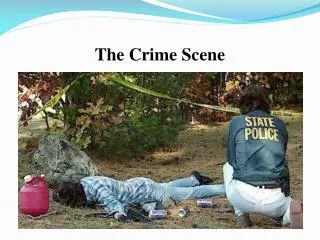
Photography • If crime scene includes a body: • Take photos to show body’s location & position relative to the whole crime scene • Take close-up photos of injuries & weapons lying near the body • After the body is removed, photograph the surface underneath. • When size is significant, use a ruler or other measuring scale • Digital cameras allow for enhancement & examination in fine detail. • Videotaping a scene is also becoming popular.
Purpose of Crime Scene Photography • 1. To record the original scene and related areas • 2. To record the initial appearance of physical evidence • 3. It will provide investigators and others with this permanent visual record of the scene for later use • 4. Photographs are also used in court trials and hearings
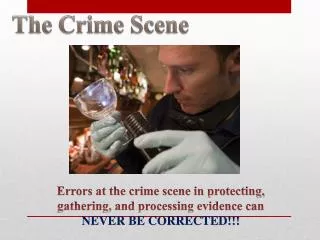
Admissibility of photographic evidence • 1. Three major points of qualification of a photograph in court • a. Object pictured must be material or relevant to the point in issue • b. The photograph must not appeal to the emotions or tend to prejudice the court or jury • c. The photograph must be free from distortion and not misrepresent the scene or the object it purports to reproduce • 2. You do not need to be an expert in photography to take crime scene photographs or testify about them
Any picture an officer takes may wind up in Court. • You will be safe if you keep this in mind for every photo you shoot. • Experience has shown that attention to a few simple rules can make pictures acceptable to most judges.
Taking overview photographs • Purpose • a. To show the scene exactly as it was when you first saw it • (1) If something was moved before you arrived, don't try to reconstruct the scene as it was. • The photographs should show the scene as you found it
a. First discuss the crime, evidence and photographs needed with other investigators at the scene • b. Be careful not to destroy any evidence while taking the photographs
Outside the scene • (1) Exterior of the building where the crime occurred and in some cases the whole locale • (2) Aerial photographs of the scene and the surrounding area can be useful in some types of cases • (3) Original series of photographs should also show all doors, windows and other means of entrance or exit
Inside the scene • (1) Begin with a view of the entrance • (2) Then photograph the scene as it appears when you first step into the room • (3) Next, move around the room to get photographs of all the walls • (a) These photographs should also show the positions of any potential items of evidence • (4) Include photographs of other rooms connected with the actual crime scene
Photographs to record items of evidence • 1. Take two photographs of each item of evidence • a. One should be an orientation (midrange) shot to show how the item is related to its surroundings • b. The second photograph should be a close-up to bring out the details of the object itself
2. Measuring and marking devices • a. Take two photographs if a marking or measuring device is used • (1) One photograph without the device, the other with the device • (2) So the defense can't claim that the scene was altered or that the device was concealing anything important
PHOTOGRAPHING SPECIFIC CRIME SCENES • Each crime scene has unique characteristics and the type of photographs needed will be determined at the scene by the investigator familiar with the crime.
Homicide • 1. Use color film • 2. Photographs (example: homicide inside a residence) • a. Exterior of the building • b. Evidence outside the building • c. Entrance into the scene • d. Room in which the body was found
e. Adjoining rooms, hallways, stairwells • f. Body from five angles • g. Close-up of body wounds • h. Weapons • i. Trace evidence
j. Signs of activity prior to the homicide • k. Evidence of a struggle • l. View from positions witnesses had at time of the crime • (1) Use a normal lens • m. Autopsy
Suicide, other dead body calls • 1. If there is any doubt, photograph the scene as a homicide
Assaults, injuries • 1. Photographing injuries • a. Face of victim in the photographs • b. Bruises • c. Bite marks • (1) Orientation shot • (2) Close-up at 90 degree angle to avoid distortion • (3) Ruler in same plane as bite mark • (4) Focus carefully • (5) Bracket exposures
PHOTOGRAPHING EVIDENCE • Fingerprints • 1. When to photograph fingerprints • a. Before lifting on major cases or if the latent may be destroyed when lifting • b. To bring out detail in a latent
Impressions • 1. Footprints and tire tracks • a. Procedure • (1) Take an orientation photograph to show where in the scene the impression is located • (2) Take a close-up for detail • (a) Use a scale on the same plane as the impression
Bloodstain photography • 1. Use color film • 2. Orientation photographs to show locations of bloodstain evidence at the scene • 3. Close-up photographs to show detail • a. Use a scale on the same plane as the bloodstain • b. Keep the film parallel to the plane of the bloodstain
Ask yourself questions such as: • Does this picture reveal the true position of the witness to the crime? • Do the skid marks seem longer or shorter in the viewfinder than they are in real life? • How large is the lead pipe used as a weapon?
Shoot most pictures with the camera at eye level. • This is the height from which people normally see things and that makes it easier to judge perspective.
One practical way to assure complete coverage and to provide correct perspective is to follow the FOUR CORNER APPROACH. (Fig.1)
Sketches • Once photos are taken, sketch the scene. • A rough sketch is a sketch, drawn at the crime scene, that contains an accurate depiction of the dimensions of the scene & shows the location of all objects having a bearing on the case. • All measurements are made with a tape measure • Show all items of physical evidence • Assign each item a number or letter and list it in the legend • Show a compass heading designating north • A finished sketch is a precise rendering of the crime scene, usually drawn to scale. • Computer-aided drafting (CAD) has become the standard.
Rough-sketch diagram of a crime scene. Courtesy Sirchie Finger Print Laboratories, Inc., Youngsville, N.C., www.sirchie.com.
bsapp.com Rough Sketch to Final
Notes • Note taking must be a constant activity throughout the processing of the crime scene. • The notes may be the only source of information to refresh memory. • Tape-recording notes at a scene can be advantageous – detailed notes can be taped much faster than they can be written.
Dealing with Physical Evidence • Once found, physical evidence must be collected & stored in a way that preserves its integrity for forensic comparison & analysis. • The search for physical evidence must be thorough and systematic, even when suspects are immediately seized. • A forensic scientist is not usually needed at the scene unless the evidence is complex or it is a major crime. • Some police agencies have trained field evidence technicians.
Searching the Crime Scene • One person should supervise & coordinate. • Include all probable entry & exit points in search • What to search for will be determined by the particular circumstances of the crime. • Examples • Homicide • Hit-and-run • In most crimes, a search for latent fingerprints is required.
Spiral • Strip/Line • Grid • Zone/Quadrant • Pie/Wheel CRIME SCENE SEARCH PATTERNS • The crime scene coordinator may choose from a variety of crime scene search patterns based upon the type and size of the crime scene.
Collect Physical Evidence • Physical evidence can be anything from massive objects to microscopic traces. • It may be necessary to take custody of all clothing worn by the participants in a crime. • Handle carefully & wrap separately to avoid loss of trace evidence. • Critical areas of the crime scene should be vacuumed & the sweepings submitted to the lab for analysis. • Mobile crime-scene vehicles carry supplies to protect the crime scene; photo, collect, & package evidence; & develop latent fingerprints.
Collect Physical Evidence • The integrity of evidence is best maintained when the item is kept in its original condition as found at the crime scene. • The entire object should be sent to the lab. • If evidence is found adhering to a large structure, remove specimen with forceps or other appropriate tool. • In the case of a bloodstain, one may either scrape the stain off the surface, transfer the stain to a moistened swab, or cut out the area of the object containing the stain.
Collect Physical Evidence • Each different item or similar items collected at different locations must be placed in separate containers. • Packaging evidence separately prevents damage through contact and prevents cross-contamination.
Autopsy Room • Medical examiner or coroner carefully examines the victim to establish a cause & manner of death. • Tissues are retained for pathological & toxicological examination. • The following are collected & sent to the lab: • Victim’s clothing • Fingernail scraping • Head & pubic hairs • Blood (DNA typing) • Vaginal, anal, & oral swabs (in sex-related crimes) • Recovered bullets from the body • Hand swabs from shooting victims (for GSR analysis)
Tools for Evidence Collection • Forceps • Unbreakable plastic pill bottles w/ pressure lids • Manila envelopes, glass vials, pill boxes • Paper bags are better than plastic…why? • Fire evidence must be kept in an airtight container to prevent evaporation of petroleum residues • Clothing must be air-dried & placed in individual paper bags. • http://www.crime-scene.com/ecpi/evidence_collection.shtml
Chain of Custody • Chain of custody is a list of all people who came into possession of an item of evidence. • Chain must be established whenever evidence is presented in court as an exhibit. • Failure to do so may lead to ? Regarding authenticity & integrity of evidence. • All items should be carefully packaged and marked upon their retrieval at crime sites. • Normally, the collector’s initials & date of collection are inscribed directly on the article. • The evidence container must also be marked with collector’s initials, location of evidence, & date of collection.