1 / 0

Staff iPad WebDAV Setup Guide You may already have WebDav downloaded and on your iPad

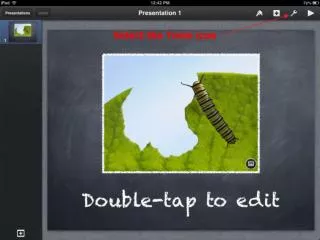
Staff iPad WebDAV Setup Guide You may already have WebDav downloaded and on your iPad. WARNING!!!!. Do not do this setup UNTIL you have installed iTunes on your computer and created an Itunes account AND downloaded a free app.

yovela
Télécharger la présentation

Staff iPad WebDAV Setup Guide You may already have WebDav downloaded and on your iPad

An Image/Link below is provided (as is) to download presentation Download Policy: Content on the Website is provided to you AS IS for your information and personal use and may not be sold / licensed / shared on other websites without getting consent from its author. Content is provided to you AS IS for your information and personal use only. Download presentation by click this link. While downloading, if for some reason you are not able to download a presentation, the publisher may have deleted the file from their server. During download, if you can't get a presentation, the file might be deleted by the publisher.

E N D

Presentation Transcript


  1. Staff iPad WebDAV Setup GuideYou may already have WebDav downloaded and on your iPad

  2. WARNING!!!! Do not do this setup UNTIL you have installed iTunes on your computer and created an Itunes account AND downloaded a free app. A document on how to do this is called “iTunes Acc Without Credit Card”. It is located here: G:\1A COMMON\1 A IT FAQ\iPad\Staff iPad Guides This enables you to create an iTunes account without having to put in credit card details. Please do this first.
  3. Do you already have WebDav? WebDav may have downloaded automatically to your iPad. If so, look for the WebDav app icon Then go to slide #8 (shown below)
  4. First WebDAV needs to be downloaded from the App Store. 1) Tap “App Store”
  5. 2) If prompted, this will allow you to download iBooks– tap the desired option
  6. 3) Tap in the search box and type in “WebDAV” 4) Tap “Search”
  7. This screen shows all the apps associated with WebDAV. The upper box displays iPad apps and the lower one displayed iPhone apps. More apps can be viewed by tapping the “See All” button above the respective boxes. 5) For now, tap the “FREE” button, next to WebDAV Navigator, this will change to a green button saying “INSTALL” 6) Tap the “INSTALL” button
  8. You will then be prompted for the password of the Apple ID. 7) Enter in the password for your Apple ID and tap “OK”
  9. The iPad will then install WebDAV Navigator. 8) When it has completed tap the app icon
  10. 9) Once WebDAV Nav is open, tap the add link button
  11. 10) The following details need to be entered. Name: Chisholm Workspaces Server URL: https://online.chisholm.wa.edu.au/myWork Username: the same username you use to login to the schools computers Password: the same password used to login to the school’s computers 11) Once that has been done, Tap “Save” Must be a capital W
  12. You can now view any of the shares by tapping the item in the list
  13. To navigate the shares just tap on the item you wish to view. Note: on some iPad the folders may be at the bottom and you will have to scroll down to see them.
More Related