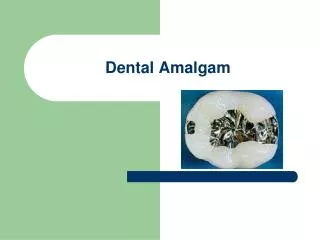
Amalgam
Amalgam. cavity. preparation. Dental amalgam has been used in operative dentistry for not less than 150 years. Almost 80% of single tooth restorations are fabricated from amalgam, in view of its numerous advantages, which include:. Advantages.


Amalgam
E N D
Presentation Transcript
Amalgam cavity preparation
Dental amalgam has been used in operative dentistry for not less than 150 • years. Almost 80% of single tooth restorations are fabricated from amalgam, • in view of its numerous advantages, which include:
Advantages 1- Good adaptability to cavity walls and margins i.e. provides good seal that prevents: 1) Recurrence of caries. 2) Irritation to dentin and pulp. 2- High compressive strength → minimum 80 MN / m2. 3- Low coefficient of thermal expansion when compared to other restorative materials: → Amalgam → 25 x 10-6. Tooth → 11.5 x 10 -6.
Advantages 4- Indestructible in oral fluids → i.e. maintains marginal seal, proximal contact and contour. 5- Biologically compatible with oral tissues. 6- Convenience of manipulation. 7- Could take and maintain high surface polish that increases the strength. 8- Low coast.
Disadvantages 4- Thermal conductivity. 5- Dimensional changes during setting → 20 / cm. 6- Poor esthetic.
INDICATIONS Amalgam should be considered together with posterior composite and cast gold as a restorative for classes I, II, the distal surface of cuspids and class V in posterior teeth. Material selection in such cases will depend on:
A) THE EXTENT OF THE LESION: • The most suitable indication for amalgam is the small and medium sized class I and II cavities especially those with four walls and a floor, where the amalgam will be confined and not subjected to tensile loads.
Extensive lesions especially those including undermined cusps will require cusp capping and tooth supported against high loads including tensile, where cast gold will serve better.
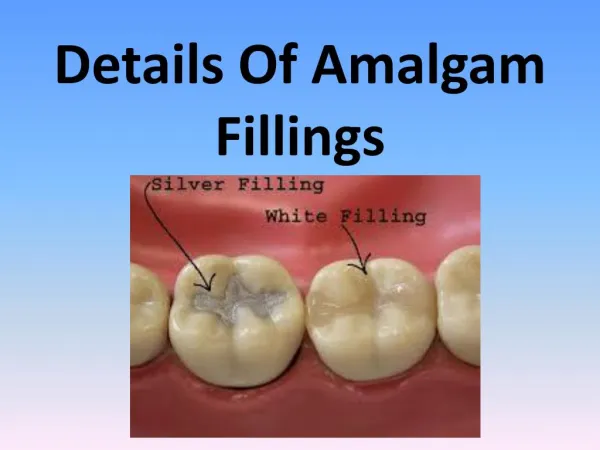
B) ESTHETICS: • For esthetic-conscious patients, amalgam will be objectionable particularly in conspicuous areas of teeth and posterior composites may be favored.
C) CARIES INCIDENCE: • Amalgam may be favored if repair or remake is likely to include extensions for original cavities and for patients with moderately high caries incidence; being less costly and having good sealing ability.
D) ECONOMICS: • Although amalgam restorations cost far less than cast gold restorations yet costing per se may not be in favor of amalgam in the long run if the restoration has to be repeatedly be made. Amalgam can also be used for core build-up under full crowns.
Cavity preparation • Cavity preparation for amalgam restoration is characterized by: → • CSA 90C. • Cavity walls parallel or perpendicular to the direction of occlusal force. • Enough depth to provide bulk to the material.
Cavity preparation • If a cusp is undermined and is to be capped with amalgam, it must be reduced minimum of 2 mm, to provide enough bulk of the amalgam enables it to withstand the tensile stresses. • The isthmus area shows: → Minimal bucco-lingual width. • → Axio-pulpal line angle beveled, rounded or saucerized to provide: • a) Elimination of stress concentration area. • b) Bulk of amalgam.
B) DESIGNS OF CLASS I CAVITY PREPARATION • Cavity preparation for Class I lesions for amalgam restoration. It may be either: • A- Class I simple cavity. • B- Class I buccal pit cavity. • C- Class I extension cavity.
CLASS 1 CAVITIES Definition: These are pit and fissure type cavities that involve the occlusal surfaces of molars and premolars, the occlusal 2/3 of buccal and lingual surfaces of molars, and the palatal pits in maxillary anterior teeth.
These are self-cleansable areas. However, they may get involved by caries due to their inherent defective structure as areas of imperfect coalescence of lobes of calcification of these teeth. These areas are retentive for food and thus invite caries.
These lesions are clinically characterized by: • A small surface opening which may remain unnoticed until the lesion becomes of a considerable size. • A conical spread in both enamel and dentin, with the bases of cones at the Amelo-Dentinal Junction, "A. D."J. • Its rapid burrowing at the dento-enamel junction. These lesions may involve one or more surfaces and hence a simple or compound cavity should be prepared.
Application of Principles: A. Simple occlusal cavities Designing the Outline Form. The outline form of a routine class I cavity should describe a symmetrical design running in sweeping curves along all pits, fissures, and angular grooves between the cusps and with a minimum width.
The mesial and distal margins are placed midway between the bottom of the proximal fossae and the crest of the proximal ridges and in a direction parallel to these ridges.
The mesial and distal wall should have a slant or slight divergence from the pulpal floor outward to avoid undermining the marginal ridges.
In a bucco-Iingual direction, the cavity is extended just sufficient to eliminate the defective and susceptible tissues. The lingual and the buccal wail should be parallel to the respective tooth surface.
It must be reemphasized that the outline form for class 1 cavities should be very conservative since they involve cleansable areas. • It is governed only by the extent of caries in both enamel and dentin and the amount of extension or need to eliminate pits and fissures to secure smooth margins.
Again: The outline form for simple design of Class I cavity preparation should include all carious and undermined enamel, all pits and fissures and extended to area self-cleansable in the shape of multi curves without any sharp line angles.
Bucco-lingually, it should not extend beyond the intercuspal line except if there is caries with minimal width of the cavity about 1/4 - 1/3 the inter-cuspal distance. Mesio-distally, it should be extended mid way between the triangular fossa and the crest of the marginal ridge.
The resistance form Achieved by maximum conservation of sound tooth structure. Also, considering the amalgam as a brittle material, cavo-surface margin configuration of 90oC provides both the enamel margins and the amalgam restoration with enough bulk at margins to resist the fracturing forces
Minimal cavity width and providing bulk of the restoration through a cavity depth at level of 0.2-0.5-mm beyond the DEJ will provide minimal surface area of the restoration exposed to the occlusal loading force with bulk strength through the depth.
Flat and smooth pulpal floor parallel to the occlusal plane will help in proper distribution of occlusal forces and provides stability that deletes the wedging action of the restoration upon the tooth structure. Roundation of axial line angles also eliminates stress concentration.
Retention form: Only retention against axial displacement is needed in the form of mechanical undercuts in dentin by converging the cavity walls occlusally about 5 - 15° from the tooth long axis.
Convenience form In simple Class I cavity design, no need for convenience in as it is easily seen and instrumented. Only, accentuation of cavity walls, line and point angles and selection of suitable sized instruments is considered as a satisfactory convenience.
Removal of Carious Dentin • In small size cavities, the carious dentin should have been removed during making the cavity extensions. • In moderately deep and deep cavities, the carious dentin is peeled off carefully at the sides using large spoon excavators, and then scooped out in few and large pieces. • Only light pressure in a direction parallel to that of the pulp is utilized. This is continued until a sound dentin floor is reached.
Planning of Enamel Walls • The enamel walls of the cavity should be finished free from any loose, short, or undermined enamel, and trimmed to meet the tooth surface at a right cavo-surface angle. • This may be done by sharp and regular-edged chisels and hatchets, plane fissure burs, stones, or sand-paper discs. • All sharp corners in enamel must be rounded, as they may contain short enamel rods.
Performing of the toilet of the cavity A sharp explorer is then used to check the details of the prepared cavity and to loosen the tooth debris which are then blasted out with warm air.
II Procedure The outline form is performed by first gaining access through the enamel to the carious dentin floor of the cavity followed by making the necessary cavity extensions.
In case of initial carious lesions, access is obtained by employing a small sized round bur. • In big carious lesions, access is obtained easily by breaking down the undermined enamel overlying the carious dentin, using a suitable size chisel. • In either case, access is started at the most defective area of enamel, i.e., a carious pit or fissure.
The bur is held at a right angle to the involved surface of, the tooth and light pressure in an in-and-out direction is exerted. Cutting is continued until the amelo-dentinal junction (A.D.J.) is reached.
The necessary cavity extensions through pits, fissures, and deep developmental grooves are made using an inverted cone bur held at right angle to the surface of the tooth. • The bur is rotated, and carefully introduced through the opening just obtained, so that its weak corners do not touch the enamel and get dulled.
With the bur seated in the cavity just below the amelo-dential junction ½ -1 mm. gentle pressure is applied in the direction of required extension. • During cutting, the bur should be kept moving in-and-out of the cavity and at right angle to the tooth surface. In this way, the bur will undermine and lift the cut enamel, and at the same time unclog itself.
Provision of ample resistance and adequate retention through boxing of the preparation could be obtained. • This is obtained by using a fissure bur held perpendicular to the surface of the tooth. All the line angle in dentin must be squared up hoe excavators.
B. Buccal Pit Cavities • The outline of these cavities usually describes a triangle with its base faming the gingival wall and its sides forming the mesial and distal walls. • The gingival wall is placed at or slightly occlusal to the height of contour of the tooth.
All walls are extended just enough to eliminate defective enamel and dentin. The enamel walls are planed in the direction of enamel rods and perpendicular to the axial wall.
Hoe excavators are used to smooth the axial wall and make it parallel with the external surface of the tooth. • It should be re-emphasize that the shape of the cavity will be governed by the extension of caries, accordingly the outline of these cavities may be a rounded or oval in shape.
Class I extension cavity: • Compound or complex Class I cavity design is an extension of the occlusal cavity to buccal or/and lingual surfaces
It is indicated in: • 1. Deep caries in buccal or / and lingual pits. • 2. Deep fissure or groove extended from the occlusal to the lingual or / and buccal surfaces. • 3. Fissure crossing the oblique ridge in upper molars.
4. When the remaining oblique ridge in upper molars or transverse ridge in lower premolars is weak (Fig. 4-4, A and B), it is a must to be included in the cavity outline to avoid its fracture.
The outline form: • The outline form of compound or complex Class I design is the she same as simple Class I cavity preparation in addition to extension to include the carious or retentive area either buccal or/and lingually.
It may be extended with step, forming axial wall and gingival floor, or without step, in • cases showing extended caries or fissure at the level of the pulpal floor. • The formed step will provide inclusion of the carious or retentive area without • endangering the pulp.
Resistance form: • The same features of resistance form as simple Class I is performed in addition to: roundation of axio-pulpal line angle to prevent stress concentration and to provide bulk to the restoration at this critical area.