PowerPoint
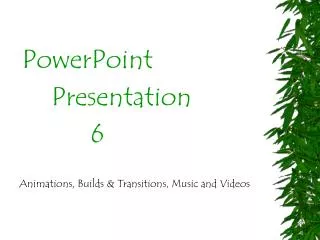
PowerPoint. Presentation. 6. Animations, Builds & Transitions, Music and Videos. Animations. PowerPoint supports animated GIF’s such as those displayed on this page. Animations can either begin automatically, after a period of time, or upon clicking.

PowerPoint
E N D
Presentation Transcript
PowerPoint Presentation 6 Animations, Builds & Transitions, Music and Videos
Animations PowerPoint supports animated GIF’s such as those displayed on this page. Animations can either begin automatically, after a period of time, or upon clicking. These animations begin automatically after the slide is displayed.
These animations are keyed to begin at one second intervals after the slide is displayed.
These six animations will appear in sequence when the mouse is clicked for each.
Builds and Transitions Builds refer to processes which occur within the slide while transitions refer to the change between slides. Both can be accessed from the Animations entry on the menu bar: Custom Animation for Builds and Slide Transition for the transitions. Activating the custom animation on a page displays the pop-up menu such as the one to the right.
Custom Animation Process The first step is to select which items will display automatically and which will be incorporated into builds. Secondly, place these items in order of animation and indicate if they will occur when the mouse is clicked or if they will occur automatically. You can set them to occur automatically following the passage of an indicated number of seconds after the previous action. The third step is to select the desired effects—how the text or picture will appear and from what direction, what sound effects will accompany it, and whether or not the text will be dimmed when the next passage is displayed. The next page displays how this one has been modified.
Custom Animation Process The first step is to select which items will display automatically and which will be incorporated into builds. Secondly, place these items in order of animation and indicate if they will occur when the mouse is clicked or if they will occur automatically. You can set them to occur automatically following the passage of an indicated number of seconds after the previous action. The third step is to select the desired effects—how the text or picture will appear and from what direction, what sound effects will accompany it, and whether or not the text will be dimmed when the next passage is displayed. This page has been modified from the previous one.
Slide Transitions The process of changing from one slide to the next is termed a transition. You begin by selecting Animations on the ribbon, then selecting the desired transition (in this case, checkerboard across). Add the sound effect (breaking glass, the speed, and whether you wish it to occur on the mouse click or automatically (and set a delay if you wish).
Can you tell which settings were used in the transition from the last slide? Well, here they are--read the settings. Fade through black Chime (sound) “Loop “ box checked On mouse click Speed (slow) Note that when you apply a transition to a single slide, it applies to the transition from the previous to the current slide.
The Previous Slide • The title slide has two custom animations--the flag, which zooms up from the bottom, and the music. • Both are animated by going to the Custom Animation menu under Animations (see next slide) • The music is set to stop after the 3rd slide, but under Other Options it is set to loop continuously (in the event it plays through before the final slide).
Sound File Types • There are numerous sound file types which are supported in PowerPoint (see Insert-Movies & Sounds-Sound from File) • Midi (.mid) and Wave (.wav) files are two common types which work well and which can be obtained on the internet. • The sound used on the title sound is a midi file named Cotton_Eyed_Joe.mid • Since the music file is linked rather than embedded, it must be maintained in the same folder as the presentation..
Recording Sounds • You may add your voice to a Power Point presentation. • Plug a microphone into the input jack, then position the microphone the desired distance from your mouth. • Click on “Insert” on the menu line, select “Movies and Sounds”, then choose “Record Sound”. • Click on the red button to start, then click “OK” to stop.
Movies & Videos • A linked movie/video is presented below:
You-tube Link • Click on the video you wish to link, then click on URL for the movie. • Insert a hyperlink with that URL, giving it any desired title. • Click to activate the link in the show. • The URL on the next page is http://www.youtube.com/watch?v=WB61wXKROtw&feature=topvideos