Light Led Panel
Light Led Panel . Esra’a Nassar Mona Amer Supervisor : Dr.Ashraf Armoush. Outline . Overview Goals Tools System software Constraints Processing Demo . Overview. The LED Light Panel is an 8x8 array of individually-controllable RGB LEDs .


Light Led Panel
E N D
Presentation Transcript
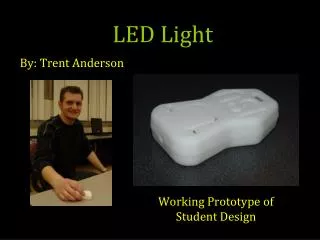
Light Led Panel Esra’aNassar Mona Amer Supervisor : Dr.AshrafArmoush
Outline • Overview • Goals • Tools • System software • Constraints • Processing • Demo
Overview • The LED Light Panel is an 8x8 array of individually-controllable RGB LEDs . • It can stream content from a PC via USB . • An Arduino-compatible microcontroller is used to interface the LEDs to a PC
Where the idea come from ? • In the past humans are communicating via a huge color organ to create the scene of pattern , image and movies. • Color organ is electronic devices that responded to their music inputs with light shows .
What is the problem with color organ ? • need about 20 more years of piano lessons to reach the maximum potential of this instrument. • It is a musical instrument thought, a LED instrument . • It show simple patterns and animations and complex to control.
What Light Led Panel added ? • Show complex patterns and animations and simpler controls. • Add texture, color, and motion to music.
CharacteristicsLight LED Panel • It’s bright, dark and colorful. • It can be use as a center-piece or a perimeter-piece . • Programmable and easy to setup . • easy to play.
What this panel do ? • A light show Display. • Better than LCD on view the resulted picture like 3D • Create new pattern and animation.
Hardware Prerequisites • PNP Transistor • Diffusion RGB LED • Shift Register 74HC595 • Open Collectors ULN2003 • Arduino Microcontroller • bread bored for testing • Different value of Resistances • Jumper • Power Supply 5 Volt 3A.
Why Arduino UNO ? • The Uno differs from all preceding boards in that it does not use the FTDI USB-to-serial driver chip. • It programmed as a USB-to-serial converter.
System Software Arduino 1.5.5 BETA for Windows
Arduino Software • The software of Arduino is open-source environment makes it easy to write code and upload it to the i/o board. • Arduino software runs on Windows, Mac OS X, and Linux. • The environment is written in Java .
Methodology LED Light Panel provide a study of pixels , each photo or pattern is pixelized then transfer through USB to be show in the panel .
Systematic of displaying pattern Defining array char as a Buffer [8][8] Set Buffer Call it every t time pass as parameter Modifying Set Pixel Show Function Called here Shift it Out To Data pin on Microcontroller Send Pixel
Processing Getting Start with our PCB
Processing Selecting Row void selectThirdRowWithDifferentColor(){ sendPixel(3, 5,0,1,1);//cyan sendPixel(3, 4,0,1,0);//green sendPixel(3, 3,1,0,0);//red sendPixel(3, 3,0,2,1);// cyan sendPixel(3, 1,1,0,1);//purple sendPixel(3, 0,0,1,1);//cyan }
Processing-cont • Select the intersection between row and column setPixel( videobuffer[i],videobuffer[j],0,1,0);
Displaying pattern After we had control of almost the LEDs we will do the following pattern simple heart
Constraints • Financial constraint The Project cost around 1100 NS • Material constraint. • Number of IC’s that we need. • IC’ replacement “shift Register “
Constraint-cont • Resource Constraint • Can’t Find an exact tools that we need. • Amplifier that is Compatible with Arduino. • 386AMP audio amplifier Module (Arduino compatible). • Strip of RGB LEDs. • Limitation of the number of the devices. • Can’t Find 100 Led of Common Anode LEDs .
Problems • Noise Done by the PCB affected the result that comes from the Microcontroller . • Finding a suitable Resistor that match with the three LEDs. • Pnp Transistors used for selecting anode command Do not respond to the change of the code
Solution • Check Out Microcontroller. (blinking test ) • Check Our Code that we program it. • check IC’s that we connect manually. • Check out the wires and the connectivity for each one of them using Multimeter . • The current must used on the circuit used it as a sinking current.
Our Future work • Adding sound sensor • Light sensor • Playing game it by adding a joystick