Registration Basics Using BLink and Banner
480 likes | 610 Vues
This PowerPoint presentation serves as a comprehensive guide for students and faculty to navigate Bethel's online advising and registration system effectively. It covers essential topics such as finding your advisor, access to academic records, understanding registration requirements, and navigating class schedules. Key questions addressed include determining registration times, identifying holds, checking class availability, and understanding course prerequisites. This resource enhances preparation for the academic planning process and ensures an efficient registration experience.

Registration Basics Using BLink and Banner
E N D
Presentation Transcript
Purpose of Presentation • This PowerPoint presentation is designed to help you use Bethel’s online system for advising and registration. • It can be used by any student or faculty to prepare for advising and registration. • It can also be used to accompany the Academic Planning assignment in ILA/ILB.
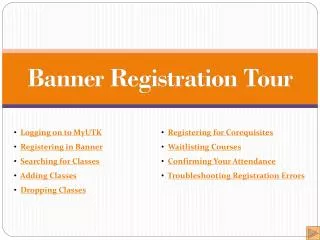
The following questions will be answered • How do I know who my advisor is? (Slide 6-7) • How do I know what his or her office number is? (Slide 8) • How do I find my academic records? (Slide 9-12) • How do know what requirements I have met or still need to meet? (Slide 13-20) • How do I know what day and time to register? (Slide 21-26) • How do I find out if I have any holds that will keep me from registering? (Slide 27-30)
The following questions will be answered (cont) • How do I find the class schedule? (Slide 31-32) • How do I find a particular class I want to take? (Slide 34) • How do I find a class that will meet a particular Gen. Ed. category requirement? (Slide 35-36)
The following questions will be answered (cont) • How do I find out if a class is full? (Slide 38) • How do I find out what the prerequisites for the course are? (Slide 39-42) • How do I actually register? (Slide 43-47) • How many credits can I take? (Slide 48)
Find Your Academic Record Where? BLINK (BLink gives you access to your academic records, which are stored in a program called Banner.) • Student Academics tab • Student Records Link • Student Records (Self-Service Banner)
Degree Evaluation: • Directions are in the Registration Information you received by e-mail from the Registrar “Generating a Banner Degree Evaluation” • Find out: • how many credits you have earned • which requirements you have already met and which ones you still need to meet
You may need to scroll down to see the “Generate New Evaluation”
This student has taken a “Q” course, but still needs a “K” course.
Your registration time is determined by how many credits you have earned • Note: “Credits earned” does not include the courses you are currently taking. It is only the courses you have completed. (Courses you transferred to Bethel as well as credits from AP exam received by Bethel are included in “Credits earned" • Earned credits can be found on the last page of your transcripts.
Earned Credits • In the registration materials your received by e-mail from the Registrar find the page called “Registration Time Chart” • Find the day and time you will register according to the number of earned credits you have.
Important: Do BEFORE Registration Look for the RED FLAG in your Registration tools to see if you have any holds • WHERE? • Start at BLink • Student Academics • Registration Tools • Registration Status
Banner Search Options • See entire schedule • Search by subject (e.g. Biology, Chinese) • Search for particular course • Search by Gen. Ed category • Search by instructor
Search by Subject Choose subject
Search for a Particular Course 1) Choose subject 2) Type in course number
Searching for Gen. Ed courses Click on the first subject (American Sign Language) , hit “shift” scroll down to last subject (Youth Ministry)
Select category Select Gen Ed category (Attribute)
Letter indicates Gen Ed category (Attribute) You must know the CRN to register
Can I Take This Course? Is there room? Cap = Class capacity Act = Number of students registered Rem = Remaining spots available (a negative number means the class is already over capacity)
Can I Take This Course? Do I have the prerequisites? Click on the CRN
Registration Day • Have the CRN for all your course options.
When you register... • Follow the instructions on the handouts • Use any computer with internet access • BLink • Student Academics Tab • Drop/Add a class • PROBLEMS? Call UREG @8734 • There will also be Registrar’s Office staff to help you in the Library IC Information Commons during evening registration hours
Credit min. and max. • Interim: • The norm is 3 credits. • No more than 5 credits. • Fall and Spring: • The norm is 13-16 credits. • No more than 18 credits each term. • The minimum is 12 credits for full-time status. • Some financial aid requires 30 credits per academic year.