Download
1 / 71
710 likes | 871 Vues
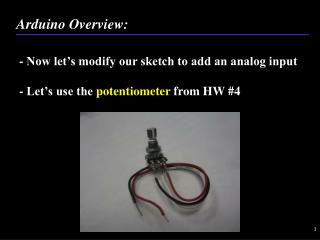
Arduino Overview:. - Now let’s modify our sketch to add an analog input - Let’s use the potentiometer from HW #4. Arduino Overview:. - Connect the Red wire to +5V, Black to GND, and White to A0. Arduino Overview:. - Leave the LED connected to pin 9 but it won’t blink. Arduino Overview:.

E N D
Arduino Overview: - Now let’s modify our sketch to add an analog input - Let’s use the potentiometer from HW #4
Arduino Overview: - Connect the Red wire to +5V, Black to GND, and White to A0
Arduino Overview: - Leave the LED connected to pin 9 but it won’t blink
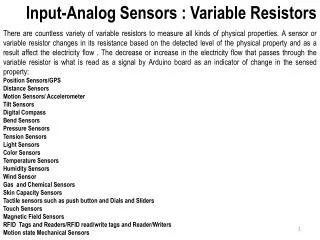
Arduino Overview: - Potentiometer is acting like an analog sensor - We can now hook up any analog sensor and see its value (at least through serial) - What other sensors can we hook up? - Let’s add some… - But first let’s add the Protoshield
Arduino Overview: - Take out the Protoshield your team built in HW#4
Arduino Overview: - Carefully connect it with your unpowered Uno
Arduino Overview: - Carefully connect it with your unpowered Uno
Arduino Overview: - Carefully connect it with your unpowered Uno
Arduino Overview: - Carefully connect it with your unpowered Uno
Arduino Overview: - Reconnect Uno to laptopand verify all is working - Activate Serial Monitor
Arduino Overview: - Disconnect LED Breadboard and connect wire from pin 9 to JC3 on ProtoShield - Activate Serial Monitor
Arduino Overview: - Carefully move wire to JC3 to JC2…
Arduino Overview: - Add the Temperature Sensor to the Breadboard
Arduino Overview: - Connect Pin 1 to 5V
Arduino Overview: - Connect Pin 3 to GND
Arduino Overview: - Connect Pin 2 to A5
Arduino Overview: - Modify your sketch to add the following variable
Arduino Overview: - Modify your sketch to add the following lines in loop
Arduino Overview: - Compile and Upload - Activate Serial Monitor - Test by putting your finger on the sensor - Do you see a change?
Arduino Overview: - Convert to Voltage and display on Serial Monitor
Arduino Overview: - Should see this…
Arduino Overview: - Use spec sheet to convert to degrees C - 10 mV/C - Look for offset
Arduino Overview: - 0.5 V offset
Arduino Overview: - Modify your sketch
Arduino Overview: - Should see this…
Arduino Overview: - Data make sense? - How would you calibrate this sensor?
Arduino Overview: - Add the Humidity Sensor to the Breadboard
Arduino Overview: - Connect 5 V from Temp Sensor
Arduino Overview: - Connect GND from Temp Sensor
Arduino Overview: - Connect Out to A4
Arduino Overview: - Modify Sketch
Arduino Overview: - Should get…
Arduino Overview: - Convert to voltage and understandable units from data sheet - Algebra
Arduino Overview: - Modify Sketch
Arduino Overview: - Should get…
Arduino Overview: - Data make sense? - How would you calibrate this sensor?
Arduino Overview: - Add the Accelerometer to the Breadboard
Arduino Overview: - Connect 3.3V to Vcc from UNO
Arduino Overview: - Connect GND to GND from Humidity Sensor
Arduino Overview: - Connect ZOUT to A3 on UNO
Arduino Overview: - Connect YOUT to A2 on UNO
Arduino Overview: - Connect XOUT to A1 on UNO
Arduino Overview: - Accelerometer has a few other settings we need address from the Data Sheet
Arduino Overview: - Sleep…Connect 3.3V from AccelVcc to SLP
Arduino Overview: - Range…Connect 3.3V from AccelVcc to GSEL
Arduino Overview: - Modify Sketch as follows
Arduino Overview: - Modify Sketch as follows
Arduino Overview: - Should get…
Arduino Overview: - Convert to voltage and understandable units from data sheet - Algebra
Arduino Overview: - Convert to Voltage = accelX * (5.0/1024) - Subtract offset and convert to Gs Gs = (voltage – 1.65) / (0.206)