Automating GENI Experiments: Efficient Strategies for Scalable and Repeatable Testing
260 likes | 401 Vues
This document outlines the systematic approach to automating experiments within the GENI (Global Environment for Network Innovations) framework. It contrasts automated experiments with traditional hand-run methods, emphasizing the advantages of scalability, repeatability, and resource efficiency. Key recommendations include using templated post-boot scripts for configuration and maintaining flexibility with virtual machines. It provides examples of how to implement scalable configurations and highlights best practices for optimizing experimental resources in research settings.

Automating GENI Experiments: Efficient Strategies for Scalable and Repeatable Testing
E N D
Presentation Transcript
Systematic Experimentation:Automating Experiments andExoGENI Image Snapshots Paul Ruth, pruth@renci.org RENCI / UNC Chapel Hill
GENI Experiments GENI ≠Amazon EC2
GENI Experiments GENI ≠Amazon EC2 Amazon EC2 ≅ Buying a machine from Dell
GENI Experiments GENI ≠Amazon EC2 Amazon EC2 ≅ Buying a machine from Dell GENI ≅ Getting time on a shared instrument (e.g. telescope or large cluster computer)
GENI Experiments • Automated Experiments: • Repeatable • Scalable • Use resources only when running the experiment • Hand-run/Hand-built Experiments: • Not repeatable • Not scalable • Waste resources with slices that “can’t be shutdown” • Tips (should be rules): • Long lived experiments are allowed (even encouraged). • However, long lived slices for short experiments should be avoided. • Especially if the reason is that its difficult reproduce the slice • Only configure slices by hand when developing experiments • Always automate configuration for executionof experiments
GENI Experiments • Automated Experiments: • Repeatable • Scalable • Use resources only when running the experiment • Hand-run/Hand-built Experiments: • Not repeatable • Not scalable • Waste resources with slices that “can’t be shutdown” • Tips (should be rules): • Long lived experiments are allowed (even encouraged). • However, long lived slices for short experiments should be avoided. • Especially if the reason is that its difficult reproduce the slice • Only configure slices by hand when developing experiments • Always automate configuration for executionof experiments If you can not easily shutdown your experiment and re-run it, then you are doing it wrong!!!
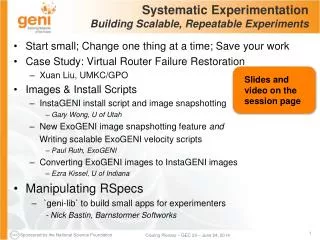
Automating GENI Experiments • Basic experiments should include: • Request (RSpecor NDL) • Base image(s) (custom or standard image) • Post boot scripts to configure each VM • Install software not include in image • Configure unique setup for each VM • Start services, clients, etc. • Scalable experiment should include • Request (RSpecor NDL) • Base image(s) (custom or standard image) • Templated Post Boot scripts to configure arbitrary sized slice. • Potions of slice can be scaled using common boot scripts More details on the ExoBlog: http://www.exogeni.net/2013/06/example-postboot-scripts-for-creating-hostnames-and-name-resolution/
ExoGENIPostboot ScriptsBasic Example #!/bin/bash echo 172.16.1.1 Server >> /etc/hosts echo 172.16.1.100 Client1 >> /etc/hosts echo 172.16.1.101 Client2 >> /etc/hosts /path/to/my/software/client-start Server • Experiment is repeatable • Each client has its own post boot script • Adding an additional client requires modifying all post boot scripts • Changing the IP address of any VM requires modifying all post boot scripts
ExoGENIPostboot ScriptsBasic Templated Example #!/bin/bash echo $Server.IP(“VLAN0”) $Server.Name() >> /etc/hosts echo $Client1.IP(“VLAN0”) $Client1.Name() >> /etc/hosts echo $Client2.IP(“VLAN0”) $Client2.Name() >> /etc/hosts /path/to/my/software/client-start $Server.Name() • Experiment is repeatable • Each client has its own post boot script • Adding an additional client requires modifying all client post boot scripts • Changing the IP address of any VM does NOT require modifying any post boot scripts
ExoGENIPostboot ScriptsBasic Templated Example #!/bin/bash echo $Server.IP(“VLAN0”) $Server.Name() >> /etc/hosts echo $Client1.IP(“VLAN0”) $Client1.Name() >> /etc/hosts echo $Client2.IP(“VLAN0”) $Client2.Name() >> /etc/hosts /path/to/my/software/client-start $Server.Name() #!/bin/bash echo 172.16.1.1 Server >> /etc/hosts echo 172.16.1.100 Client1 >> /etc/hosts echo 172.16.1.101 Client2 >> /etc/hosts /path/to/my/software/client-start Server
ExoGENIPostboot ScriptsScalable Example • Experiment is repeatable • Experiment is scalable • Clients share post boot script • Adding an additional clients DOES NOT require modifying post boot scripts • Changing the IP address of any VM DOES NOT require modifying post boot scripts #!/bin/bash Echo $Server.IP(”VLAN0") $Server.Name() >> /etc/hosts #set ( $max = $Client.size() - 1 ) #foreach ( $i in [0..$max] ) echo $Client.get($i).IP(”VLAN0") `echo $Client.get($i).Name()| \ sed 's/\//-/g'` >> /etc/hosts #end /path/to/my/software/client-start $Server.Name()
ExoGENIPostboot ScriptsScalable Example #!/bin/bash echo $Server.IP(”VLAN0") $Server.Name() >> /etc/hosts #set ( $max = $Client.size() - 1 ) #foreach ( $i in [0..$max] ) echo $Client.get($i).IP(”VLAN0") `echo $Client.get($i).Name()| \ sed 's/\//-/g'` >> /etc/hosts #end /path/to/my/software/client-start $Server.Name() #!/bin/bash echo 172.16.1.1 Server >> /etc/hosts echo 172.16.1.100 `echo Client/0 | sed 's/\//-/g'` >> /etc/hosts echo 172.16.1.101 `echo Client/1 | sed 's/\//-/g'` >> /etc/hosts /path/to/my/software/client-start Server
ExoGENIPostboot ScriptsScalable Example #!/bin/bash echo $Server.IP(”VLAN0") $Server.Name() >> /etc/hosts #set ( $max = $Client.size() - 1 ) #foreach ( $i in [0..$max] ) echo $Client.get($i).IP(”VLAN0") `echo $Client.get($i).Name()| \ sed 's/\//-/g'` >> /etc/hosts #end /path/to/my/software/client-start $Server.Name() #!/bin/bash echo 172.16.1.1 Server >> /etc/hosts echo 172.16.1.100 `echo Client/0 | sed 's/\//-/g'` >> /etc/hosts echo 172.16.1.101 `echo Client/1 | sed 's/\//-/g'` >> /etc/hosts echo 172.16.1.102 `echo Client/2 | sed 's/\//-/g'` >> /etc/hosts echo 172.16.1.103 `echo Client/3 | sed 's/\//-/g'` >> /etc/hosts /path/to/my/software/client-start Server
Custom ExoGENI Images • Motivation • Advanced experiments need custom images • Difficult for most users • Need for simple tool to create custom images
Custom ExoGENI Images • Motivation • Advanced experiments need custom images • Difficult for most users • Need for simple tool to create custom images NEW script: Create an ExoGENI image from a running ExoGENI VM
ExoGENI Image Background • Images defined by XML metadata file • Image (AMI) - mandatory • Kernel (AKI) - optional • Ramdisk (ARI) - optional • Hosted on HTTP server • Permanent server at your institution • Soon will work with DropBox and Google Drive • Slice requests require • URL to metadata file – goes into the ‘name’ in RSpec • Hash of metadata file – goes into the ‘version’ in RSpec
ExoGENI Image Background: Metadata <images> <image> <type>ZFILESYSTEM</type> <signature>9efee8fa9c6705455c87a42477bd4ebd04d39c81</signature> <url>http://geni-images.renci.org/images/standard/centos/centos6.3-v1.0.10.tgz</url> </image> <image> <type>KERNEL</type> <signature>5e76d034e27cb861275fc3d1bd9d97c3905ef5a2</signature> <url>http://geni-images.renci.org/images/standard/centos/kernels/vmlinuz-2.6.32-431.5.1.el6.x86_64</url> </image> <image> <type>RAMDISK</type> <signature>c999527cc0d8739a3d3f38d48f03fa6c73151cca</signature> <url>http://geni-images.renci.org/images/standard/centos/kernels/initramfs-2.6.32-431.5.1.el6.x86_64.img</url> </image> </images>
ExoGENI Image Snapshot (NEW) • Snapshot of running ExoGENI VM • Creates: image, kernel, ramdisk, metadata • High level steps • Create/modify a VM • Run the script • Copy the new image files to an http server • Insert metadata URL and hash into a request More details on the ExoBlog: http://www.exogeni.net/2014/06/creating-a-custom-image-from-an-existing-virtual-machine/
ExoGENI Image Snapshot:Running the Script Example: Creates image files and metadata in /tmp ./imgcapture.sh-n <name> -d <destination> -s <size> -u <url> -n <name>: The name of the new image. -d <destination>: The directory to put the image files. -s <size>: Size of the image -u <url>: The http url of the web server where you will host your image. ./imgcapture.sh -n new_image -s 2G –d /tmp \ -u http://geni-images.renci.org/images/new_image -d /tmp
ExoGENI Image Snapshot: Future Work • Snapshot non-ExoGENI VMs • e.g. IG, Virtual Box, physical machine • Requires installation of NEuca tools • Currently available as rpm, deb, and source
Thank you • GENI Project OfficeAward#: 1934, 1872, 1582