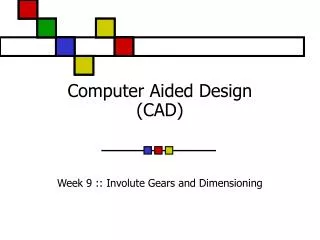
Computer Aided Design (CAD)
Computer Aided Design (CAD). Week 9 :: Involute Gears and Dimensioning. Gears - Introduction. Single Gear. Gear Train. Driver and Driven Gear Wheels. Types of Gears. Spur Gear. Rack & Pinion. Helical Gear. Worm Gear and Wheel. Note: Not an exhaustive list. Pitch Circle Diameter.

Computer Aided Design (CAD)
E N D
Presentation Transcript
Computer Aided Design(CAD) Week 9 :: Involute Gears and Dimensioning
Gears - Introduction Single Gear Gear Train Driver and Driven Gear Wheels
Types of Gears Spur Gear Rack & Pinion Helical Gear Worm Gear and Wheel Note: Not an exhaustive list.
Pitch Circle Diameter Circular Pitch Fillet Radius Some Gear Terminology
Gear Data and Equations • Pressure Angle: Normally 20º • Pitch Circle Diameter (PCD): Module x No. Teeth A circle representing the two gears as tangent cylinders. • Addendum = Module The part of the tooth above the Pitch Circle. • Clearance = 0.25 x Module (1/4 of Module) The gap between the tip and the root of two meshing teeth. • Dedendum = Module + Clearance The part of the tooth below the Pitch Circle.
Gear Data and Equations • Circular Pitch = Module x 3.14 (Pi) The distance from a point on one tooth to a similar on the next. • Tooth Thickness = Circular Pitch / 2 • Fillet Radius (approx) = Circular Pitch / 7
Spur Gear Calculation & Drawing • The method used here to draw a typical spur gear is called “Unwin’s Construction”. It is also called the “Approximate Method” because it is only produces an Approximate “Involute Curve”. • Tip: When drawing a Gear in AutoCAD – make full use of Layers and Colours.
diameter. Spur Gear Calculation & Drawing #1
Spur Gear Calculation & Drawing #2 a circle
Spur Gear Calculation & Drawing • Now its your Turn -> • Draw a Spur gear with the following details: Module: 2mm Number of Teeth: 25
Dimensioning to BS308 Standards • Each dimension required should only appear once. There should be no more dimensions than necessary. • Linear Dimensions are normally in millimeters (mm). The symbol may be ommitted provided the drawing carries a statement of the unit used. • Angular Dimensions should be expressed in degrees and minutes, e.g.: 20° 30’
Dimensioning to BS308 Standards • Projection lines and dimension lines should normally be placed outside the outline of the view. • Crossing of projection and dimension lines should be avoided. • Projection lines should start just clear of the outline of the feature and should extend a little beyond the dimension line. • Projection lines should normally be drawn perpendicular to the dimension required.
Dimensioning Overview • Dimensions should be placed near the middle, and above the dimension line. • Larger Dimensions should be placed outside smaller dimensions.
Dimensioning Methods • Parallel Dimensioning: Consists of a number of dimension lines originating from a datum feature. • Chain Dimensioning: Should only be used where the accumulation of tolerances does not endanger the function of the part.
Diameter Dimensioning • Diameter dimensions of a circle or cylinder is shown by the symbol Ø in front of the No.
Radius Dimensioning • Radii should be dimensioned by a dimension line that passes through, or is in line with, the center of the arc. • The dimension line should have one arrowhead only, that which touches the arc. • The symbol R is placed in front of the No.
Dimensioning Features • Dimensioning of equally-spaced features may be simplified by using methids similar to below:
Dimensioning Holes etc. • Notes: - The term “spotface” implies that the depth is the minimum necessary to provide a machined surface. - Chamfers at 45° should be dimensioned as below and not described by a note.
Dimensioning Screw Threads • The letter M, standing for ISO metric thread, is followed by, the nominal diameter and the pitch, both in millimeters. E.g. M8 x 1. • The absence of a pitch (e.g. M8), means that a course pitch is specified. (e.g. The course pitch for an M8 thread is 1.25mm.(See Page 7 in AutoCAD Notes part II) • Thread tolerance6H is suitable for INTERNAL thread tolerance.6g is suitable for EXTERNAL thread tolerance.E.g. M10 x 1 – 6g
Dimensioning Internal Threads • Note the hatch lines and line weights.