Download
1 / 39
410 likes | 604 Vues
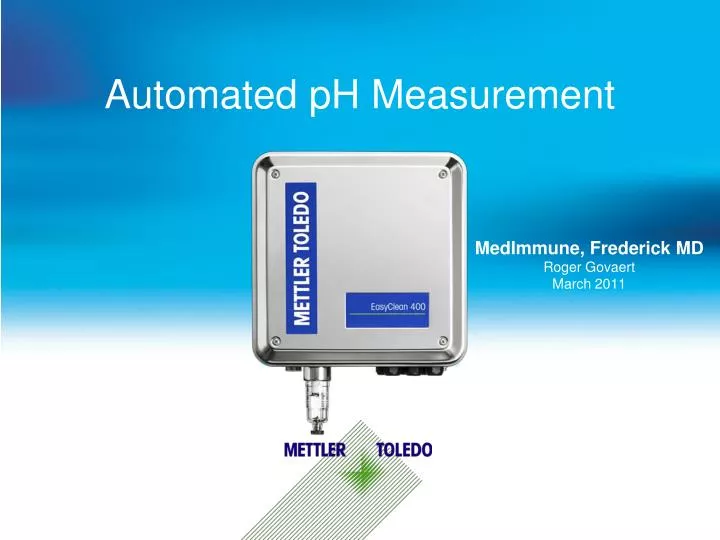
Automated pH Measurement. MedImmune, Frederick MD Roger Govaert March 2011. Agenda. System Overview Main Components M700 Transmitter Programming Basics Communications Maintenance. Sensors suitable for InTrac7XXe. EasyClean 400(X): Overview. Functionality

E N D
Automated pH Measurement MedImmune, Frederick MD Roger Govaert March 2011
Agenda • System Overview • Main Components • M700 Transmitter • Programming Basics • Communications • Maintenance
Sensors suitable for InTrac7XXe EasyClean 400(X): Overview Functionality Fully automated electrode maintenance system. Automatically rinses cleans and calibrates an electrode mounted in an InTrac 7XXe housing. Type EC 400X for hazardous areas. System integration via Profibus PA or Foundation Fieldbus possible. System requirements: Transmitter M 700 with EC 700 Module All pH sensors InTrac7XXe housing
Cleaning & Calibration at the Heart of the System EasyClean Automation
Agenda • System Overview • Main Components • M700 Transmitter • Programming Basics • Communications • Maintenance
EasyClean 400 Base Air valve Air pressure- gauge Water valve Piezo valve Purge air Air pressure- regulator PLC Terminals Water pressure gauge Filter, water trap
Media adaptor for connecting the container island with the EasyClean 400 • The media adaptor offers up to three ports • Classic media island for two buffer and one cleaning agent container Media Adapter • Buffer and cleaning agent container (3.5 l / 0.92 gal) • Self-sustaining assembly with integrated pump
Media Pump • NO moving mechanical parts • NO wear out • All wetted parts are chemical resistant • NO stored energy according to • ATEX 94/9/EG Expansion pump Connection to the media adapter Floating body for level indication Suction pipe
Media Pump How the Expansion Pump works Air/Liquid is drawn out of a main cylinder. This causes a flexible membrane tube in the center to expand. During this expansion, the media is drawn from the bottom of the membrane tube. Check valves maintain proper direction of flow. Air/Liquid is forced into main cylinder. This causes a flexible membrane tube in the center to constrict. During this constriction, the media is pushed out of the top of the membrane tube. Check valves maintain proper direction of flow.
Media Connection • Buffer Island End • Unique shape for error free connection • Tubing Connection End • Unique size and colors for easy connection • InTrac Interface End • Unique shape for error free connection
Housing Adapter Housing adapter distributes buffer, cleaning agent, control air and air for indicators Tip: Orient this module opposite the pneumatic connections as shown in insert
Housing Adapter Standard connections should look like this. • Media connection to rinsing chamber • Rinsing chamber outlet • Feedback of “SERVICE” position • Feedback of “MEASURE” position • Control air for “SERVICE” position and supply for “SERVICE” position feedback unit • Control air for “MEASURE” position and supply for “MEASURE” position feedback unit • Holding bracket for strain relief of media connection
Agenda • System Overview • Main Components • M700 Transmitter • Programming Basics • Communications • Maintenance
M 700 M 700 – pH 2700(i), O2 4700(i), Cond 7700, CondInd 7700 • Open flexible system • Reduce cost per loop through multi channel system • Optional Software allows application specific solutions Common features • VariPoWer (VPW) supply: 20 to 250 V • Plain-text user interface with intuitive menu guidance • Four configurable relay contacts (extendable to 8) • Logbook function • Sensor network diagram • 2 channel recorder
Components of the EC 400(x) The M 700 EasyClean 400 Module • Integrates in to the M 700. Communication with the EasyClean 400 via RS 485 interface • Has an integrated pH measurement Module • Provides the power supply for EasyClean 400 • Module design allows for easy interfacewith M 700, ISM, PA and FF technologies
EC400 Module Wiring • Wire the EC400(x) Module with a VP cable according the diagram. Clear – Measure (Terminal 2) Red – Ref. Elec. (Terminal 8) Green – RTD (Terminal 14) White – RTD (Terminal 13) Green &Yellow – Shield (Terminal 15) Blue– Sol. Ground (Terminal 12) PT100 - Remove Jumper Term. (18 & 19) connect Gray wire. Not Used with ISM Systems
Intelligent Sensor Management pH Module ISM pH Module is connected to EasyClean 400 Module for automated pH functionality of ISM Sensors/Systems Clear Coax To ISM pH Sensor Colored Ground
M700 Base Connections • Wire the BASE Module of the M 700 as follows: • Power Lead 1* – Terminal 18 • Power Lead 2* – Terminal 19 • Earth Ground – Terminal 17 • Output 1 (+) – Terminal 7 • Output 1 (-) – Terminal 8 • Output 2 (+) – Terminal 9 “if required” • Output 2 (-) – Terminal 10 “if required” 1 2 2 1 * There is no polarity for power on the M 700
Agenda • System Overview • Main Components • M700 Transmitter • Programming Basics • Communications • Maintenance
Main Menu Structure ALL DEMO UNIT PASS CODES ARE SET TO 0000
FRONT Module – Display Configuration • Press Menu key to select menu. Select parameter setting using arrow keys, confirm with Enter. Select: “Administrator level”: Passcode 1989 • Select “M 700 FRONT” • Select “Measurement display” • Set the number of primary values (large display) to be displayed • Select process variable(s) to be displayed and confirm with Enter. Pressing the Meas key returns to measurement. Notice the Module Icons for each variable! Make sure you are displaying the variable that you really want.
BASE Module – Output Settings • Call up parameter setting. Enter passcode. • Select M 700 BASE • Select “Output Current I1” • Select your measured variable • Select Curve, e.g. “Linear”: The measured variable is represented by a linear output current curve. The desired range of the measured variable is specified by the values for “Start” and “End”. • Enter your “Start” 4(0)mA value • Enter your “End” 20mA value • Press Meas to return to main display. If you’re using a second output, follow the same steps but when choosing the Output Current choose I2 instead of I1.
Calimatic buffer For automatic calibration, you must define the buffer set you want to use. Select a buffer solutions from this buffer set in any order. The selected buffer set with the nominal values of the individual buffer solutions is displayed in gray. The “Calimatic buffer” menu shows all buffer sets available. Check module manual for buffer set details Calibration Buffer Presets
Select Module to control Ensure you have selected correct module (2700i pH) Fixed of Weekly Programming Fixed time interval or daily/weekly custom programming Program Selection Select and Edit (as desired) programs you wish to run EC Parameter Settings
Available Automated Programs • Cleaning • Retract, Clean and Measure • 2-Point Calibration • Retract, Clean, Cal Point 1, Cal Point 2 and Measure • 1-Point Calibration • Retract, Clean, Cal Point 1 and Measure • Service • Retract, Clean, Extended Hold and Measure • Parking • Retract, Clean, External Hold, and Measure • User Defined Program 1 • User Defined Program 2
Agenda • System Overview • Main Components • M700 Transmitter • Programming Basics • Communications • Maintenance
System Integration Integration via Fieldbus Network Conventional integration: Digital Inputs/Outputs, Current Output DI DO 4.. 20 mA Internal communication Internal communication
Agenda • System Overview • Main Components • M700 Transmitter • Programming Basics • Communications • Maintenance
Maintenance • Replacing seals in contact with the process medium • All seals that come in contact with the process medium should be replaced at least every six months for reason of safety. • With aggressive media the seals may need to be changed at correspondingly shorter intervals. • Medium–wetted seals must be examined at least monthly, as well as during normal maintenance procedures to check for dirt or damage. • Frequent insertion and retraction motion of the immersion tube can also have an influence on the necessary maintenance intervals
MC 700 Maintenance • Start probe maintenance • Here you can select a preset program (Cleaning, Cal 2point, Cal1point, etc.) or one of the 2 user-specific programs. Select using arrow keys confirm with enter. • Probe maintenance • With the EC 400 “SERVICE” program, the probe is moved into SERVICE position. The individual program steps are indicated in the display. After having terminated the servicing work, press the “End Service” softkey to move the probe back to “Measuring” position (PROCESS).
Maintenance • Reset wear counter • The wear counter indicates the number of probe movements. • Manual control • Select function using arrow keys. Symbol flashes, activate with enter. “ON” appears below the icon. Terminate function with enter. (“ON” disappears again.) * The access code is specified in the “Parameter setting / EC 400 / Installation” menu.
Maintenance • It is recommended that a service visit be scheduled once a year. This check-up will ensure that the Easy Clean 400 is maintained properly. Site visits will include inspection and maintenance of O rings, seals, pumps, filters, hosing and armature. These visits will also provide an opportunity for additional training as required.