Download
1 / 6
60 likes | 159 Vues
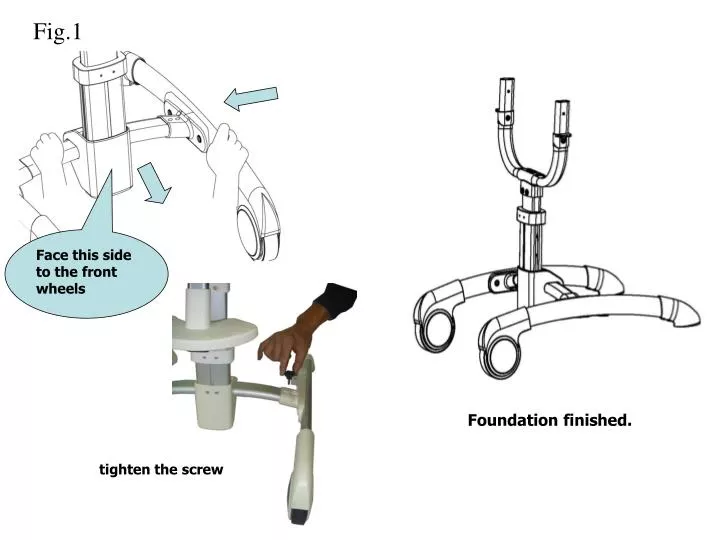
Fig.1. Face this side to the front wheels. Foundation finished. tighten the screw. Push the pins on the legs inwards and fully insert into the housing. Make sure the pins are protruding though the holes in the housing after fitting. !. Insert the seat Make sure every

E N D
Fig.1 Face this side to the front wheels Foundation finished. tighten the screw
Push the pins on the legs inwards and fully insert into the housing. Make sure the pins are protruding though the holes in the housing after fitting. ! Insert the seat Make sure every connected part is completely locked together. Fig.2 ! Ensure the pins are protruding through the holes.
Armrest positioning hole Fig.3 Put the food tray into the armrest with proper position and you can adjust the food tray as the picture. Place the armrest pins outside. Push the pins inwards and fully insert into the housing. Make sure the pins are protruding though the holes in the housing after fitting. ! Make sure the food tray was locked while using.
Fig.4 Adjust the seat height Step the connection bar and pull the puller button with your hands.
Fig.5 Folding Face this side to the front. Finished folding after tighten the screw.
High Chair H-268-1 Complies with: BSEN14988:2006+A1:2012 part1,2