Download
1 / 138
1.75k likes | 2.87k Vues
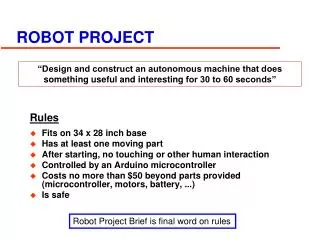
Robot Project. By Alan Cheng. The Goal of This Project.

E N D
Robot Project By Alan Cheng
The Goal of This Project • The goal of this project is to create a physical robot that can move physically in the environment, grab items and show emotions. The robot would need to have sensors and vision. It would be able to speak and to create sounds (pre-recorded). Also, the effects of a Darwinian vs Lamarckian Genetic Algorithm would be tested on this robot.
The Road Map • The robot base • The ESRA III robot • OpenCV and object detection • OpenCV and the ERSA III • Bluetooth and the robot • Future Improvements and Additions • Today’s Demo
The Standard Base • A “standard” base normally contains two motors for the back wheels and two non-motor controlled wheels in the front. http://www.hitechnic.com/blog/wp-content/uploads/TrikeBase.png http://farm1.static.flickr.com/53/128493978_031324a051.jpg
The Standard Base(2) • Used in 2 wheel drive cars. • Pros (+’s) • Easy to build and flexible on wheel placement. • Easy to program • Fast • Cons (-’s) • Turning is slower • Braking requires a good amount of friction
Omnidirectional Drive • Three types of wheels that can be used: • Mecanum wheels • Omni wheels • Standard wheels • A base with mecanum wheels requires a standard placement of the wheels (like a car). However, this base can move left and right along with forward and back from the sameposition.
Omnidirectional Drive(2) • By moving the each pair (side-by-side position wheels) in opposite directions, it is able to move left and right. http://www.designnews.com/photo/58/58077-DNx040719N539B_C.jpg http://en.wikipedia.org/wiki/File:MG_6646.resize.jpg
Omnidirectional Drive(3) • Pros: • Can move in all 8 cardinal directions from the same position (omnidirectional) • Cons: • Wheels are harder to find • Harder to program • Examples of Usage • Einstein robot base • Airtrax Inc.
Omnidirectional Drive(4) • An omnidirectional drive using omniwheels has each wheel angled at 45 degrees on each corner. http://shop.pitsco.com/store/detail.aspx?CategoryID=62&by=9&ID=5817&c=1&t=0&l=0 http://farm1.static.flickr.com/53/128493978_031324a051.jpg
Omnidirectional Drive(5) Forward Backward
Omnidirectional Drive(6) Left Right
Omnidirectional Drive(7) Turning Left Turning Right
Omnidirectional Drive(8) Diagonally up-left Diagonally up-right
Omnidirectional Drive(9) Diagonally down-left Diagonally down-right
Omnidirectional Drive(10) • Pros: • Omni-directional in 8-directions • Fast • Spinning is fast • Cons: • Hard to build • Hard to program
Why Use an Omnidirectional Drive? • The main reason I used it is because it can move in eight directions from the same position. • It can make the robot move fast in an theatre environment when speed is important. • The base was hardest part of building but was still manageable. Programming is harder but not very hard.
Materials Used So Far • Tetrix base set: ($399.00 from Pitsco) • 2 omni wheels • 2 DC drive motors • 2 motor mounts • 2 motor shaft hubs • 2 motor power cable • 1 Hitechnic DC motor controller • RobotC 2.01 • Lego Nxt 2.0 base set ($279.99 from Lego.com)
Materials Used So Far(2) • 4 omni wheels ($39.95 for set of 2, Pitsco) • 4 DC drive motors ($29.95 each, Pitsco) • 4 DC motor mounts ($19.95 each, Pitsco) • 4 motor shaft hubs ($7.95 each, Pitsco) • 4 motor power lead ($1.95 each, Pitsco) • 2 Hitechnic DC motor controller ($79.95 each, Lego Education) ~ I borrowed from PSU
RobotC 2.01 • RobotC 2.01 was used for programming the robot. Additional programming languages maybe used later. RobotC 2.02 and IS out. Color sensor support is not added. • RobotC 2.01 has fixed bugs from 1.40, enhanced motor and sensor support, and many more…
Setting the Tetrix in RobotC • Download RobotC firmware by going to Robot -> download firmware • Go to robot -> platform type -> Nxt & Tetrix • Go to robot -> motors and sensor setup
Setting the Tetrix in RobotC(2) • S (number) refers to the port the Hitechnic motor control is attached to. • Go to the sensor tab and define your sensors there. Then click ok. • A couple of lines referring to the motor and sensor setup should be at the top of the program.
Robodyssey’s ESRA III • Robot kit used for displaying emotions. • 3 Hitec servos and 4 Blue Bird servos (in version with eyebrows and ears) • Mini SSC controller is required to control the motors. • Visual Show Automation (VSA) is the program that programs the SSC controller. • Time it took to build the ESRA: 5 hours. • You may need to drill in extra holes. • Some extra small components (e.g. screws) may be needed. Base is flimsy.
Parts Used • Robodyssey’s ESRA III with ears and eyebrows - $233.99 • Mini SSC II Controller - $44.00 • Visual Show Automation - $69.95 Mini SSC II Controller www.robodyssey.net Visual Show Automation www.robodyssey.net ESRA III www.robodyssey.net
Using Visual Show Automation • Connect to ESRA to the computer • Go to Edit -> Settings (or F3) • This should appear: • The track corresponds to the port that to. • Change the port to COM (insert number) • You change the name or color here.
Programming in Visual Show Automation • In order to make an event (in other words make a motor move), click and drag the desirable length of the event in the corresponding track ->
Editing the Event • After creating an event, double click on it. • The following window should appear.
Editing the Event (2) • You can drag the “virtual servo display” and when released, the motor should move to that state. Remember to click on starting/stopping position and click capture or else the event wont do anything.
Adding Sound (speech) to the Program • Click or press F2 • Input the correct file • If audio needs to be edited, I suggest Audacity. It’s free and can export in different extensions. • The motors will be partially synchronized. • Edited the events to fit the audio.
Running the Program • Press on the sidebar or press enter. • If the ESRA is connected to the computer, it should move.
My Opinions on the ESRA • Easy to assemble, however the instruction manual sometimes is unclear and not specific enough. • Visual Show Automation is very self explanatory. Only audio synchronization is harder because you can’t drag the audio (the wave) at all. • Overall, I think that the ESRA III and VSA is a great beginning to beginners.
OpenCV • OpenCv stands for Open Source Computer Vision • It is open source and free • Newest version is 2.1. • OpenCv was developed by Intel and is continued by Willow Garage • Uses C/C++ • OpenCv is a library for C/C++ • For Windows and Linux
Setting Up OpenCV in C/C++ • First set up the OpenCV 2.10 library. • In order to set up OpenCV with Microsoft Visual Studio, first go to the project’s property -> configuration properties -> Linker -> Input. Click on additional dependencies and input “highgui210.lib cxcore210.lib ml210.lib cv210.lib”
Some General Use Functions • OpenCv already has some general use functions. Many general purpose functions are built into a library. This allows easier programming. We can load images and display them, make a trackbar, or even detect the border of object. All of the functions can be found in the OpenCV help file.
Some Simple Functions(2) • We’ll start with a simple program. One that’s loads and displays an image, then ends when a button is pressed. • The image chosen is airplane.jpg from the sample OpenCV pictures. The Airplane Image
Some Simple Functions(3) • The Program:
IplImage • In order to load an image into an 2D array, we have to create the storage place for the image. IplImage creates a pointer to the 2D array. It is written as below: • IplImage* (name);
cvLoadImage • The next step is to load the image file. In the program, creating the empty image and storing the picture in there is combined together into one line. The layout for loading the image is as below: • cvLoadImage( “Location of the file ” );
cvNamedWindow • Then we create a window. This is where the image will be displayed. • cvNamedWindow( “ name of window ” );
cvShowImage • The image is then displayed. The pointer where the image is stored and the name of the window is required. • cvShowImage( “ name of the window ”, (name of pointer);
cvWaitKey • The program then waits until a key is pressed. We can use any ASCII number for any key instead of the default value 0. 0 means any key. • cvWaitKey( ASCII Number )
cvReleaseImage • This deallocates the memory allocated for creating the image. Without deallocating anything, it is more likely that the program will have a memory error and crash • cvReleaseImage( name of pointer )
cvDestroyWindow • This function destroys the window of the named name. • cvDestroyWindow( window name )
Object Detection • Contours is used in my program for object detection. • Image has to be converted into one-channel image (binary image). • Can find all noises though. • The border is counted as a contour. • Filter is necessary.
Goal of the Object Detecting Program • The goal of the object detecting program is to find the blue cup, and only the blue cup. Thus we can find the centroid of the cup and make a robot find and pick up the cup.
Flowchart of the Program Filter contours Read Text file for filter Threshold the hue and saturation images Draw contours and centroid Capture the frame No Is space pressed? Yes Find contours Convert to HSV Separate to HSV 3 graylevel image Calculate the shape features END