Download
1 / 59
590 likes | 591 Vues
Learn about the reactive behaviors of obstacle avoidance and goal finding in motion planning, and explore the methods of blending and competition for combining these behaviors.

E N D
Motion Planning (1/3) Instructor Prof. Shih-Chung Kang 2008 Spring
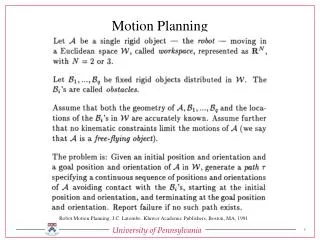
Goal finding R Goal
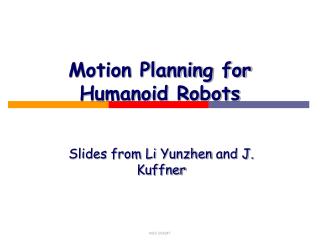
Goal finding and obstacle avoidance Obstacle R Goal Obstacle 2020年1月1日星期三 4
Robot Behaviors • There are three main approaches to robot behavior: reactive - where the robot tries to respond directly to the changing environment. deliberative - where the robot thinks ahead and reasons about possible actions before deciding which one to execute; hybrid - which is a combination of reactive and deliberative. • In this tutorial we will look at two methods of combining reactive behaviors. • Blending and Competition
Blending and Competition (1/3) • We consider the task where the robot has a goal point it wishes to reach, but there are obstacles it must also avoid. • The robot has two reactive behaviors. The go-to-goal behavior simply directs the robot towards the goal, and the avoid-obstacle-behavior directs the robot away from obstacles when they are detected. • The go-to-goal behavior can be represented as a force vector which points in the direction of the goal. The avoid-obstacle-behavior maps the senor input to a force vector pointing away from the obstacle. The magnitude of this force depends on how close the robot currently is to hitting the object according to the sensor reading.
Blending and Competition (2/3) • If these two behaviors are combined through competition the behavior with the force of largest magnitude will win, such that the robot will switch between the two behaviors according to its sensor readings until it reaches the goal. • If these two behaviors are combined through blending the vectors will be added and this will hopefully combine to move the robot gradually towards the goal while avoiding obstacles. S.C. Kang
Blending and Competition (3/3) S.C. Kang
Problems with Blending and Competition • Both approaches to controlling behavior have some drawbacks. Firstly it may not be easy to describe the behaviors as forces with a direction and magnitude. • A particular drawback of blending is that forces with equal magnitude but opposing direction can cancel each other out. Suppose for instance, there is an obstacle directly in the robot's path to the goal. • Competition does not have this particular drawback; however oscillations between behaviors can occur when using competition if the forces of the behaviors have similar magnitudes. S.C. Kang
Step 1: Start the Program • We will start working on a diagram to drive the robot to a goal point while avoiding obstacles. We will need to track the robot's position as it drives towards the goal and moves away from obstacles. • Consider an orientation/rotation of zero degrees to be the orientation where the front of the robot is pointing along the x-axis.
Step 2 Create CompeteHelper (1/2) • Start a new VPL diagram so we have a clean slate to work with. To make your own Activity in drag an Activity block into the empty main Diagram from the Basic Activities pane.
Step 2 Create CompeteHelper (2/2) • In the Properties pane on the right-hand side, change the name of your activity in both the fields to CompeteHelper. S.C. Kang
Step 3 Edit Start Page (1/2) • By default VPL creates an Activity with a Start page and one Action. Any code you put on the start page will be run the first time some action in the Activity is called. • Double click on the CompeteHelper box to open the activity. By default VPL opens the activity to the Action page. You can select the Start page from the drop down menu at the top. S.C. Kang
Step 3 Edit Start Page (2/2) • In the Start page of your CompeteHelper activity , initialize the variables shown in the following diagram. These are all the variables we will need for tracking the robot's current position. S.C. Kang
Step 4 UpdatePosEvalDone Action (1/2) • We are going to create a number of actions in CompeteHelper. The aim of our first action is to update the robot's current position and evaluate if it has reached the goal. • Click on the icon beside the drop down menu to open the Actions and Notifications dialog again. Rename the action called Action, UpdatePosEvalDone. S.C. Kang
Step 4 UpdatePosEvalDone Action (2/2) • Next add an input variable of type bool. The input will be the trigger for this action, so we will call the bool, Start. Finally add a bool output variable Done since we want to return whether or not the robot has reached the goal. S.C. Kang
Step 5 CalcCurrentPosition Action (1/6) • Add an Activity box to UpdatePosEvalDone and call it CalcCurrentPosition. We need to add the following input variables of type double: XPrev, YPrev, CurrentHeading and DistanceMoved, and output variables of type double: XNew and YNew. S.C. Kang
Step 5 CalcCurrentPosition Action (2/6) • We want to assign each of the input values to a variable. • Assign the value calculated to a variable, until your diagram looks like the one following: S.C. Kang
Step 5 CalcCurrentPosition Action (3/6) • Once all of these assignments have been made, you can use an If block to evaluate which quadrant the Heading is in so you can make your calculation. S.C. Kang
Step 5 CalcCurrentPosition Action (4/6) • To calculate the robot's current position we just need to use simple trigonometry. There is a slightly different case for each of the different quadrants. The following diagram shows an example of the calculation in the second quadrant. The distance h in the diagram corresponds to the input DistanceMoved in our Activity. S.C. Kang
Step 5 CalcCurrentPosition Action (5/6) • For each branch of the If statement, try to write VPL code to calculate XNew and YNew and set these variables. First quadrant Second quadrant Third quadrant Fourth quadrant S.C. Kang
Step 5 CalcCurrentPosition Action (6/6) • To calculate sine and cosine you can use MathFunctions. Note that Sine and Cosine expect their input to be in radians, so you will also need to use the function to convert degrees to radians. S.C. Kang
Step 6 EvalAtGoal Action (1/2) • Back in the UpdatePosEvalDone action, we want this activity to evaluate whether the robot has reached the goal. • Add a new activity to your diagram and call it EvalAtGoal. You will need to add the inputs and the output, similar to the screenshot below. S.C. Kang
Step 6 EvalAtGoal Action (2/2) • Now it is time to write the VPL code for this function. S.C. Kang
Step 7 Finish UpdatePosEvalDone (1/3) • Back to UpdatePosEvalDone action. • Connect the output of the Calculate to the input of CalcCurrentPosition. The Data Connection properties should look like the screenshot below. S.C. Kang
Step 7 Finish UpdatePosEvalDone (2/3) • You need to extract the value with the label XNew and the value with the label YNew, which you can do using Calculate blocks, and assign these values to the state variables XCurr and YCurr. These two control flows should then be joined. S.C. Kang
Step 7 Finish UpdatePosEvalDone (3/3) • Next set OldDistanceTravelled to NewDistanceTravelled and call EvalAtGoal. The input to EvalAtGoal is just the state variables state.XCurr, state.YCurr, state.XGoal, state.YGoal. The output Done of EvalAtGoal should be set to the output, Done, of the action. S.C. Kang
Step 8 Avoid Obstacle Action (1/3) • We will now add a new action to our CompeteHelper activity - an avoid obstacle action. This action should be initiated when the avoid-obstacle behavior "wins" against the go-to-goal behavior. The aim of this action is to cause the robot to drive away from an obstacle. • This action requires no inputs and no outputs. It simply needs to calculate the direction to rotate the robot, so that it is pointing away from the obstacle, and start the robot driving in that direction. S.C. Kang
Step 8 Avoid Obstacle Action (2/3) • To add a new action to the CompeteHelper activity open the Actions and Notifications dialog and on the Actions side of the Actions pane, click the add button. Call your action AvoidObstacle. S.C. Kang
Step 8 Avoid Obstacle Action (3/3) • If the robot is already rotated in some direction however, we need to add maybe 45 degrees to the robot's current rotation and take the result modulo 360 degrees. This new rotation should be set to the variable CurrentRotation and the old value of CurrentRotation should be recorded in the variable OldRotation. S.C. Kang
Step 9 DriveOnDirection Action (1/5) • Now that we have calculated the direction we want to drive on. We will make a new activity to do this. • Add a new Activity box to the diagram and call it DriveOnDirection. We need to give it as input both the new desired rotation of the robot, and the current rotation of the robot. S.C. Kang
Step 9 DriveOnDirection Action (2/5) • Also we need to give a double value, Moved, as output for recording total travelled distance. S.C. Kang
Step 9 DriveOnDirection Action (3/5) • It needs to call RotateDegrees on the LegoNXTDrivev2 passing in DesiredHeading-OldHeading as the Degrees and a number such as 0.5 as the Power. S.C. Kang
Step 9 DriveOnDirection Action (4/5) • It can then simply call DriveDistance and set properties like below since we are trying to move carefully and detect obstacles. S.C. Kang
Step 9 DriveOnDirection Action (5/5) • Output the travelled distance 17.27. (360 degrees; circumference of the wheel) S.C. Kang
Step 10 Finish Avoid Obstacle (1/2) • We can now finish coding the AvoidObstacle action by connecting the existing control flow to our new DriveOnDirection block and connecting its output to the result square. S.C. Kang
Step 10 Finish Avoid Obstacle (2/2) • The Data Connections properties for the input to DriveOnDirection must specify state.CurrentRotation as the DesiredHeading and state.OldRotation as the OldHeading. S.C. Kang
Step 11 GoToGoal Action • The GoToGoal action will be called on to drive the robot when the go-to-goal behavior wins. It is the final action we need in the CompeteHelper activity. GoToGoal requires no inputs or outputs. Add this action in VPL as you did the previous two. S.C. Kang
Step 12 CalculateGoalRotation Action (1/9) • The first thing we need to do is write an activity that will calculate the angle the robot needs to drive on to reach the goal from its current position. We will call this activity CalculateGoalRotation. Add an Activity block to the GoToGoal action, and give it this name. S.C. Kang
Step 12 CalculateGoalRotation Action (2/9) • This activity's action has 4 inputs - the current X,Y positions and the goal X,Y positions and one output - the rotation. Create these inputs output as you have done previously. S.C. Kang
Step 12 CalculateGoalRotation Action (3/9) • We can use basic trigonometry to calculate the desired heading of the robot (measured as a rotation from the x-axis). The following diagram shows an example of the calculation in the second quadrant. S.C. Kang
Step 12 CalculateGoalRotation Action (4/9) • Write the VPL code to compute the theta' from the diagram using the ArcTangent function in MathFunctions and then convert the result to degrees. S.C. Kang
Step 12 CalculateGoalRotation Action (6/9) • We can perform the same calculation for theta' for each quadrant, provided we take the absolute value of the difference in y-coordinates and the difference in x-coordinates. S.C. Kang
Step 12 CalculateGoalRotation Action (7/9) • We then need an If block to determine which quadrant we are working in, so we can calculate theta. We can also use the If block to handle the boundary cases. Add an If to your diagram and a condition for each case. • Connect a Calculate block to each case to calculate the correct value of theta. Finally, merge the outputs of all the calculate blocks and use the value on the output link of the merge to set the Rotation variable in the result. S.C. Kang
Step 12 CalculateGoalRotation Action (9/9) • Overall structure : S.C. Kang
Step 13 Finish GoToGoal • Now that we have made the CalculateGoalRotation activity. Now back to GoToGoal Action. • We simply need to record state.CurrentRotation in the state variable OldRotation, use CalculateGoalRotation to calculate the rotation to drive on, store this as our new CurrentRotation, and then use the DriveOnDirection activity. S.C. Kang
Step 14 Make the Main Diagram (1/6) • You have now finished with writing the CompeteHelper activity. In fact, you have now written enough helper code to go back to the main diagram and put it all together. • First of all, set up the LegoNXTBrickv2. S.C. Kang


![Motion Planning and Control Using RRTs [Selected Slides/Movies]](https://cdn0.slideserve.com/1142311/motion-planning-and-control-using-rrts-selected-slides-movies-dt.jpg)