Download

1 / 18
180 likes | 430 Vues
tftp , nfs , samba 실습. 임베디드 시스템 I. 타켓보드 모니터링 프로그램 설치. 터미널 타겟보드 모니터링 및 제어 프로그램 Linux : minicom , gtkcomm Windows : Teraterm , putty Minicom 설치 Linux : apt-get install minicom 명령어를 이용한 다운로드 Windows : Teraterm , Putty 를 검색하여 다운

E N D
tftp, nfs, samba 실습 임베디드 시스템 I
타켓보드 모니터링 프로그램 설치 • 터미널 • 타겟보드 모니터링 및 제어 프로그램 • Linux : minicom, gtkcomm • Windows : Teraterm, putty • Minicom설치 • Linux : apt-get install minicom명령어를 이용한 다운로드 • Windows : Teraterm, Putty를 검색하여 다운 • 편집기 다운 : apt-get install vim, apt-get install gedit
Host PC가 Windows(Recommanded) Putty Connection Type : Serial Speed : 115200 Serial line : 해당 COM Port TeraTerm Serial Radio Buttun클릭 Port에서 해당 COM Port 선택 OK
Host PC가 Linux ② ① ③
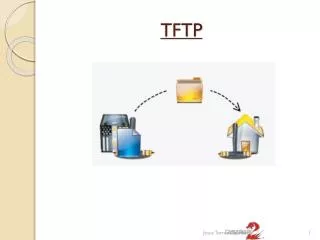
tftp설치 • Root로 로그인 한 후 터미널 실행 • apt-get install tftptftpdxinetd명령 실행 tftp관련 데몬 다운로드
tftp설정 • vi /etc/xinetd.d/tftp실행 • /etc/xinetd.d/tftp에 아래의 내용 입력 tftp설정 파일 수정
tftp설정 • tftp데이터 저장 파일 생성 및 권한 설정 & xinetd재시작 • Tftp서버 데몬 확인 /tftpboot디렉토리 생성 /tftpboot디렉토리 권한 설정 xinetd데몬 재시작
tftp이용한 파일전송 테스트 • Target보드를 부팅 • 매뉴얼 부팅 시 Enter를입력하여 u-boot로 진입 값이 0이 되기 이전에 Enter를 눌러 u-boot 모드로 진입
tftp이용한 파일전송 테스트 • u-boot에서 print명령어를 이용하여 Target보드의 설정 상태 확인 가능 Target 보드 IP Address 게이트웨이IP(맨 뒷자리: 1) Server PC IP
tftp이용한 파일전송 테스트 • Setenv명령어를 이용하여 설정 변경 • serverip : Host PC IP Address • ipaddr : Target Board IP Addres • 변경된 설정은 print명령어를 이용하여 확인 가능 Host(Server) PC IP 확인
tftp이용한 파일전송 테스트 • Print명령을 통한 설정 결과 확인 • ping test : server IP연결이 잘되었는지 확인
tftp이용한 파일전송 테스트 • tftp를 통한 Host PC에서 Target Board로의 파일 전송 • Host PC의 tftp저장 폴더에 파일 생성 • Target board의 u-boot에서 아래의 명령 실행 Targer보드의 c0008000 Ram Addresss로 test 파일 다운로드
NFS 설정 • NFS(Network File System) • Network를 통해 파일 공유 가능 • NFS 설정 • 터미널에 apt-get install nfs-kernel-server 명령 실행을 통한 다운로드 • 터미널에 vi /etc/exports 실행 후 아래의 내용 입력 • /etc/init.d/nfs-kernel-server restart 명령 실행
NFS 동작 확인 • Target Board 부팅 후 root 로그인 후 IP 설정 • Host PC쪽 NFS 저장 폴더 접속 • NFS가 잘 되지 않을 시 : tftp활용 • tftp –t [다운로드 받을 filename] [서버IP] –g -------- ex) tftp –r test 192.168.0.47 -g Target 보드 IP 설정 Server(Host)PC 와의 연결 확인 192.168.0.47 : Host IP /nfsroot : Host nfs디렉토리 /tmp: target보드 공유 디렉토리 Host PC의 /nfsroot디렉토리의 파일리스트 출력
SAMBA 설정 • SAMBA • Windows에서 Linux 파일에 접근하기 위함 • SAMBA 설정 • apt-get install samba smbfs명령 실행 • 아래의 명령 실행으로 로그인 User 비밀번호 설정 • smbpasswd –a [User id] • vi /etc/samba/smb.conf실행 후 추가 Samba user ID 등록 user password 입력
SAMBA 설정 • SAMBA 설정 적용 • Windows에서 Ubuntu 파일 접근 smbd데몬 재시작
SAMBA 설정 • Ubuntu 파일 리스트