1 / 0

Flash Video

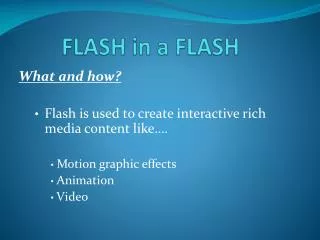
Flash Video. Dawn Pedersen American River College. Introduction. This will be a brief overview of using video in Flash. We will cover the following topics today: Streaming Video: an Analogy Video Formats Using the Adobe Media Encoder Playing an FLV in Flash CS4. Introduction.

daria
Télécharger la présentation

Flash Video

An Image/Link below is provided (as is) to download presentation Download Policy: Content on the Website is provided to you AS IS for your information and personal use and may not be sold / licensed / shared on other websites without getting consent from its author. Content is provided to you AS IS for your information and personal use only. Download presentation by click this link. While downloading, if for some reason you are not able to download a presentation, the publisher may have deleted the file from their server. During download, if you can't get a presentation, the file might be deleted by the publisher.

E N D

Presentation Transcript


  1. Flash Video

    Dawn PedersenAmerican River College
  2. Introduction This will be a brief overview of using video in Flash. We will cover the following topics today: Streaming Video: an Analogy Video Formats Using the Adobe Media Encoder Playing an FLV in Flash CS4
  3. Introduction We will not cover the following topics; I encourage you to research these on your own: Using FLVPlayback Manually Playing Video Using ActionScript Adding Captions Using Alpha Channel Video Going Full Screen Embedding Video into an SWF Adding Cue Points
  4. Introduction Prepare for the upcoming tutorial by downloading Rabbit.zip from here—it’s 63MB, so start now (the file refuses to upload to bookofcels.com): http://blulob.com/arc/Rabbit.zip Unzip/Extract Rabbit.mov from the Rabbit.zip file.
  5. Streaming Video: an Analogy Think of Hoover Dam. It controls the powerful Colorado River. When the dam was completed, the water behind it backed up to form Lake Mead.
  6. Streaming Video: an Analogy Now the water flows along the Colorado River into Lake Mead. The dam releasesthat water, in a controlled manner,back into the Colorado River.
  7. Streaming Video: an Analogy That means that if the water rushes to the dam ad overwhelms it, or the dam operator releases too much water, the people downstreamfrom the dam arein for a really badday.
  8. Streaming Video: an Analogy Streaming video is like that water flow to the Hoover Dam and beyond. The data in the FLV file is sent, at a data rate established when the video was encoded, from the server to the Flash Player.
  9. Streaming Video: an Analogy The video is then held in a buffer and released, in a controlled manner, by Flash Player to the browser. If the flow is too fast—the data rate is too high for the connection—the browser is overwhelmed. The result is video that jerkily stops and starts.
  10. Streaming Video: an Analogy This is due to the buffer constantly emptying and having to be refilled. Your job is similar to that of the crew that manages the flow of water from the buffer behind the Hoover Dam back into the Colorado River.
  11. Video Formats The first step in the process of creating the FLV file that will be used in the Flash movie is to convert an existing video to the FLV format. You will be working with digital videos that may include the following formats: AVI (Audio Video Interleave) – a Windows format DV – the format used when video moves directly from a video camera to the computer MPG/MPEG (Moving Pictures Expert Group) MOV – the QuickTime format from Apple
  12. Video Formats These are the three output formats available to you: FLV – the common format found on the web, playable on Flash Player 6 and higher. F4V – developed to manage HD files for use in Flash Player 9.0.115.0 or higher H.264 – a common format better known as MPEG-4 or MP4
  13. Encoding an FLV The first step in the conversion process does not involve Flash. Open the video in the player of your choice and watch the video twice. The first time, just enjoy the video. The second time, ask yourself the following: Is there a lot of movement in this video? Is the audio of major importance? Is there a lot of color in the video? Is the video in focus, or are there areas where the image becomes pixelated?
  14. Encoding an FLV The answers to these questions will determine your approach to encoding the video. Open and watch Rabbit.mov twice now. It’s a little over 4 minutes long. In class, I’ll play it on the big screen for everyone at once. Yes, the file is huge—over 70MB. When creating Flash video, you need every bit of information contained in the video when you do the conversion.
  15. Using the Adobe Media Encoder To encode video, you use the Adobe Media Encoder (rather than Flash.) Open the Adobe Media Encoder, found here: PC: Start Menu > All Programs > Adobe Design Premium CS4* > Adobe Media Encoder CS4 Mac: Hard Drive\Applications\Adobe Media Encoder CS4 *The exact title here will depend on what version of CS4 was installed.
  16. Using the Adobe Media Encoder Open Rabbit.mov in Adobe Media Encoder: File > Add Navigate to Rabbit.mov Click on Open Leave the Format dropdown set to FLV/F4V. Click the Preset dropdown arrow and select Edit Export Settings… at the bottom of the list.
  17. Using the Adobe Media Encoder In the Export Settings window, you will see a preview area on the left and a settings on the right. If you are in Simple Mode, you will see a circle button with two arrows pointing down. Click it to jump to Advanced Mode for this exercise—the two arrows point up.
  18. Using the Adobe Media Encoder Below the preview area is a timeline. You can scrub across the timeline here and set IN and OUT points. You can also set cue points, which we will not cover today.
  19. Using the Adobe Media Encoder Click on the Video tab on the right. Codec: also mentioned in the audio lecture, the Codec reduces the data rate while maintaining image quality. Set this to On2 VP6. Encode Alpha Channel: for use only if the video contains an alpha channel (for example for use with a green screen). Deselect it for our video. Resize Video: videos should be resized in video software such as Adobe Premier, not here. Deselect it.
  20. Using the Adobe Media Encoder Frame Rate: means frames per second. A good rule of thumb is to choose a rate that is half that of the original file. For our example, set Frame Rate to 15. Bitrate Encoding: CBR (constant bitrate) is for streaming video services such as Flash Media Server 3. VBR (variable bitrate) is for regular web servers using the HTTP protocol. Select VBR.
  21. Using the Adobe Media Encoder Encoding Passes: One pass is for videos with few bitrate changes. The video analysis and encoding are done at the same time. Two passes is for videos with numerous bitrate changes. For example, at one point a narrator may stay put, but the next scene has race cars roaring by. In the first pass, the encoder analyzes the video for major changes. In the second pass it encodes the video to accommodate those changes. Select Two.
  22. Using the Adobe Media Encoder Bitrate [kpbs]: The slider sets the bitrate for the video portion of the encoding. This is where your job is like the Hoover Dam operator: If you set this too high, the residents downstream will have a bad day. You cannot supersize the quality—you will end up with the same quality as the original and a much larger file. The data rate for an FLV is the sum of the audio and video data rates. For novices, a good target is 350 kbps. Set the video bitrate to 300 kbps.
  23. Using the Adobe Media Encoder Set Key Frame Distance: this is in the Advanced are for a reason. Leave this unselected until you master video compression. Key Frame Interval: will appear only if Set Key Frame Distance is selected. This will depend on how much action is going on. Video of paint drying would work with one keyframe for every 300 frames. Video of a race car in motion would work with one keyframe for every 30 frames.
  24. Using the Adobe Media Encoder Click on the Audio tab to change audio settings. You need to make two decisions here: Stereo or mono? What will the data rate be? Stereo or Mono: unless you are encoding your band’s video, stick with mono. Also, if you are starting with mono, you cannot improve sound quality by selecting stereo—it will only increase file size. Select Mono.
  25. Using the Adobe Media Encoder Bitrate Settings: for Bitrate [kbps], you should generally choose 48 or 64. Anything higher only serves to increase demand on the bandwidth. Anything lower results in an increasing degradation of audio quality. Still, 32 will work if the soundtrack is nothing more than a voice-over. 16 is ideal if the soundtrack is composed of intermittent sounds like frogs. Set the Bitrate to 64 for our video.
  26. Using the Adobe Media Encoder Click OK to return to the render queue. Click the Start Queue button to stat the render process. You will see the progress bar move across the screen as the video is being rendered. When the encoding is complete, a green check mark will appear in the Status area. When you see the green check mark, close the Adobe Media Encoder and check out the file size of the resulting FLV file.
  27. Playing an FLV in Flash There are three ways to set the video to play in Flash: Let the wizard do it for you Use the FLVPlayback component Use a video object (requires ActionScript but most versatile) We’re going to use the wizard.
  28. Playing an FLV in Flash Create a new Flash document. File > Import > Import Video (this will open the Import Video wizard) Tell the wizard where your FLV file is located: click Browse and navigate to Rabbit.flv Click Next to move to the Skinning page. Click the Skin dropdown menu to see the available choices. Click a skin style and preview the skin.
  29. Playing an FLV in Flash A skin is a techie word for video controls. You are presented with two major skin groupings: Over – will overlay the controls directly on top of the video, which means you may want to configure the skin to automatically hide until the user moves the mouse cursor over the video. Under – place the controls below the video. Select SkinUnderAllNoCaption.swf. Click the color chip to open the color picker, choose a color, and the skin will change to that color.
  30. Playing an FLV in Flash Click the Continue (Next) button to move to the Finish Video Import page. Review your settings. Click the Finish button. You will see a progress bar as the video is added to the Flash stage. Click the video on the stage. In the Properties panel, set its x and y coordinates to 0.
  31. Playing an FLV in Flash Save the Flash movie as Rabbit.fla in the same folder/location as the FLV file. The playback component needs this path to ensure playback of the video. Modify > Document Click the Contents radio button to shrink the stage size to fit the video, and click OK. Click the video on the stage and press the right or left arrow key a few times. Oops! The controls are hanging off the stage.
  32. Playing an FLV in Flash Return the video to x=0. Change the stage dimensions to accommodate the controls (Modify > Document): 320 x 285. Save the movie and test it (Control > Test Movie).
  33. A Last Word About Files You should find that all of these files ended up in the same folder/location on your computer: Rabbit.fla Rabbit.flv Rabbit.mov Rabbit.swf Rabbit.zip SkinUnderAllNoCaption.swf
  34. A Last Word About Files If you were to upload the movie to the web for playback, it is imperative that you keep all of these files within the same folder on the server: Rabbit.flv (the actual encoded FLV movie) Rabbit.swf (the SWF Flash Player file) SkinUnderAllNoCaption.swf (the SWF skin with video controls) These files need not be uploaded at all: Rabbit.fla (your source Flash file) Rabbit.mov (the original high-resolution video) Rabbit.zip (the compressed file you downloaded)
More Related