Download

1 / 35
460 likes | 654 Vues
The Microscope. Mr. Gacc/Bakka BHS. Visit www.worldofteaching.com for more free powerpoints. The History. Many people experimented with making microscopes Was the microscope originally made by accident? (Most people were creating telescopes) The first microscope was 6 feet long!!!

E N D
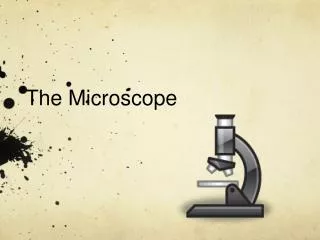
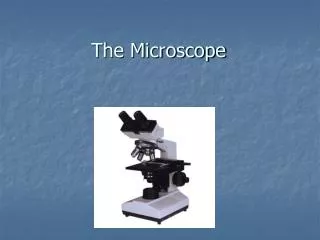
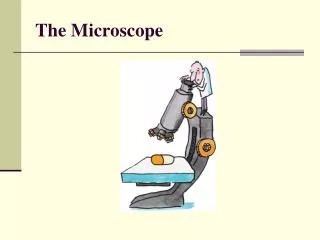
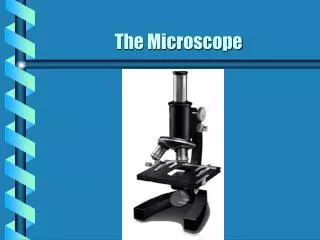
The Microscope Mr. Gacc/Bakka BHS Visit www.worldofteaching.com for more free powerpoints
The History • Many people experimented with making microscopes • Was the microscope originally made by accident? (Most people were creating telescopes) • The first microscope was 6 feet long!!! • The Greeks & Romans used “lenses” to magnify objects over 1000 years ago.
The HistoryHans and Zacharias Janssen of Holland in the 1590’s created the “first” compound microscope Zacharias Jansen 1588-1631 The “First” Microscope
The History • Robert Hooke & • Anton van Leeuwenhoek made improvements by working on the lenses Robert Hooke 1635-1703 Hooke Microscope Anton van Leeuwenhoek 1632-1723
History • In 1665 Robert Hooke examined a thin slice of cork with a single magnifying lens and observed tiny compartments • He gave them the latin name cellulae, meaning small rooms - hence the origin of the term cell. • He later observed cells in plant tissues and observed the cells were “fill’d with juices”
History • In the early 1700’s Leeuwenhoek looked at pond water and called the microscopic organisms “animalcules” • These were the first observations of living cells • 1820 - Robert Brown observed a nucleus in orchid cells
History In 1838, Matthius Schleiden stated all plants are made of cells Theodor Schwann stated all animals are made of cells .
Cell Theory - 3 parts 1. Cells are the basic unit of life In 1855, Rudolf Virchow further extended the cell theory and added: • All organisms are composed of one or more cells 3. All cells come from pre-existing cells
How a Microscope Works Convex Lenses are curved glass used to make microscopes (and glasses etc.) Convex Lenses bend light and focus it in one spot.
How a Microscope Works Ocular Lens (Magnifies Image) Objective Lens (Gathers light, magnifies and focuses image inside body tube) Body Tube (Image Focuses) • Bending Light: The objective (bottom) convex lens magnifies and focuses (bends) the image inside the body tube and the ocular convex (top) lens of a microscope magnifies it (again).
Body Tube • 1. The body tube holds the objective lenses and the ocular lens at the proper distance Diagram
Nose Piece • 2. The Revolving Nose Piece holds the objective lenses and can be turned to increase the magnification Diagram
Ocular Lens or Eye lens • 3. Magnifies the specimen image 10x Diagram
Objective Lenses • 4. The Objective Lenses increase magnification from 4x to 10x to 40x. Diagram
Stage Clips • 5. These 2 clips hold the slide/specimen in place on the stage. Diagram
Diaphragm • 6. The Diaphragm controls the amount of light on the slide/specimen Turn to let more light in or to make dimmer. Diagram
Light Source • 7. Projects light upwards through the diaphragm, the specimen and the lenses • Some have lights, others have mirrors where you must move the mirror to reflect light Diagram
Arm • 8. Used to support the microscope when carried. Holds the body tube, revolving nose piece and objective lenses. Diagram
Stage • 9. Supports the slide/specimen Diagram
Coarse Adjustment Knob • 10. Moves the stage up and down (quickly) for focusing your image. • Never use coarse adjustment under high power!!!!! Diagram
Fine Adjustment Knob • 11. This knob moves the stage SLIGHTLY to sharpen the image. Diagram
Base • 12. Supports the microscope Diagram
Magnification • To determine your magnification…you just multiply the ocular or eye lens by the objective lens • Ocular 10x Objective 40x:10 x 40 = 400 So the object is 400 times “larger” Objective Lens have their magnification written on them. Ocular lenses usually magnifies by 10x
Hand lens - 5x • Stereo microscope - 10 - 60x & 3d image
Tunneling - cell parts/organells 2 types of electron microscopes Scanning - 3D image of RBCs & insects
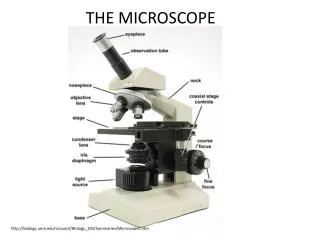
Ocular Lens or eye lens Body Tube Nose Piece Arm Objective Lenses Stage Stage Clips Coarse Adjustment. Diaphragm Fine Adjustment Light Source Base Skip to Magnification Section
Using a Microscope • Start on the lowest magnification • Don’t use the coarse adjustment knob on high magnification…you’ll break the slide!!! • Place slide on stage and lock clips • Adjust light source (if it’s a mirror…don’t stand in front of it!) • Use fine adjustment to focus • Use diaghram for light intensity
Caring for a Microscope • Clean only with a soft cloth/tissue • Make sure it’s on a flat surface • Don’t bang it • Carry it with 2 HANDS…one on the arm and the other on the base
References • http://www.cerebromente.org.br/n17/history/neurons1_i.htm • Google Images • http://science.howstuffworks.com/light-microscope1.htm