Download
1 / 53
530 likes | 535 Vues
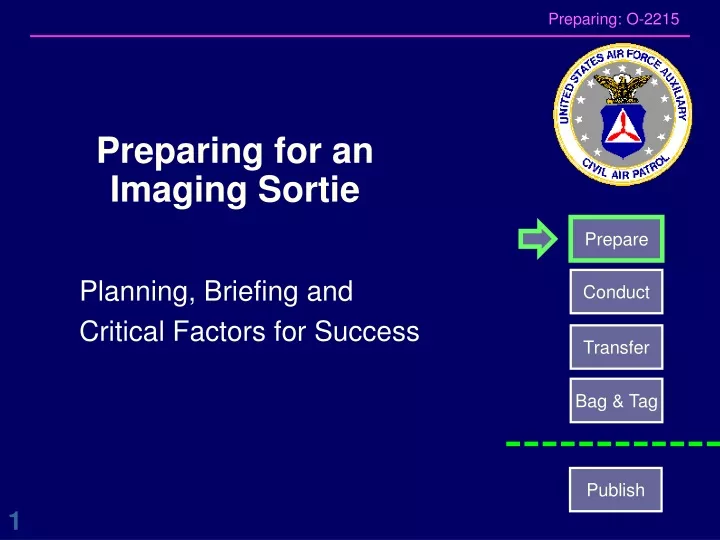
Preparing for an Imaging Sortie. Prepare. Conduct. Planning, Briefing and Critical Factors for Success. Transfer. Bag & Tag. Publish. Agenda. Determine Customer Requirements and Expectations Mission Staff Briefing Sortie Planning Planning Considerations Potential Imaging Patterns

E N D
Preparing for an Imaging Sortie Prepare Conduct Planning, Briefing and Critical Factors for Success Transfer Bag & Tag Publish
Agenda • Determine Customer Requirements and Expectations • Mission Staff Briefing • Sortie Planning • Planning Considerations • Potential Imaging Patterns • Imaging Sortie Techniques • Critical Factors for Success
Preparation • The key to a successful imaging mission is preparation, planning, patience and practice! • Use consistent processes for repeatable results • Do your homework before you fly • Train like you fly, fly like you train
Briefing – Customer Requirements (1) • Know the customer requirements on your imaging content and deliverables • Get it right the first time • Meet/exceed customer expectations • Saves time & cost
Briefing – Customer Requirements (2) • If customer requirements aren’t specified: • The mission briefer (or aircrew) must ask enough questions to ensure the customer gets what they really want • If no further info is available: • Develop potential scenarios on deliverables by applying your experience and “Best Practices” • Obtain consensus on mission requirements within your team
Briefing – Customer Requirements (3) Examples of information you need: • What and where is the target? • Get the exact location of the target(s). • Get a good verbal description of the target • How should the target and surrounding features be imaged? • Single target images or area/timed images for mosaic • Single feature of interest or collection of features • Close ups, wide perspectives • Areas to include, surrounding features, infrastructure, etc. • Altitude and/or lookdown angle requirements
Briefing – Customer Requirements (4) • Does the customer care about lighting conditions over the target area? • The customer may not want photos taken under a heavy overcast, or in early morning or late afternoon light • What information do they want to accompany the images?, e.g.: • Altitude (MSL or AGL, or both) • Latitude and Longitude • Time (local or Zulu) • Distance from target (nautical or statue miles) • Direction to target (e.g., looking South) • Angle to target (e.g., 45°)
Briefing – Customer Requirements (5) • What image format ( JPG, TIF, Raw) & quality (Hi, Med, Low) do they want? • This also helps you determine how large (or how many) media cards you will need for the sortie • Do they mind if you crop images, if needed? • E.g. cropping out unwanted features – wheel, etc. • Do they mind if you adjust the image, if needed? • E.g. adjusting the image brightness, contrast, due to poor lighting conditions, etc. Getting the requirements right helps prevent you having to re-fly
Briefing – Customer Requirements (6) • Do they want you to add text or symbols to the photos with some of the above info? • Is CAP branding (e.g. CAP Shield) OK? • How do they want you to name the image files? • E.g. subject, time, sequence number, etc.? • How do they want you to send the photos? If Email? • May affect photo format & quality (file sizes) • Addressing, Subject and remarks, CC/BCC, etc.? • Call after sending? • Any anti-spam issues?
Mission Staff Briefing • For complex missions, the mission staff may use a target control list to put together the briefing packages for the aircrews • The staff should also be careful not to pair an inexperienced pilot with an inexperienced photographer • In addition to the briefing items specific to the imaging mission, briefing information should include: • Terrain, obstacles and ground cover around the target (s) • Weather (local and target area) • Time format (local or Zulu)
Use of Target Cards • For complex missions and multiple targets, target cards may be used to identify target names in a sequence of photos, etc. • 3x5 index cards (or similar) with the common name of each target • Written with sharpie or magic marker to make them more legible. • May contain coordinates, mission/sortie numbers, etc. • The AP will photograph the applicable card just before taking photos of each target
Planning Considerations (1) • Teamwork during the planning and execution • Planning the type of pattern(s) to be flown based on requirements, terrain and weather • Target sketches may be required for briefing • Capture all the data, e.g., lat/long of all entry and turning points • Reviewing the communications between the pilot and AP • Plan for an ID Pass (e.g. 10 mins) to assess the target/weather situation and make any planning adjustments • Decide the best altitudes, angles and directions • Determine any mission impacts like fuel stops, etc. • Plan for plenty of time to obtain photos • Allow time for extra photo passes and aircraft repositioning Maintain Flexibility to Adapt to Unplanned Conditions
Planning Considerations (2) • Crew Roles • The AP is normally the Mission Commander when in vicinity of the target • MP retains responsibility for the safety of the flight as Aircraft Commander • The MO assists in keeping a photo log, monitoring the scene, maintaining situational awareness and communications with ground assets, etc.
Google Earth • An excellent tool to use for pre-flight briefing and post flight photo processing preparation • Pre-flight: Using satellite imagery, inspect target area, terrain features & plan photo patterns, etc. • Post-flight: confirm/refine target location and image direction • Import graphics (e.g. search grids, waypoints, etc.) via KML files • Import photos w/GPS location • Import & overlay flight tracks from GPS and/or G1000 SD data card • Export or email graphics, map images and geotagged photos • Can also overlay other maps such as VFR sectionals, USGS Topo, etc.
Imaging Flight Pattern Types • Four Square • Standard most stable pattern for most missions • Birds Eye (Overview) • Shows details between structures or a long series of vertical photos along roads, etc. • Circling • Good for quick shots of multiple targets or wide areas of damage for future mission planning purposes, etc. • 45° Angle to Target • Used for fixed angle photos & based on customer requests
Pattern Execution Considerations • Every imaging pattern starts with an “ID Pass” • Verify the target and note its coordinates (MO) • Determine best aircraft positioning & altitude for proper framing • Additional planning passes may be required • Generally, an overview photo is required to provide the customer “context” of the target and its location relative to surrounding landmarks, etc. • Wide angle shot to show sufficient landmarks, ingress routes, etc. • May have to reposition aircraft for optimum view • Aircraft Maneuvering • The approach to the imaging pattern / photo run should be stable & allow enough time to analyze approach for best framing results • Fly slowly enough for multiple photos • Before leaving, capture any final photos, notes or sketches to aid in debriefing
Circling Imaging Flight Pattern ID Pass ½ NM Alt > 1k ft AGL
Circling to Look for Best Shot(Intersection of two high-voltage electrical lines)
4-Square Imaging Flight Pattern Flying technique for repeatable results on each leg (adjusting for wind): • Overfly target to record position • Fly pattern @ 90kts & use true HDG if possible • Select a cardinal direction & fly first leg • When abeam to pilot’s shoulder, start 35 sec counter • At 35 secs, begin right 270° standard turn for next leg & repeat 1,000 ft Offset Example
4-Square Imaging Pattern • Four perspectives on same target, 90° apart • Usually at cardinal directions to help photo interpretation
Bird’s Eye Imaging Flight Pattern • Circle target to find best altitude & direction for photo • Can use 10° bank and opposite rudder to increase available lookdown angle Alt > 1k ft AGL
45° Angle to Target Flight Pattern(or any fixed angle as required) 45 Lookdown Angle SR 2k ft 45 2k ft
Flexibility & Improvisation (1) • Unique Missions may require flexibility & improvisation • Aircrew needs to adapt basic patterns to fit mission requirements or environmental conditions • Examples: • Massive storm damage, e.g. hurricanes, tornados, heavy snowfall, flooding etc. • Natural disasters, e.g. fire, oil spills, etc.
Flexibility & Improvisation (2) • These may be complex missions • Multiple crews and sorties to image same event on same day/successive days using the same equipment & aircraft • Photo capturing, logging and processing requirements very formalized & systematic • Potentially 100,000+ images collected in a mosaic for a single event, e,g, Hurricane Sandy, Gulf Oil spill, etc. • Processing tasks may be done by dedicated resources other than the aircrew – requires precise photo logging • These may be single customer, survey missions • Pima County watershed / flood plane analysis • Specific photo requirements on track, sequencing, overlaps, delivery format, etc.
Flexibility & Improvisation (3) • Can use special equipment & combinations of photo & visual search pattern techniques • Mosaic requirements Window Camera Mount Timer, part of ADIS Kit http://www.capvolunteernow.com/todays-features/?necessity_prompts_invention_by_ohio_wing_aerial_photographer&show=news&newsID=16893#
Imaging Sortie Techniques (1) • The first pass by the target is very important to confirm: • You are at the correct altitude (angle) for best results • You are looking in the right direction for best results • You are at the correct distance from the target • You are flying at the correct speed • The GPS is locked on and tracking (if applicable) • If any of these conditions aren’t met: • Have the pilot turn around • Correct the problem • Redo the first pass 20- 45 1,000 ft AGL Camera Position << Spacing >> Target Position 1/2nm = 20 1/6nm = 45
Imaging Sortie Techniques (2) • For a target shot, the MP must be as close as possible to the target while still allowing the AP to properly frame the target: • At 1kt AGL, typically offset by 1kft to 3kft horizontally (20° to 45° lookdown angle), zoom <135mm • If at 3kft offset you are too close to the target, gain altitude rather than moving away horizontally • The MP must always strive to keep the AP in the proper position for a shot on successive passes • Small adjustments (maybe not obvious to the pilot) must often be made to get the right angle or position • Lifting the wing, moving the strut out of the frame or making minor course (heading) changes are the most common adjustments
Imaging Sortie Techniques (3) • The AP must know how to direct the pilot: • Keep the directions clear and simple, e.g.: • Finding the target: “Target at 10 o’clock” • Final alignment on a pass: “Lift your wing” or “Move the strut forward” or “Left 10°” • The pilot also needs positive feedback, especially if you are shooting out of the right-side windows. • Use simple words such as “Good, good” to let the pilot know they’re on the right track and speed • Finally, tell the pilot when you are done taking photos on that pass • By saying something like “OK, I have the shots” Be Directive - Then Descriptive
Imaging Sortie Techniques (4) • Notes: • Sometimes wind direction/speed forces the pilot to tilt the wings or crab so much (in order to maintain the planned flight path) that the photographer can’t properly frame all of the photos as planned • In this case, try taking the photos from another direction (e.g., from the northwest rather from the north) or note the difficulty and discuss it during debriefing
Imaging Sortie Techniques (5) • The AP must decide whether the pictures satisfy all mission requirements • Don’t be afraid to admit that you didn’t get a particular shot, and ask the MP to reposition for another try. • Never hesitate to make another pass or to reposition the aircraft to ensure a good photo • Don’t let any other crewmember rush you. • Remember, you should take as many photos as you think you need to fulfill mission requirements • Extra photos are better than extra flights
Factors Affecting Success (1) • Artificial Deadline or Impatience • If you don’t plan sufficient time for all phases of your sortie • Hurried shots and risk returning to base without good photos • If you get impatient during any phase of your sortie, you almost guarantee • That all your photos won’t be quality photos • Or that some photos will be missed • Returning without quality photos of all your targets is a waste of time and effort • Another crew will have to be sent out to complete your sortie.
Factors Affecting Success (2) • Vibration comes from the airplane, its engine and air turbulence • To reduce the effects of vibration: • Hold your camera properly • Don't rest any part of the camera or your body against the airframe • Keep your arms and elbows from coming in contact with the window sill or armrest • Ideally, the only part of the airframe that will be in contact with your body is the seat cushion
Factors Affecting Success (3) • Haze and fog are the most likely limits to visibility you have to deal with • Ways to deal with haze and fog are: • During the ID Pass, see if there is a difference between looking straight down at the target and looking at a lower lookdown angle • With haze, higher lookdown angles to the target may be better. With fog, the reverse may be true… • For the best shot, put the sun behind the camera (i.e. behind the photographer’s head) • May try adjusting White Balance to compensate • Be sure to reset to Auto when finished • If possible, wait for the best visibility instead of shooting through thick haze or other obscuring conditions
Factors Affecting Success (4) • Focus.Your distance from the ground (altitude) stays roughly the same • When using Autofocus (AF), try using the “A” position. Alternates: • “S” - This focuses each shot before the shutter will release, even if you change the zoom setting • “C” – This continuously focus the lens, no interlock with shutter release – focus may change from shot to shot • If you must use Manual focus (e.g. camera won’t auto focus), set the lens at the “Infinity” stop • Unless you're using a lens longer than 200 mm or are at less than 1,000' AGL • Most AF lenses can focus past infinity and have to be focused with the AF system
Factors Affecting Success (5) • The wind will knock your camera around if you let a telephoto lens extend even a little bit out the window • You have to make a conscious effort to lean back away from the window to keep your lens inside
Inventory the Equipment Before Departure (1) • Perform an inventory to make sure you have everything you need to accomplish the mission: • Camera/GPS batteries charged (including spares) • Spare battery terminals must be protected to prevent shorting & fire • Memory cards with sufficient capacity (including spares) • Filters; a UV filter should be installed to protect the lens • Working condition of the camera and lens cap straps • Photo/Recon Log, Target Cards, Recon Sketch Sheet, and Image Pattern Planning sheets (along with a good clipboard) • Cleaning supplies • Seat cushion (to improve your position when shooting through the rear left window photo window) • If necessary, something to use as a “portable darkroom” for reviewing images on the LCD screen (e.g. cloth to cover your head & camera or cardboard to shade the light)
Inventory the Equipment Before Departure (2) • Adjust Camera: • Turn on the camera and check status. • Look for a full battery charge, sufficient space on the media card, and other settings as listed below • Follow the checklist to set up the camera • Set the exposure mode, usually Auto/No-Flash • Know your shooting mode (Single or Burst) • Ensure image type, quality & resolution are set to meet mission requirements • Example checklists in backup material • Take a sample picture to ensure correct camera/GPS operation
Inventory the Equipment Before Departure (3) • Adjust GPS Settings – D90 & D7100: • Connect the GPS unit to the camera and ensure it locks onto the satellites. • Check Camera & GPS set to current time (Zulu recommended) • Can use the Nikon Photo Transfer program to sync the camera to the PC (if PC is also on Zulu time) • Check GPS time zone setting and set time zone accordingly • Take & check a test photo to ensure everything works
Inventory the Equipment Before Departure (4) • Adjust GPS Settings (D200): • Connect the portable GPS unit to the camera and ensure it locks onto the satellites. • Synchronize your camera’s time to that of the GPS (suggest Zulu time). • Ensure the GPS is in the “tracking” mode.
Prepare the Aircraft • If you know a lookdown angle that works best for you, consider putting a piece of tape on the strut so the pilot can use it to help line up the airplane for photo passes (work together to properly locate the tape) • Clean the aircraft windows before you leave • Make sure you have cleaning supplies on board, particularly for multiple sorties • Note: For complex missions, a shot of the aircraft ‘N’ number with the camera provides a good “starting image” • Particularly if there are images on your media card from a previous sortie. • Can also take a photo of your sortie card (the one with mission & sortie numbers). • Final check that all the imaging equipment is loaded • Arrange your equipment for easy access & safely stowed
Eye-Fi SD Card • Eye-Fi SD card (or equivalent, ~$20-$80) creates a WiFi hotspot that will download copies of photos real time to your PED (Free iOS or Android app required) • Enables immediate review of photos on larger PED screen to ensure optimal capture of objective (framing, focus, exposure, etc.) • Also can be used to zoom in on objective for real time target analysis by the crew • Quality SD/CF card adapters may work for CF card slots on D200 w/correct camera settings? – not tested… Photos saved into Camera Roll Open & zoom in for details
Look Down Angle 20 30 45 Camera View – 18mm Note: Wheel perspective Side View - 45 isn’t easy! Camera View – 125mm
Look Down Angle – Ground Practice • If your airplane parks at the same location everyday, you can mark the lookdown angle targets on the ground for crew training / familiarization. • Alternatively, for temporary parking, you can fashion some blocks of wood cut at the appropriate angles for a sight gage Camera window center @ 4’ 8” 20° Wood Block = Look down angle 45° 30° 20° = Horizontal distance from window 4’ 8” 8’ 12’ 10”
D90/D7100 - Key Controls Summary Shooting Display Screens Playback Button: • Press MSC up/down for Shooting Display screens • Press MSC L/R to cycle thru photos (GPS data displayed if recorded) Menu Button • Use MSC & OK Button to navigate thru screens and select settings Multi-Selector (MSC) Control • Up/Down • Left/Right OK Button • Selects a menu item or setting Shooting Menu Screen More info on SQ website, or: CAP D90 Op Manual: http://www.capmembers.com/emergency_services/operations_support/advanced-technologies/ Nikon D90 Op Manual https://support.nikonusa.com/app/answers/detail/a_id/16087
Camera Switch Settings Power On Shutter Release Mode Sw: Auto/No Flash Lens AF: AF Optical Stab.: On Camera AF: AF Camera display should look something like this when set up correctly
Shooting Menu Settings Single Frame (One release/press) AF-Auto (Focused before release) Camera time set to ZULU TIME! ISO: 800 Image Size: Large Image Quality: Normal Focus Area Selector Lock: L Press Info for display Use Shooting Menu to Reset to Above Settings If Necessary