Download
1 / 48
480 likes | 847 Vues
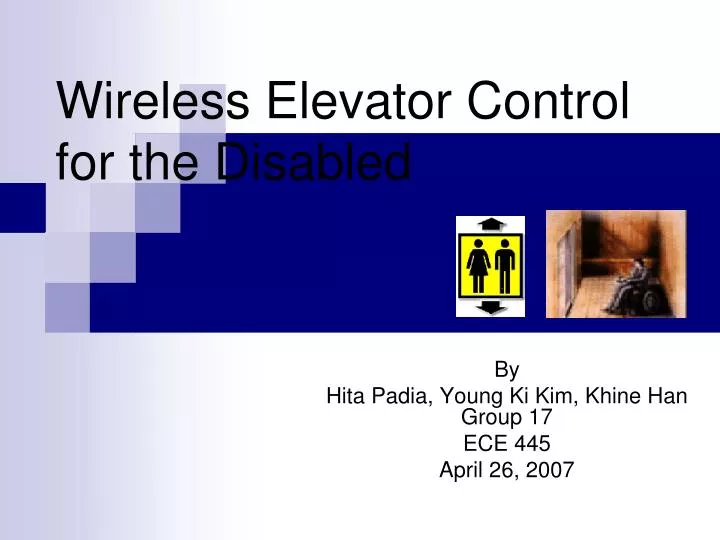
Wireless Elevator Control for the Disabled. By Hita Padia, Young Ki Kim, Khine Han Group 17 ECE 445 April 26, 2007. Introduction. To help disabled people who have difficulties in reaching the elevator control buttons to call or select floors.

E N D
Wireless Elevator Control for the Disabled By Hita Padia, Young Ki Kim, Khine Han Group 17 ECE 445 April 26, 2007
Introduction • To help disabled people who have difficulties in reaching the elevator control buttons to call or select floors. • Uses RF communications instead of IR detection
Features • Calling elevator within a range of 20ft. • LCD screen to display floor selections. • ‘Door Open’, ‘Send’ buttons and joystick on the control box for desired floor selections. • Detachable control box on wheelchair. • Expandable design (currently 4-floor prototype)
System overview • Hardware: -LINX HP3 Series Transmitter and Receiver -916 MHz Whip and Microchip antennas -2 x 8 character LCD -Joystick and Push Buttons -PIC microcontrollers (16F877A) - Power Supplies: 9V batteries and AC to DC Adapter - Reed Relays • Software: - Programming PICs in C
Hardware overview- TX module - PIC16F877A Microcontroller - Transmitter (Linx TXM-900-HP3-PPS) - Chip Antenna (ANT-916-SP) - 2X8 LCD for displaying floor numbers or characters - Joystick for selecting floors - Two push buttons for door-open and select/send operations - 9V batteries
TXM Circuit: Microcontroller • PIC16F877A (SMD type) - Receive signals from joystick and push buttons - Determine and send corresponding data bits to the LCD screen - Also determine when and which bytes should be sent to the receiver - Sleep mode unless interrupt signals are received from the inputs
TXM Circuit: Transmitter • Transmitter (Linx TXM-900-HP3-PPS) - 915.37 MHz operation selected by DIP-switch on board (CS2, CS1, CS0 = 1,0,1) - Send the data received from PIC to the RXM
TXM Circuit: Chip Antenna • Chip Antenna - Send signals at 916MHz - resistant to proximity effects with good isotropic radiation patterns
TXM Circuit: User Interface • 2X8 LCD Screen - Interfaced with PIC - Displays starting floor in first row and destination floor in second row - Displays “Door Open” if the door open button is pressed
TXM Circuit: Joystick • Joystick (4-way Microswitch) - Scroll through the LCD screen - Select both the starting and destination floors - Movements interfaced with PIC to control the floor numbers display on the LCD screen - Association with screen scrolling: • Left-Right movement : destination floor selection • Up-Down movement : starting floor selection
TXM Circuit: Push Buttons • Push Buttons (SPDT momentary switches) - Send signals to PIC for transmission - Two push buttons for Send (blue button) and Door-Open (white button) - Need to press Send button twice: • 1st Press signals PIC to send selected floor #s • 2nd Press signals elevator has arrived at starting floor - Pressing Door-Open button signals PIC to send corresponding data byte (0xff) to RXM
Hardware overview- RX module • Components - PIC 16F877A - Receiver (RXM-900-HP3-PPS) - Darlington Transistors - 5V DC Reed Relay Switches - Protection Diodes
RXM Circuit: Microcontroller Polls the receiver for data Data received is determined and hamming corrected before data execution Supplies small current to the base of the darlingtons to turn them on according to data
RXM Circuit: Receiver Same 916MHz configuration as transmitter
RXM Circuit: Antennas 4th 3rd 2nd G Elevator Hoist-way Antennas placed every 2 floors using coaxial cables Hanged upside down in the elevator’s hoist-way Connected to the RXM through a splitter
RXM Circuit: Darlington Transistors Amplifies the small current from PIC to turn on the reed relay switches High current gain Current adjustments are made by using different resistances at the emitter
RXM Circuit: Reed Relays (NO) Operates at 5V DC Connected in parallel to the relay switches inside the elevator’s control circuitry Closing time of reed relay is set to 500ms: enough to charge up the elevator’s relays Low power consumption (~20 mA each)
RXM Circuit: Protection Diodes Placed in parallel with the reed relays Prevents large back emf from the relays (when transistor switch is turned off) from damaging the transistors
Software: Programming Key Points Smd_tmodule.hex, Tmodule.hex Smd version is the complete program for PCB Hard to add any new connections Breadboard version uses DIP type PICs Both include an LED flashing for 10s after PIC has waken up Both interrupt driven: turn off LCD and transmitter before going to sleep - Power up process: initialize LCD
Software: Programming Smd_rmodule.hex, Rmodule.hex - Both include an LED test signal that lights up whenever data is received from receiver - Nothing happens if unexpected data is received -
Software: Hamming Code (7,4) Data from transmitter is encoded in Hamming and decoded by the receiver side PIC Last 7 bits sent by PIC is data encoded in Hamming, MSB is used to differentiate between door open and floor selections
Hamming Code: Limitations 1-bit error correction feature but data sent is limited to 4 bits (for 8 bit transmission) Suggested Solution: - Encode an 8-bit data in 4-bit chunks and transmit twice
TXM Power Supply Circuit Two 9V Lithium batteries in parallel. Use of MC33375 5V (SMD type) voltage regulator to step down voltage to 5V Damage protection by connecting 1N4004 diodes in series with each battery power line
Verification Procedures • MC33375 Voltage Regulator Test(1) - Connect 1uF and 0.1uF capacitors to both input and output of the regulator in parallel - Connect a load R=100ohm to the output of regulator -Supply 12V to 2V with Agilent E6361A Power Supply - Measure and observe the voltage across the load and the current flowing through the load using mutimeter whether it steps down to 5Vdc and draw proper current or not
Verification Procedures • Test for MC33375-5.0R2G(2) - Oscilloscope measurement of voltage across a 100 ohms load - somewhat stable but high ripple component
Verification Procedures • Test for MC33375-5.0R2G (3) - Add one more 1uF E.L to its output in parallel to reduce the ripple -Supply 9V with Agilent E6361A - Measure and observe the voltage across the load using oscilloscope - More stable, smaller ripples
RX Circuit Power Supply • Wall-Power (120Vac, 60Hz) • AC/DC Adapter (5Vdc)
Verification Procedures • Test for AC to 5V DC Adapter - Connect output of adapter to 10uF E.L and 0.1uF in parallel as the datasheet recommended - Measure and observe the voltage that adapter outputs using oscilloscope
Verification Procedures • Testing the LINX RX and TX range Input at the RXOutput at TX at 22 feet
Testing the LINX RX and TX range (Continued) • Output at RX at 30 feet
Power Consumption • Current Flowing Through the Circuits • Power Consumption
Battery Life • We use two 9V Lithium batteries in parallel to raise the current capacity of power supply for TXM. • A 9V Lithium battery has a current capacity of 1.2Ah • The Equation for Battery Life • Battery Life
Testing ProcedureTransmitting and Receiving Antenna • Power Transmitted from the Transmitting Micro chip Antenna = -20.647dBm
Safety Considerations • Lithium batteries can explode when shorted: separation of power and ground pins and insulation • FCC Compliance Verification still needed • High voltage operation of relay switches in the elevator circuitry: hooking up the RXM with an elevator requires a professional
Problems Encountered • PIC Microcontroller Problems - Programming SMD type PIC - Interfacing PIC with LCD display - Interrupt INT_RDA not working Image Source: http://img.akizukidenshi.com/images/org/pic16f877-pt.jpg
Problems Encountered (continued) Strength of Microstrip antenna not strong enough when enclosed in the circuit box Reed relays from ECE store room found to be unable to stand the 120V connection to the elevator’s relay switches Coaxial cable– gain of new (RG-58C) vs gain of old (RG-174)
Results! • Correct and stable interface with LCD and inputs • Successful control of elevator relays • Range Problems - 36 ft antenna found to work well in vertical direction (w/o a lot of obstables) - Thick walls around elevator obstructing signal reception
Recommendations • Place antennas outside of the hoist-way • Signal amplifiers connected to each reception antenna • Use a weather resistant whip antenna for the transmission side and place antenna outside the box
Idea Extensions • Usage of transceivers on both modules - every building with receiver hooked up can then send # of floors it has to transmitter once within range • Similar concept for other purposes - Opening building entrances
Credits • Professor Gary Swenson • Dwayne Hagerman • Jeff Miller • Professor Franke • Mark and all the guys from Parts Shop • Machine Shop guys • Fellow 445 students
Thank You • Questions? • Comments?