Download
1 / 24
240 likes | 363 Vues
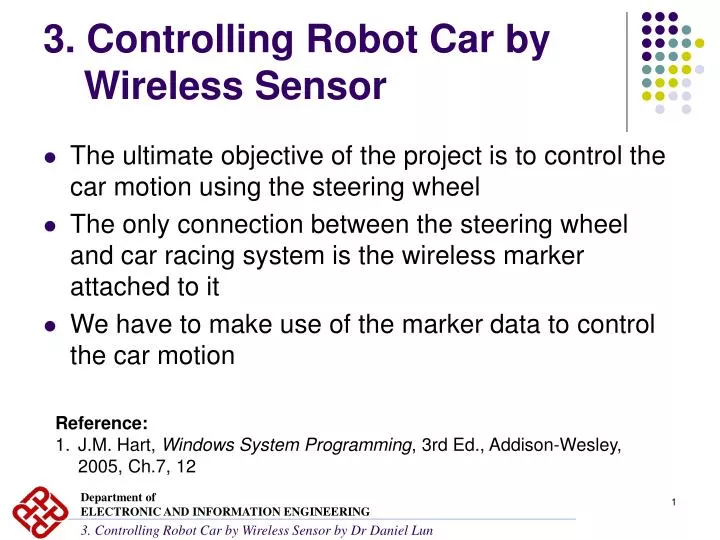
Department of ELECTRONIC AND INFORMATION ENGINEERING. 3. Controlling Robot Car by Wireless Sensor by Dr Daniel Lun. 3. Controlling Robot Car by Wireless Sensor. The ultimate objective of the project is to control the car motion using the steering wheel

E N D
Department of ELECTRONIC AND INFORMATION ENGINEERING 3. Controlling Robot Car by Wireless Sensor by Dr Daniel Lun 3. Controlling Robot Car by Wireless Sensor • The ultimate objective of the project is to control the car motion using the steering wheel • The only connection between the steering wheel and car racing system is the wireless marker attached to it • We have to make use of the marker data to control the car motion Reference: 1. J.M. Hart, Windows System Programming, 3rd Ed., Addison-Wesley, 2005, Ch.7, 12
Department of ELECTRONIC AND INFORMATION ENGINEERING 3. Controlling Robot Car by Wireless Sensor by Dr Daniel Lun Problem of the Previous Program • The markers’ data are obtained by calling the function Latus::UpdatePO() • In the previous program, Latus::UpdatePO() are called inside the functions EIE330ProjectApp::renderInfo and EIE330ProjectApp::processCalculation() • The above 2 functions will be called by Ogre only when it updates the screen • If the graphics is complex, the update rate can be very slow, e.g. 20 frames/sec or slower • It means that the markers’ data can only be obtained in such a slow rate
Department of ELECTRONIC AND INFORMATION ENGINEERING 3. Controlling Robot Car by Wireless Sensor by Dr Daniel Lun Update screen Ogre main program processCalculation() { : mLatus::UpdatePO() : } If the screen is updated once per 100ms, markers’ data can only be obtained in the same rate, i.e. once per 100ms renderInfo() { : mLatus::UpdatePO() : } : Finish update screen
Solution - Multithreading Get Markers’ data Update screen Ogre main program UpdatePO() { : } processCalculation() { : } renderInfo() { : } Routine A and B run at the same time (virtually) : Routine B : Routine A Finish Finish update screen
Department of ELECTRONIC AND INFORMATION ENGINEERING 3. Controlling Robot Car by Wireless Sensor by Dr Daniel Lun Processes and Threads • In Windows, usually a process will be generated when an application is executed • When an application is executed m times, m processes will be generated, each with a different process ID • A Windows process contains its own independent virtual address space with both code and data • Each process contains one or more independently execution unit, calledthreads • The Windows thread is the basic executable unit • A process can • Create new threads within the processes • Create new, independent processes • Manage communication and synchronization between these objects
Department of ELECTRONIC AND INFORMATION ENGINEERING 3. Controlling Robot Car by Wireless Sensor by Dr Daniel Lun A Process And Its Threads Windows Process 1 Winword Process 5 Process 2 Lab3 Notepad Threads Process 3 Process 4 Winword Excel
Why Threads? • In normal execution, a program always needs to wait • Wait for user input, wait for screen display, wait for file access, etc. • It is unwise to require programs to execute one after the finish of another • Program B can make use of the waiting time of program A to start its execution as long as program B is not waiting for the result from program A • It was first proposed to achieve this by having multiple processes • However, it was soon found that the overhead (e.g. the time required) for switching between processes is very high • Besides, processes are not tightly coupled to one another, it is difficult to share resources, such as open files • They motivate the idea of further dividing a process into smaller units, i.e. threads
Department of ELECTRONIC AND INFORMATION ENGINEERING 3. Controlling Robot Car by Wireless Sensor by Dr Daniel Lun How Threads Are Executed? • A computer has only one CPU, which can execute one program at a time • Hence, in reality, threads are not executing at the same time, but alternatively one after the other • For a multithreading system, a thread has at least the following three states: Ready Running Start execution Finish execution Sleeping
Department of ELECTRONIC AND INFORMATION ENGINEERING 3. Controlling Robot Car by Wireless Sensor by Dr Daniel Lun • Ready state • All threads that are ready to execute but without the CPU are at the ready state • If there is only 1 CPU in the system, all threads except one are at the ready state • Running state • The thread that actually possesses the CPU is at the running state • If there is only 1 CPU in the system, at most there is only one thread is at the running state • Sleeping state • The process that is waiting for other resources, e.g. I/O or a preset time, is at the sleeping state
Department of ELECTRONIC AND INFORMATION ENGINEERING 3. Controlling Robot Car by Wireless Sensor by Dr Daniel Lun • Threads will alternatively get into the CPU one after the other (called the round robin scheme) • At the time that a thread is selected to be “in” the CPU • It goes from ready state to running state • After that, it will be swapped out • It goes from running state back to ready state • Or it may due to the waiting of a preset time • It goes from running state to sleeping state • When time-up • It goes from sleeping state to ready state
Department of ELECTRONIC AND INFORMATION ENGINEERING 3. Controlling Robot Car by Wireless Sensor by Dr Daniel Lun Implementation - CreateThread HANDLE CreateThread ( LPSECURITY_ATTRIBUTES lpsa, DWORD dwStackSize, LPTHREAD_START_ROUTINE lpStartAddr, LPVOID lpvThreadParm, DWORD dwCreationFlag, LPDWORD lpThreadId); Example HANDLE mThread; // Handle to thread DWORD mThreadId; // Use to store the thread id UpdateParaStruct *pUPS = new UpdateParaStruct; // Define a structure to store passing parameters mThread = CreateThread(NULL, 0, RunningUpdateThread, (LPVOID)pUPS, 0, &mThreadId);
Department of ELECTRONIC AND INFORMATION ENGINEERING 3. Controlling Robot Car by Wireless Sensor by Dr Daniel Lun CreateThread Parameters • Input parameters • lpsa –A pointer to a security attribute structure. It determines whether the returned handle can be inherited by child processes. If lpsa is NULL, the handle cannot be inherited • dwStackSize – Indicate thread’s stack size. Use 0 for default size • lpStartAddr – A pointer to the function to be executed. For our example, the function RunningUpdateThread will be executed. RunningUpdateThread() should be defined as follows: DWORD WINAPI RunningUpdateThread(LPVOID parameter) { : }
Department of ELECTRONIC AND INFORMATION ENGINEERING 3. Controlling Robot Car by Wireless Sensor by Dr Daniel Lun CreateThread Parameters • lpvThreadParm – A pointer passed as the thread argument. For our example, the pUPS pointer, i.e. the pointer of the structure UpdateThreadStruct, is passed to the thread function. • dwCreationFlag – indicate the readiness of the thread. If 0, means that the thread is ready to run immediately • lpThreadId – A pointer to a DWORD that receives the new thread’s identifier. The system will fill in it with the thread ID • CreateThread will return the handle to the thread created. A NULL handle value indicates a failure
Department of ELECTRONIC AND INFORMATION ENGINEERING 3. Controlling Robot Car by Wireless Sensor by Dr Daniel Lun Passing Parameters to Thread • A thread function only accepts one input parameter, i.e. lpvThreadParm • If more than one parameters are to be passed to a thread function, the most convenient way is to put them in a struct and pass its pointer, e.g. struct UpdateParaStruct // For passing 2 data to the Update thread { Latus *pL; bool *pExit; };
Receive the Passed Parameters • When the thread function receives this pointer, it should first tell the function what kind of pointer it is • Then retrieve the parameters stored in the structure DWORD WINAPI RunningUpdateThread(LPVOID parameter) { UpdateParaStruct* pUPS = (UpdateParaStruct *) parameter; Latus *pLatus = pUPS->pL; bool *pExit = pUPS->pExit; : }
To Control the Execution Rate of a Thread • To control the execution rate, the simplest way is to force the thread to “sleep” for some time DWORD WINAPI RunningUpdateThread(LPVOID parameter) { UpdateParaStruct* pUPS = (UpdateParaStruct *) parameter; Latus *pLatus = pUPS->pL; bool *pExit = pUPS->pExit; while (true) { pLatus->UpdatePO(); Sleep(10); // Force to sleep for 10msec } return 0; } For the about thread, assume the other part of the program uses negligible amount of time, the execution rate of this thread is approximately once per 10msec
Department of ELECTRONIC AND INFORMATION ENGINEERING 3. Controlling Robot Car by Wireless Sensor by Dr Daniel Lun How a Thread Terminates • Most common way: • A thread terminates itself by returning from the thread function using the exit code as the return value DWORD WINAPI RunningUpdateThread(LPVOID parameter) { : : return 0; //exit code = 0 //Never return 259 since it is equal to the // constant STILL_ACTIVE, which is used to // indicate the thread is still active }
Department of ELECTRONIC AND INFORMATION ENGINEERING 3. Controlling Robot Car by Wireless Sensor by Dr Daniel Lun How to Know if a Thread is Still Alive • We can check if a thread is still alive by calling GetExitCodeThread(), e.g. HANDLE hThread; // Handle to thread DWORD ThreadId; // Use to store the thread id UpdateParaStruct *pUPS = new UpdateParaStruct; hThread = CreateThread(NULL, 0, StartPlayer, (LPVOID)pUPS, 0, &ThreadId); : DWORD exitCode; if(GetExitCodeThread(hThread, (LPDWORD)&exitCode)) std::cout << exitCode << std::endl; //GetExitCodeThread will return nonzero if successful // The exit code is stored in exitCode
Force a Thread to Terminate • The simplest way is to call the function TerminateThread(), but many side effects • Another way is to let the thread function to check frequently a shared variable which can be modified by the thread outside DWORD WINAPI RunningUpdateThread(LPVOID parameter) { UpdateParaStruct* pUPS = (UpdateParaStruct *) parameter; Latus *pLatus = pUPS->pL; bool *pExit = pUPS->pExit; while (!(*pExit)) { : } return 0; } Assume pExit is a pointer of a shared variable which will be updated by a thread outside. If that thread wants this thread to terminate, it just needs to change such variable to TRUE
CreateThread(… &Exit … ) Thread B if Exit == false bool Exit = false; bool Exit = true; &Exit if Exit == true return 0; // terminate Department of ELECTRONIC AND INFORMATION ENGINEERING 3. Controlling Robot Car by Wireless Sensor by Dr Daniel Lun Thread A
Department of ELECTRONIC AND INFORMATION ENGINEERING 3. Controlling Robot Car by Wireless Sensor by Dr Daniel Lun Software Architecture for Lab 3 Thread 1 Thread 2 EIE330ProjectApp &UpdateParaStruct RunningUpdateThread Game Latus Exit 1 Exit 2 mLatus->UpdatePO() mLatus->Analysis() &ActionParaStruct mLatus mGame Thread 3 RunningActionThread Screen Update mLatus->Action()
Department of ELECTRONIC AND INFORMATION ENGINEERING 3. Controlling Robot Car by Wireless Sensor by Dr Daniel Lun Analysis() • After receiving the markers’ data, we should analyze the data to determine the kind of action we should perform • The analysis is supposed to be done in a function Latus::Analysis() which should be called after each call to UpdatePO() • The analysis result should be put in an array of ActionStruct structs, each struct has 2 fields
Array of ActionStruct • Based on the analysis result, a number should be put by the function Latus::Analysis() to the type of an ActionStruct to indicate the kind of action to be performed. • E.g. • type = 1 go forward • type = 2 go backward • type = 3 turn right • type = 4 turn left ActionStruct mActionTable[3] type data mActionTable[0] mActionTable[1] mActionTable[2] • For some actions, you may want to provide additional data • Put it in the data field • In some cases, you may want to define a sequence of operations for each analysis result • Do it by filling in all 3 structs
Department of ELECTRONIC AND INFORMATION ENGINEERING 3. Controlling Robot Car by Wireless Sensor by Dr Daniel Lun Action() • After the action table is filled, the function Latus::Action() should be called to carry out the operations defined in the table one by one • Since the car motion is much slower than the data received from the markers, the function Action() can be called in a much slower rate • A separated thread is used to called Action() – called in thread function RunningActionThread() • The rate of execution of this thread should match with the command execution rate of Mindstorms