Download
1 / 29
290 likes | 450 Vues
Integrify 5.0 Tutorial : Creating a New Process. In this tutorial, we will show you how to: Create a new process Add different task types into our process Define recipients of tasks Configure form and approval task types Need Help? Contact Integrify Support at:

E N D
Integrify 5.0 Tutorial : Creating a New Process In this tutorial, we will show you how to: • Create a new process • Add different task types into our process • Define recipients of tasks • Configure form and approval task types Need Help? Contact Integrify Support at: 888-536-9629 x2 or support@integrify.com
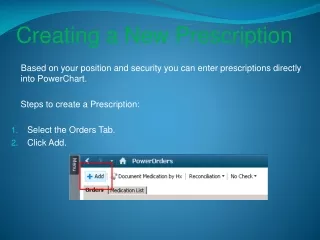
Adding a New Process Under the Administration section, select Processes, then Add New
Adding a New Process • From the popup window: • Give the process a Name • Assign to a Category • Optionally add a Description Select Save
Adding a New Process 1) After saving the process, you will have the ability edit the metadata of the process here 2) You can edit the Name, Category, Publish Status, Description, Style Template, Objective, Information URL, Attachments, Allow Comments and Visible to Users Starting a New Request fields by clicking on the fields for each 3) For example, when you click on Forms on Top, you can then select a different style template which is how you want the users to see the request detail displayed 4) You will always have the option to select Remove Process, Copy Process, New Version or Export here
Adding Tasks to a Process 1) Select Process Flow to start adding tasks to your process 2) Select New Task to add a new task 3) The Task Type Icon List is displayed. You can now grab a task type from the list and drag the task icon over the task in the Process Flow that you want it to follow.
Adding Tasks to a Process 1) In this example, we’ll drag a Form Task over the Start Process icon so a form will be the first task in the process 2) You will now get the New Task window and can give the task a Name and optionally add Notes/Description 3) You can now select Add Task
Adding Questions to a Form By clicking on the new form task icon, you will see the Task Menu. • Within the Task Menu, you can select: • Edit Detail • Set Recipients • Configure Task • Configure Rules • Display Settings • Notification Settings • Reminders and Timeouts • Advanced Settings • Delete Task
Configuring a Form Task After selecting Configure Task from the Task Menu, you can now select a pre-defined form that you want to use from the Forms Library Then, select Save Settings and Load Questions
Configuring a Form Task • Once you have configured your form task with the form you want, you can optionally: • Limit viewing access to certain fields • Prefill fields with data • Hide unanswered fields You can perform these actions by clicking on the row and column of the field you want to edit
Setting Recipients for a Task The task indicators confirm that you have either configured the task or set recipients for the task You can now select the task’s recipients by selecting Set Recipients from the Task Menu
Setting Recipients for a Task 1) Choose how you want the process this task for your recipients by selecting either All of, All of in order or One of under Process Rule 2) You can look up either Users, Groups, Roles or Dynamic Roles by selecting here and then selecting the search icon 3) By selecting the Dynamic role and viewing the list of dynamic recipient types, you can present this form task to whomever is making the request by dragging Requester over to the Current Recipients section 4) When you have finished adding the recipients you want included for the task, select Close to update your task
Adding Tasks to a Process Next, you can add an approval task by selecting New Task and then dragging an Approval task type over the configured form task
Adding Tasks to a Process You can give the approval task a Name and select Add Task
Configuring an Approval Task After selecting Configure Task for the Manager Approval task, you can add the approval options for recipients to choose from
Setting Recipients for a Task 1) This time, we are adding multiple recipients, including 2 named users and a group 2) By selecting the recipient rules option here, you can set conditions on the inclusion of a recipient for your task 3) Let’s add a recipient rule for the Accounting group
Defining Task Recipient Rules 1) From the Condition Builder window, you can start defining your rules for the Accounting group 2) We have one that looks at the data of a question choice made by the requester in the 1st form task. We selected Data from the Source select list and then selected the IT Service Request Form and the field, Service Request Type and based the condition on the requester selection of Hardware Upgrade. 3) You can add as many conditions you want. Here, we’ve added a 2nd condition to include the Accounting group if the RequesterLocation is Chicago based on their user profile
Defining Task Recipient Rules You can now see that the Accounting group has 2 rules defined
Adding Tasks to a Process Now, let’s add a couple Milestones to our process. Milestones update the overall status of a request
Adding Tasks to a Process You can have multiple tasks that start in parallel (we dragged 3 milestones over the Manager Approval task and named each). Here, we’ve added 3 possible milestones that can be triggered when the approval task is completed.
Defining Task Transition Rules You will need to configure the rules for your milestones. Here, we’ll select the Task Menu on the Approved milestone and set the rules for it to be triggered when the Manager Approval is completed AND the option selected by the approver was ‘Approved’.
Defining Task Transition Rules From the Condition Builder window, you can now add your rules First, select Data from the Source options. Then, select the Task (Manager Approval) that you want to base your condition on and the Value from the task (Approved). Select Add Rule
Defining Task Transition Rules You can see the new rule was defined
Defining Task Transition Rules You will need to repeat the same process for your Denied and Needs More Information milestones For any task, you can set them so that when they are completed, they end the process. We’ll do this by selecting Edit Detail from the Task Menus for each milestone
Defining Task Transition Rules Under Task Detail window, check the option When this task completes, the process will end Then select Save Detail
Defining Task Transition Rules We’ll repeat this action for the Denied milestone
Defining Task Transition Rules Let’s now configure the process to go back to the requester should the approver select Needs More Information Select Configure Rules for the IT Service Request Form
Defining Task Transition Rules We added another condition for the IT Service Request Form that is based on the Needs More Information milestone being triggered. This will notify the requester of the task to re-submit the form for approval.
Publishing Your Process Your Process Flow is updated as you make changes to your task rules When you are ready to publish the process to the user community, go to the Process Detail page
Publishing Your Process Click on the current Publish Status and select Production from Development. If you want to test the process prior to going live, choose the process role icon and add members to the Process Testers role, then flip the publish status to Testing.