Download
1 / 41
420 likes | 819 Vues
Anatomy of a PC August 2005 Imperial Oil Summer Institute for Computer Studies Educators Presented by Celine Latulipe Outline Introduction & Equipment Warnings Steps 1 & 2: Prep work Step 3: Remove and Label Components Step 4: Rebuild Steps 5 & 6: Plug in and Reboot Wrap-Up

E N D
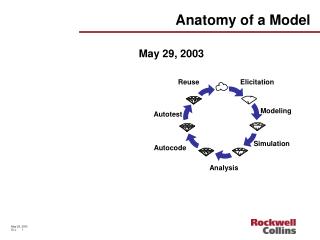
Anatomy of a PC August 2005 Imperial Oil Summer Institute for Computer Studies Educators Presented by Celine Latulipe
Outline • Introduction & Equipment • Warnings • Steps 1 & 2: Prep work • Step 3: Remove and Label Components • Step 4: Rebuild • Steps 5 & 6: Plug in and Reboot • Wrap-Up
Introduction • Why have your students disassemble and reassemble a computer? • Get over the fear of what’s inside • Develop a better understanding of what makes up a computer • Build confidence • Mostly: BECAUSE IT’S FUN!
Equipment • Screwdriver • A computer (these are old Pentiums donated by the UW Library) • Monitor and keyboard (no mouse) • Small post-it notes • Anti-static bracelets/mats • Handout
Warnings • Disassembly: UNPLUG from wall first • After reassembling, screw the lids onto the boxes before powering up (the wires from the power button to the power supply are live, so you don’t want to be near them when the computer is on) • Rebooting: plug into the wall LAST
Warnings (cont’d) • Make sure the room you use has enough power (separate circuits) • Be careful - computers have sharp parts inside (we have band-aids) • Decide how much to have the students remove, given time constraints, etc.
Step 1 – Getting Ready • Have computers booted up when students come in, so they see that they work (no Windows installed on these - just DOS) • Shut down computers • Put on anti-static bands and clip them to grounding mats • Read over handout
Step 2 – Looking Inside • UNPLUG all cables • Remove cover • Unscrew 4 screws at back closest to the edge of the computer, then pull the sides of the computer forward • The front and side panels slide off the front all in one piece • Lay the computer on it’s side with the motherboard closest to table surface
Back of Computer Remove these screws
Step 2 – Looking Inside • Identify all the major components: • Power Supply • Motherboard • Memory • Card Slots • Cards (sound, video, network) • CPU, heatsink and fan • Drives (floppy, hard and CD-ROM)
COMPONENTS power supply CD-ROM drive floppy drive cards hard drive motherboard
What these components do • Motherboard – (body) acts as a manager for everything on the computer – connects all the other components together • CPU – Central Processing Unit – (brain) this does all the work of computing • Hard Drive – (long-term memory) holds all of the information that needs to be stored between uses of the computer
What these components do • RAM – Random Access Memory – (short-term memory) holds data and program instructions that the computer is currently using • Floppy and CD-ROM drives – (mouth/ears) allow you to give data to the computer and take data away from the computer • Power Supply – (heart) supplies power to all • Network Card – (telephone) allows computer to talk to other computers over a wire
What these components do • Video card – (face) Does all of the processing necessary to get stuff looking nice on screen, quickly • Sound card – (vocal cords) Allows sounds from HD or CD-ROM to be displayed • Card Slots – (hands) Allows other components to be added to the computer (joystick cards, tv cards, etc.)
Step 2 (cont’d) • The handout has a listing of the parts to be disassembled: • CD-ROM drive, sound cable, ribbon cable (unplug power) • Floppy drive, ribbon cable (unplug power) • Sound, Video and Network cards • Memory • Draw the component beside each name on the handout
Ribbon Cables polarized
Step 3 – Taking it Apart • A - Remove CD-ROM Drive • UNPLUG sound cable from CD • UNPLUG power cable from CD • UNPLUG ribbon cable from CD • Unplug other end of ribbon cable from motherboard and label it ‘CD ribbon’ • Pay attention to where it goes on motherboard and which way the pink end goes… • Unscrew CD-ROM drive and slide out • Label CD-ROM drive with a post-it note
Hard Drive We won’t remove this.
Step 3 (cont’d) • B - Remove Floppy Drive • UNPLUG power cable from floppy drive • UNPLUG ribbon cable from floppy drive • Unplug other end of ribbon cable from motherboard and label it ‘floppy ribbon’ • Make sure you pay attention to the orientation of the ribbon cable to where it is plugged in to the mother board (which side is pink?) • Pull floppy drive out
Step 3 (cont’d) • C - Remove Video Card • Video card is the one with the 15-hole video port that the monitor was plugged into • Unscrew the card from the back of the case • Pull card straight up and out of PCI slot • Label video card with post-it note
Step 3 (cont’d) • D - Remove Sound Card • Sound card is one with audio ports on it • Leave sound cable (from CD-ROM) attached to card • Unscrew card where it attaches to back of computer • Lift sound card straight up and out of ISA slot • Label Sound Card with post-it note
Step 3 (cont’d) • E - Remove Network Card • Network Card is the one that has a port that looks like a phone jack • Unscrew card from back of computer case • Lift Network Card straight up and out of PCI slot • Label Network Card with post-it note
Step 3 (cont’d) • F - Remove RAM (only take out 1!!!) • Pull levers at each end of RAM away from RAM • At same time push RAM to one side • RAM card will tilt to one side and can be lifted out • Most of these machines have 2 RAM cards • Label RAM with post-it note
CPU/Heatsink/Fan • We won’t remove these! • We’ll pass some around so that you can see what they look like and how they attach to a motherboard
Step 4 – Putting it Back Together • Put it all back, reverse order G – A (remove post-its as you re-assemble): • Memory pops back in pretty easily • If you unplugged power cable from motherboard (to access RAM) plug it back in
Step 4 – Putting it Back Together • Place network card back into slot it came out of, screw it back in • Place sound card back into slot it came out of, screw it back in • Place video card back into slot it came out of (press firmly), screw it back in
Step 4 – Putting it Back Together • Slide floppy in and plug in power cable • Plug ribbon cable into floppy (check that the pink side of the cable lines up with the ‘1’ printed on the green part of the floppy drive) • Plug other end of ribbon cable into motherboard
Step 4 – Putting it Back Together • Slide CD-ROM back into case, replace screws, plug ribbon cable into CD and motherboard (it only goes in one way) • Plug power cables back into CD (it only goes in one way) • Plug sound cable from sound card into the back of the CD-ROM drive
Step 5 – Getting Ready to Reboot • Have Celine (or her helper) check your work – if it’s okay: • Put the lid on the box and screw it in • Plug the cables back in, in this order: • Monitor to computer (video cable) • Keyboard to computer • Monitor’s power cable into wall • Computer’s power cable into the wall
Step 6 – Reboot • Turn it on… • If it works (you get a DOS prompt), congratulations! • If not, call Celine (or her helper) over to diagnose the problem
Wrap-up • Unplug computers and monitors and stack them at back of the room • Hope you had fun! Thanks for participating!
Note about Computers for Schools • You can get a set of identical Pentium1s from Computers for Schools, along with old monitors, so that you can do this with your class • You just need a place to store them! • ctdc@frontenac.net or melliott@cfso.ca
Afterword: Modern Computers • The computers you took apart are old (5 or 6 years old?) • Computer Technology changes FAST • Pentium 1’s running at 66MHz with 64MB of RAM and a 512 MB hard drive • The graphics card is PCI (32 bits) • My current computers is smaller and faster and can do more stuff…
The Shuttle • This computer is a Pentium 4 running at 2.8 GHz • It has 512 MB RAM • It has a 20 Gigabyte hard drive • It has lots of USB connectors • It has a firewire connector • It has AGP graphics and a DVD/CDRW • It has a 6-in-1 card reader floppy drive
The Mac PowerBook • PowerPC G4 running at 1.67GHz • 15” LCD screen • It has 1 GB RAM • It has an 80 Gigabyte hard drive • It has 2 USB connectors • It has 2 firewire connector • It has AGP graphics and a DVD/CDRW • It has a PC card slot