Download

1 / 18
190 likes | 386 Vues
Graetzel Solar Cell. Michael Grätzel. 11 May 1944, Dorfchemnitz , Germany . He is a professor at the École Polytechnique Fédérale de Lausanne where he directs the Laboratory of Photonics and Interfaces .

E N D
Michael Grätzel 11 May 1944, Dorfchemnitz, Germany. Heis a professor at the ÉcolePolytechnique Fédérale de Lausannewherehedirects the LaboratoryofPhotonics and Interfaces. He discovered a new type of solar cell based on dye sensitized mesoscopic oxide particles and pioneered the use of nanomaterials in lithium ion batteries.
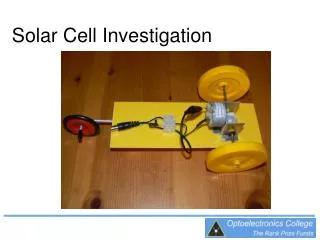
A solar cell uses light from the sun to produce electricity. Using simple materials we can make a type of solar cell called a dye-sensitised solar cell. This type of cell is cheaper than other solar cells, and is now produced commercially. It is based on a semiconductor formed between a photo-sensitized anode and an electrolyte, a photoelectrochemical system
Making a solarcell To make a solar cell we will prepare two halves of the cell and then put them together. One half of the cell is called a ‘working electrode’ and the other half is called a ‘counter electrode.’
Materials GeneralMaterials • Scotch Tape • Beakerof water • Papertowels • Smallbeaker • 2B pencil • Tweezers • Sparebeaker • 2 paperclips • Torch • Multimeter • 2 crocodile clip leads • Scalpel
Materials Chemicals and specialitymaterials: • 2 FTO slides • Titaniapaste • Blueberries • Peelofeggplants • Hibiscusflowers • Alcohol • Iodinesolution The materials we are going to use today are not dangerous.
Step 1: Checking which side of the glass is conducting • The electrodes are prepared using special glass. The glass is coated on one side with Titania paste, a material which conducts electricity. Therefore, only one side of the glass conducts electricity. • Remember to hold the glass by the edges as much as possible so that you don’t damage the surface of the glass.
1. Set the multi-meter to 2000 Ω. 2. Touch each side of the transparent glass with both ends of the two probes connected to the multi-meter and decide which side of the glass is conducting. If the value stayed at 1 the side of the glass is not conducting.
Step 2: CoatingglasswithTitania paste Now we should cover a side of the other glass with the Titania paste using a spatula, then put the glass on a hot plate to let dry the paste. However this is a very time demanding operation and we will use pre-coated glass (the white one)
Step 3: The glass in the beaker • Wehavebeakerswithdifferentkindofcompounds: 1: Alcohol + Blueberries 2: Alcohol + Peelofeggplants 3: Alcohol + Hibiscusflowers 4: Mixtureof 1,2,3 Now put the whiteglassintoonebeaker. The darker the compoundis, the more light the cellwillabsorb.
Step 4: Sealingwith scotch tape • Using scotch tape and a scalpelmakesuretosealsidesof the transparentglass. • Makesureto cover with scotch tape the conducting side.
Step5: Recover the glass in the beaker • Using a tweezerrecover the whiteglassinto the beaker
Step 6: The composition • Put the whiteglass on a papertowelwith the white side up. • Put the conducting side of the transparentglass on it. Leave a space at each side and lockthemusing a clip-
Step 7: Adding the iodinesolution • It’s timetoadd the iodinesolution. Allow the iodine solution to penetrate completely between the glass slides. This operation may last some minutes, don’t try to quicken it by adding more solution.
Step 8: It’s timetocheck! • Nowoursolarcellisready. Wehavetotryitbyusing the multimeter. Connectcrocodileclipsto the solarcell and to the multimeter. • Set the multimeterto 2V
Itworks! • Ifeverything’s okay thenourcellwill work properly. Tryto light it up withdifferentkindoflights: 1: Solar Light 2: Yellow Torch Light 3: White Torch Light (as the oneof mobile phones) The solarcellwillreact in differentways. Ifyoutryto cover itwith a papertowelyouwillsee a decreaseofvalues on the multimeter.
Byconnnecting more solarcellstogetheryouwillbeabletopowersmallelectricaldevices, suchas a calculator. Solarcellsmay last some days or evenmonths, itdepends on howwellthey are made and on howthey are preserved.