Download
1 / 17
170 likes | 403 Vues
King LTS-D Blind Insertion Airway Device. HCEC First Responder Organization Training. Goal. To prepare HCEC First Responder Organization personnel to safely utilize the King LTS-D Blind Insertion Airway Device within the scope of the HCEC Fire and Rescue Medical/Trauma Guidelines. Objectives.

E N D
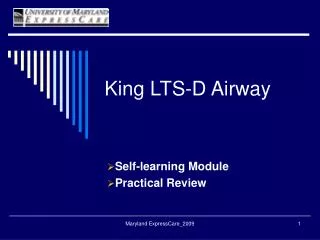
King LTS-D Blind Insertion Airway Device HCEC First Responder Organization Training
Goal • To prepare HCEC First Responder Organization personnel to safely utilize the King LTS-D Blind Insertion Airway Device within the scope of the HCEC Fire and Rescue Medical/Trauma Guidelines
Objectives • Upon completion of the didactic and practical sections of this program, the candidate will be able to: • Integrate the King LTS-D BIAD into traditional basic life support airway management • Demonstrate safe insertion of a King LTS-D BIAD • Demonstrate and/or describe procedures for ensuring proper placement of the BIAD
Assessment • Skills will be verified using an advanced airway training mannequin under the supervision of an approved HCEC FRO Trainer • Candidates must perform the skill without critical errors as listed on the HCEC Psychomotor Skill Verification sheet for Blind Insertion Airway Device
Definition • The King LTS-D is a single use blind insertion airway device (BIAD). • May be used by HCEC FRO EMT-B’s, EMT-I’s and Paramedics, under the Fire and Rescue Medical/Trauma Guidelines, who have been credentialed by the HCEC Clinical Division
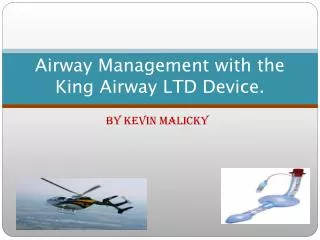
Description • A curved tube with ventilation ports between two inflatable cuffs. • The distal cuff is designed to seal the esophagus. • The proximal cuff is designed to seal the oropharynx. • At the proximal end of the tube is a 15mm connector to be used with standard breathing circuit or resuscitation bag. • The King airway is latex free product.
Size determined by Pt’s height: • Yellow: 4-5 ft • Red: 5-6 ft • Purple: > 6 ft
Indication • Cardiac arrest after assuring continuous compressions, defibrillation and BLS airway management have been completed.
Contraindications • Patients who are conscious or who have an intact gag reflex. • Patients with known esophageal disease, i.e. varices, alcoholism, cirrhosis, etc. • Patients known or suspected to have ingested caustic substances. • Deforming facial trauma that prevents proper sealing of the airway
Precautions: • Vomiting and aspiration • Excess pressure in abdomen
Instructions for use • Use appropriate PPE. • Prepare, position, and oxygenate the patient. • Choose appropriate size based on patient’s height. • Test cuffs by inflating to recommended volume of air and deflate cuffs completely before attempting to insert. • Generously lubricate tube using a water based lube. • Have suction available.
Insertion: • Position the head in a slightly sniffing position, unless spinal injury is known or suspected, then maintain cervical alignment and keep the head in a neutral position. • Insert King rotated 45-90 degrees laterally and insert into mouth • As you gently advance the tube rotate tube to midline. • Advance tube until base of connector aligns with teeth or gums.
Cuff inflation: • Inflate cuffs with minimum volume necessary to seal the airway according to tube size. • Attach to resuscitator bag and ventilate, gently withdrawing the airway until ventilation is easy and free flowing. • Monitor end tidal CO2 if available. • Assure chest rise and fall. Auscultate breath sounds. • Secure tube, using a commercially approved device, noting depth of tube placement.
Transition of care: • Relay to the receiving medic unit: • Time, size and depth of tube placement. • Patient response to procedure.
Remember: • When placing a King airway during CPR minimize interruption of CPR and place tube while CPR is in progress. • If spinal injury is known or suspected, maintain a neutral head alignment and initiate cervical spine precautions concurrently with airway management.