Download
1 / 18
180 likes | 319 Vues
Communicating with External Devices. Many systems use a memory bus to communicate with external devices Devices can include memories of all types (SRAM, DRAM, EEROM, etc.) Many other external devices, such as ADCs and sensors can be configured to work with a memory bus

E N D
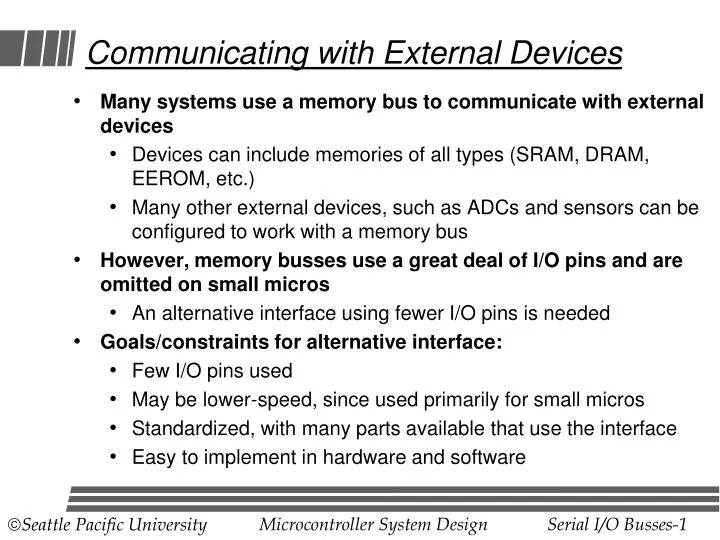
Communicating with External Devices • Many systems use a memory bus to communicate with external devices • Devices can include memories of all types (SRAM, DRAM, EEROM, etc.) • Many other external devices, such as ADCs and sensors can be configured to work with a memory bus • However, memory busses use a great deal of I/O pins and are omitted on small micros • An alternative interface using fewer I/O pins is needed • Goals/constraints for alternative interface: • Few I/O pins used • May be lower-speed, since used primarily for small micros • Standardized, with many parts available that use the interface • Easy to implement in hardware and software
Standard Serial I/O Busses • USB and Firewire • Very fast, work over distances up to five meters, easy to hook up once software and hardware are in place • Generally used to support external devices such as mice, flash cards, printers, etc. • Very heavy protocol overhead, requires a lot of programming support – too much for most micros • RS232 • Simple and slow, low overhead, can work over hundreds of meters • Point-to-Point (connects two devices only) • Standard requires +/- 12V, although sometimes used at 0/5V • Chip-to-Chip Busses: Serial Peripheral Interface (SPI), Inter-Integrated Circuit (I2C) • Very lightweight protocols, medium speed • Work on 5V or 3.3V; Short distance • One master may communicate with many other devices • Many chips available that communicate with one of these protocols
Chip-to-Chip Busses • Purpose: Provide medium-speed connection between components on a board using a small number of wires/pins • Interconnect uses few wires • Data transmitted bit-serially on two uni-directional lines or one bi-directional line • Clock (generated by master) provided on a second uni-directional line • Shared bus gives the ability to connect one master with many slaves • Some schemes assign addresses to each slave device; The slave is selected by sending the address over the data wire – this requires no additional pins • Other schemes have individual select lines for each slave device – this is simpler, but requires an additional pin for each device
Serial Peripheral Interconnect (SPI) – Single Slave SCLK SCLK SPISlave (memoryor otherdevice) SPIMaster(ususally Micro) MOSI MOSI MISO MISO SS1* SS* SCLK – Serial Clock – Produced by the master, provides timing for all transactions in system MOSI – Master Out Slave In – Data sent from the master to a slave device MISO – Master In Slave Out – Data sent from a slave device to the master SS* - Slave Select – Control line asserted (low) when data transmission to take place with slave
SCLK SCLK SPISlave 1 (memoryor otherdevice) SPIMaster(ususally Micro) MOSI MOSI MISO MISO SS1* SS* SS2* SCLK SPISlave 2 (memoryor otherdevice) SS3* MOSI MISO SS* SCLK SPISlave 3 (memoryor otherdevice) MOSI MISO SS* SPI – Multiple Slaves • Share SCLK with all slaves • Provide individual Slave Select signals (requires one extra pin on micro for each slave used) • Share MOSI with all slaves (only selected slave will look at it) • Merge all MISOs together (only selected slave will drive it)
SPI Timing SCLK SS* MOSI Bit 0frommaster Bit 1frommaster Bit 2frommaster Bit 3frommaster Bit 4frommaster Bit 5frommaster Bit 6frommaster Bit 7frommaster Bit 0fromslave Bit 1fromslave Bit 2fromslave Bit 3fromslave Bit 4fromslave Bit 5fromslave Bit 6fromslave Bit 7fromslave MISO Clock timing shown using mode 0 (Polarity = 0, Phase = 0) Clock is active only during transfer. Inactive otherwise. 8 bit transfer shown; Any number of bits allowed by standard. LSB first transfer shown; Bit order not specified by standard. Transfer is always simultaneous in both directions. (May send irrelevant data if unneeded.)
SPI Considerations • SPI “standard” specifies very little – allows any: • Clock speed (must not be faster than the slowest device used can handle – can often be several MHz) • Transmission length (most commonly a multiple of 8 bits) • Bit order (LSB first or MSB first) • Clock alignment can be configured as well • Clock Polarity (0 means inactive clock low, 1 means inactive clock is high) • Clock Phase (0 means first edge of the clock, 1 means second) • Four combinations form four modes (see documentation) All of these parameters (Mode, Speed, Transmission Length, Bit Order) must be the same for the master and slave
SPI Risks • SPI has no flow control, acknowledgment, or error-detection built in • May overrun buffers with no warning • Errors in transmission unflagged • Master assumes that slave sends good data when “commanded” to – however, slave has no way to indicate that it is really sending data • SPI has no standard clock speeds • Hopefully data sheets will specify limits… • Data sheets are notoriously underspecified • Common to find a part listed as SPI compatible, but with no documentation on the mode, speed, transmission length or bit order
PSoC SPI Blocks • SPIM/SPIS user modules for master/slave • Always transfer 8 bits at a time • Can configure SPI mode and LSB or MSB first • Must use GPIO pins under program control for the SS* signals • Assert SS* (low) before calling the SPIM transmit/receive routine • Wait for transfer to complete and unassert SS* • Can configure an interrupt to notify when SPI transfer is complete
Uses of SPI and other Serial Busses • Serial busses can be used any time devices need to transfer data at speeds from a few bps to Mbps • Examples • External memories (SRAM and Flash EEROM are common) – Send address, receive data… • External ADCs – Send configuration data, receive samples • External DACs – Send configuration data and data to be converted • External Real-time clocks – Send clock configuration, receive time • Hundreds of SPI compatible devices are available
Vcc 2K - 5K SCL SCL SCL I2CMaster(ususally Micro) SCL I2CSlave(device) I2CSlave(device) I2CSlave(device) SDA SDA SDA SDA Inter-Integrated Circuit (I2C) Bus SCL and SDA must be pulled up with external resistors SCL and SDA drivers must be open-drain/drive low on master and slaves SCL SDA SCL – Serial Clock Line – Generated by master; indicates validity of bits on data line SDA – Serial Data Line – Bi-directional; Generated by any device (subject to permission)
Vcc VCC To PSoCDigital Input Logic Port Pin Source3 Source1 Source2 InvertedPSoCSource GND GND GND GND Open-drain Bi-directional Connections Open-Drain systems allow multiple sources to drive the same line (bus). Each device can only drive the bus low. The external pull-up resistor pulls the bus high if no devices are driving it low. Bus ExternalPull-UpResistor PSoC port pin in Open-drain/Drive low mode
SCL SDA MSB Bit 6 Bit 5 Bit 4 Bit 3 Bit 2 Bit 1 LSB Sending a byte with I2C • To complete transfer, master raises SDA while SCL is stable high. STOP START ACK ACK (receiver):Same timing, written by receiver Start (master):SCL High, SDA ↓ Data (transmitter):SDA changes when SCL low, read when SCL high Stop (master):SCL High, SDA ↑ • Master always drives SCL • To start a transfer, master lowers SDA while SCL is stable high. • Eight bits are sent, MSB first. SDA can be driven be either master or slave. • One acknowledge bit is sent by the receiver. Receiver may be either master or slave. ACK = 0 means successful transfer.
Addressing slave devices • Many slave devices may be available, but there are no selection lines • I2C Slaves each have a 7-bit address • Address is sent on I2C bus before data transfer takes place • Only master can send an address • Address also includes a single-bit R/W signal indicating the direction of transfer (R = from slave, W = to slave) • Each byte transfer now requires two bytes: first for address, second for data
I2C Address and Byte Transfer Source: Philips Semiconductor I2C Bus Specification, Ver. 2.1 • Master first sends slave address (7 bits) and R/W bit. Selected Slave acks. • A byte of data is then sent: • For a write: Master sends 8 bits of data. Selected Slave acks. • For a read: Selected Slave sends 8 bits of data. Master acks. • If transmission is done, Master sends STOP. • If more bytes are needed in transmission, Master sends another START. START ACK 8-bit DataFrom Master for WriteFrom Slave for Read STOP 7-bit Slave Address R/W1 = Read0 = Write ACK
I2C Considerations • I2C is a more defined standard • Four bit transfer rates defined: 50Kbps, 100Kbps, 400Kbps, 3.4Mbps (Note: Fastest speed is lower than SPI’s top speed.) • Transfer parameters (bits transferred, clock parameters, etc.) are specified so there are fewer ways to go wrong • I2C is more robust that SPI • Transfers are acknowledged • Multi-master systems are allowed • I2C is a proprietary standard • Used to have to pay a license fee to use it – no longer the case • Phillips assigns the slave addresses – have to pay for a new slave address
PSoC I2CUser Modules • Three I2C user modules are available • I2Cm – Implements interface in firmware. Limited to 100Kbps and uses resources. Don’t use this! • I2CHW – Custom hardware on PSoC chip. Works up to 400Kbps and uses no other resources. • EZI2C – A simple “easy” interface (slave mode only) • App Note: Cypress AN50987 • http://www.cypress.com/?docID=13996
PSoC I2CHW module • When configured, choose Master, Slave, or Multi-Master/Slave option • Usually use Master for microcontroller • If slave, specify 7-bit slave address • Options: • Choose I2C data rate that is compatible with other devices used • Normally uses Port1[5] for SDA and Port1[7] for SCL. Can use Port1[0] and [1], but not recommended. • API • Straightforward – Read/Write bytes!