Download
1 / 37
370 likes | 372 Vues
Learn how to assess physical health emergencies and use airway management equipment. Attend a practical skills session for hands-on training.

E N D
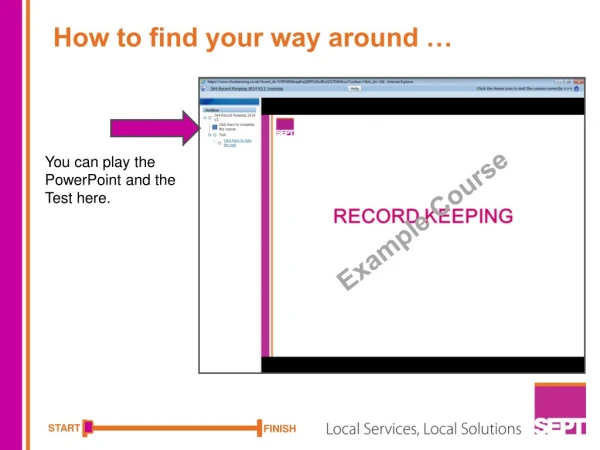
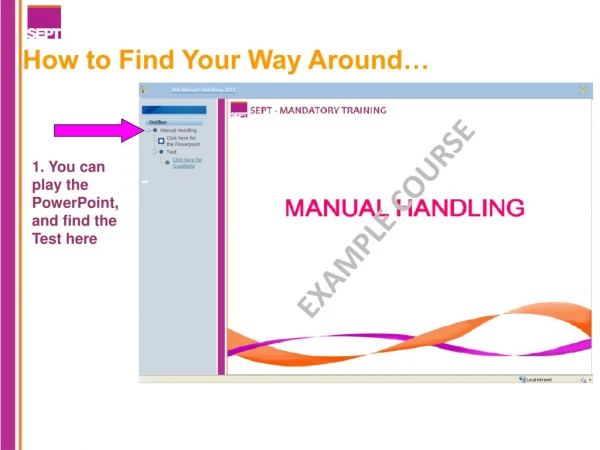
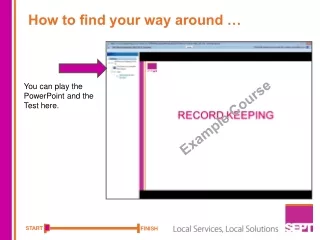
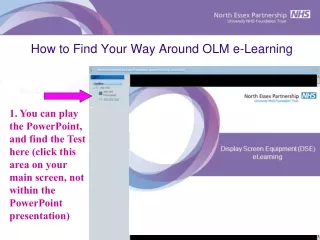
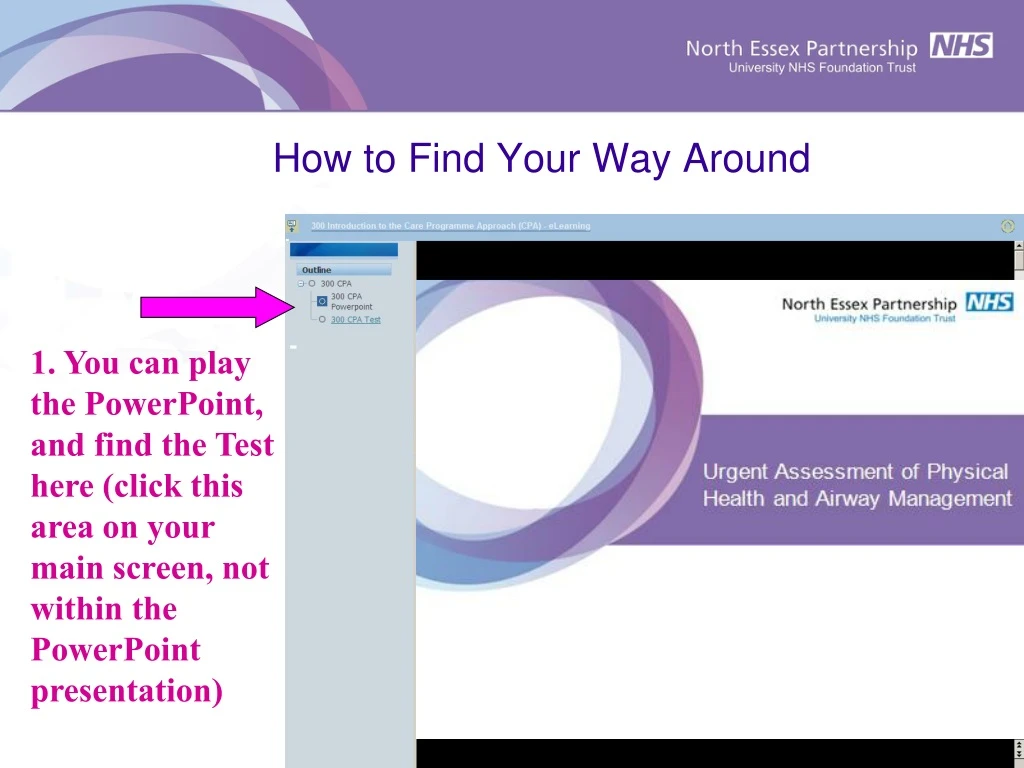
How to Find Your Way Around 1. You can play the PowerPoint, and find the Test here (click this area on your main screen, not within the PowerPoint presentation)
How to Find Your Way Around 2. You can minimise this column and make the main page bigger by clicking this icon in your main screen. Click it again to bring it back.
How to Find Your Way Around 3. Always click this ‘Home’ icon in your main screen to save your progress and log off. This is very important!
Urgent Assessment of Physical Health and Airway Management
Urgent Assessment Of Physical Health And Airway Management • This module will introduce you to the assessment of physical health emergencies and the use of the airway management equipment • You should attend a practical skills session as soon as possible on completion of this e-learning
Urgent Assessment Of The Patient’s Physical Condition Is Essential Because… • Prompt attention to physical health can help to avoid potentially life threatening situations • Often, cardiac arrests are predictable • Deterioration in vital signs is often evident prior to cardiac arrest • Hypoxia (low blood oxygen level) and hypotension (low blood pressure) are often signs that signal physical deterioration • Delays in referral to acute care facilities must be avoided
The ABCDE Approach To Assessment Must Always Be Used A… B… C… D… E… airway breathing circulation disability exposure
ABCDE Approach • The underlying principles of this approach are to ensure: • Complete and thorough assessment • Treat life-threatening problems first • Continuous reassessment • Effects of any interventions are assessed Call for help early • e.g. Duty Doctor, Senior Nurse, or 999
ABCDE Approach • Personal safety of the rescuer must never be compromised – avoid moving collapsed patient. • Check patient responsiveness, use the AVPU scale: - Alert, responds to Voice, responds to Pain, Unresponsive - Can the patient tell you what’s happened? • Vital signs - record on Track and Trigger sheet and alert senior colleague to any abnormal findings. Include: - pulse, respiratory rate, blood pressure, pulse oximetry, ECG, temperature • Movement of limbs - is there any pain? - Assess the position of the patient - Is there any deformity, swelling, or reduced range of movement?
How to recognise airway obstruction: Is the patient talking? If so the airway is likely to be clear Does the patient have difficulty breathing, are they distressed or choking? Shortness of breath – unable to converse fully? Noisy breathing? - Any stridor, wheeze or gurgling? This could signify an obstruction in the airway, which may be a foreign body or swollen airway tissue A is for Airway
Treatment of airway obstruction is vital! Airway opening may be needed - i.e. head tilt, chin lift, or jaw thrust if a neck injury is suspected Simple adjuncts (an accessory or auxiliary agent or measure), such as: naso-pharyngeal airway oropharyngeal airways laryngeal mask airway Use of adjunct may facilitate delivery of oxygen – more details coming up! A is for Airway
Recognition of breathing problems: Look at the patient Respiratory distress – can they talk? Accessory muscles – are they using abdominal muscles to help their breathing? Cyanosis – any blue tinge to lips (this is a late sign!!)? Respiratory rate – is it fast or slow? Any chest deformity? Is their conscious level deteriorating? Listen to the patient Is their breathing noisy? Are they making any unusual breath sounds? Feel for air movement around the patient’s nose/mouth and look for chest expansion B is for Breathing
B is for Breathing Treatment of breathing problems may involve using an airway adjunct – more details coming up! • Deliver oxygen at the appropriate rate • If the patient is breathing, start with 2 litres per minute via a non-rebreathing mask • Monitor oxygen level via the pulse oximeter – aim for patient’s usual reading or > 96%
B is for Breathing • If the patient is not breathing, give 15 litres per minute via a bag – valve – mask • If CPR is in progress, deliver 2 breaths per 30 compressions • If the patient has a pulse, deliver continuous breaths at the rate of 12 -15 per minute
C is for Circulation Recognition of circulation problems • Look at the patient: • Pulse – what is the rate/volume/regularity? • Pulse oximetry – is it normal? • Peripheral perfusion – what is the patient’s colour? Try to assess capillary refill time (should be < 2 seconds) • Blood pressure – is it normal? • Any unusual confusion or pain anywhere? • Any bleeding or fluid loss?
D is for Disability • Treat underlying cause – known medical problems – diseases? disabilities? • Is the patient diabetic? • Blood glucose – if < 3 mmol l give glucose gel, or IM glucagon if the patient is unconscious • Check drug chart – what’s been given? • Any other drugs taken? • Consider position – be wary of moving patient if any fracture suspected
ABCDE Approach to Exposure • Remove clothes to enable examination: • Are there any obvious injuries? • Are there any rashes? • Is there any bleeding from wounds? • Is there any bleeding from body orifices? • Maintain dignity • Avoid heat loss
Sequence of events in cardiac arrest…. • If there is no pulse or other sign of life, one person starts CPR as others call the resuscitation team and collect the resuscitation equipment and a defibrillator. If only one member of staff is present, this will mean leaving the patient. • Give 30 chest compressions followed by 2 ventilations, once commenced there should be minimal interruptions to high-quality compressions. • The correct hand position for chest compression is the middle of the lower half of the sternum. • The recommended depth of compression is at least 5 - 6 cm and the rate is 100 – 120 per minute. • Allow the chest to completely recoil in between each compression. • The person providing chest compressions should change about every 2 min, or earlier if unable to continue high quality chest compressions. • This change should be done with minimal interruption to compressions. • Maintain the airway and ventilate the lungs with the most appropriate equipment immediately at hand. • A pocket mask, which may be supplemented with an oral airway, is usually readily available. If a bag-valve-mask is used, 2 people are required • Alternatively, use a supraglottic airway device (e.g. laryngeal mask airway (LMA)) and self-inflating bag
Naso-Pharyngeal Airways (NPA) • NPAs are inserted through one nostril to create a passage between the nose and the nasopharynx • Indications: • Alternative airway for patients with clenched jaw, (seizure may cause this) in whom an oro-pharyngeal airway (OPA) placement is not possible • Patients who require airway assistance, but cannot tolerate an OPA, because they have a gag reflex • Check size by comparison to distance between nostril and lower edge ear lobe
Naso-Pharyngeal Airway (NPA) • NPA insertion can be attempted in any unresponsive patient, (who may have an intact gag reflex) to help maintain an open airway • Do not force or blindly position an NPA • Poor positioning can force the base of the tongue against the posterior pharyngeal wall, completely obstructing the airway • Do not use if basal skull fracture is suspected • Monitor breathing once airway is in place
Oro-Pharyngeal Airway • Can be used to maintain a patent airway in a patient who has no gag reflex (decreased conscious level) • Size by comparison with the corner of the patient’s mouth and the lower edge of the ear lobe • A variety of sizes are available and they are colour coded
Insertion of Oro-Pharyngeal Airway • Introduce it upside down, gently to the back of the patient’s mouth • Rotate through 90 degrees whilst visualising the tip • Gently insert into the patient’s oro-pharynx
Insertion of OPA Rotate through 90 degrees on reaching the back of the oro-pharynx
Why use i-gel? • i-gel is the innovative second generation supraglottic airway from Intersurgical launched in 2007. The first major development since the laryngeal mask airway, the i-gel changed the face of airway management and is now widely used in anaesthesia and resuscitation across the globe. • Ease and speed of insertion • Reduced trauma • Superior seal pressure • Gastric access • Integral bite block • Non-inflatable cuff • What makes i-gel unique? • i-gel has a soft, gel-like, non-inflatable cuff, designed to provide an anatomical, impression fit over the laryngeal inlet. The shape, softness and contours accurately mirror the perilaryngeal anatomy. This innovative concept means that no cuff inflation is required. • The i-gel works in harmony with the patient’s anatomy so that compression and displacement trauma are significantly reduced or eliminated.
During in-hospital cardiopulmonary resuscitation, in the absence of someone skilled in intubation, the i-gel enables effective ventilation in about two-thirds of cases
Insertion of i-gel (1) • Don’t forget PPE • Open the i-gel and on a flat surface, take out the protective cradle containing the device • Oxygenate the patient! • Place a small amount of lubricant on the middle of the smooth surface of the cradle • Lubricate the back and sides of the cuff with a thin layer of lubricant. • Make sure no bolus of lubricant is in the bowl of the cuff • Try not to touch the cuff • Replace in cradle if not for immediate use
Insertion of i-gel (2) • Grasp the lubricated i-gel firmly along the integral bite block; hold if between thumb and index finger. • Size 4 – 50 – 90kg, Size 5 90 + kg • Position the device so that the i-gel cuff outlet is facing towards the chin of the patient • Head extended, neck flexed • Assistant can gently press down on the chin if needed • Introduce the soft tip into the patients mouth, gently move towards the back of the throat, making sure the tongue is not pushed back • Glide the device downwards and backwards with a continuous gentle push until resistance is felt • Secure the device - maxilla to maxilla
Verify Placement of the LMA • Connect the LMA to a Bag-Valve Mask • Use the catheter mount if available - Catheter mount tube extensions make it easier for you to safely move patients. They are very easy to use and help keep your hands free, giving you more room to provide care. • Ventilate the patient • Confirm bi-lateral chest movement • To confirm equal breath sounds over both lungs in all fields and the absence of ventilatory sounds over the stomach, you can listen with a stethoscope
Securing the LMA • Now the LMA can be secured • Use narrow bandage to secure the airway to the patient • Secure the airway to the patient’s head…not neck
Oxygen • In a non breathing patient, a registered nurse can deliver oxygen with no prescription, and should use 15 litres per minute • In a patient with compromised breathing, oxygen should be prescribed, but if the situation is urgent and the patient requires emergency oxygen, it must be delivered at 2 litres per minute at commencement and then titrated to Pulse Oximetry reading • In some cases, where COPD is present for example, the care plan must state the flow rate required
Action • Ensure swift transfer of patient to acute services usually this will involve 999 “nil delay” • Detailed and accurate information must be available to receiving service • Inform relevant senior colleagues as soon as possible • Escort as appropriate • Document incident in full in healthcare record and include vital signs monitoring chart • Complete Datix
Summary • Prompt attention to physical health can help to avoid potentially life threatening situations • Do not delay referral to acute care facilities if required • The ABCDE approach to assessment must always be used • Treatment of breathing problems may involve using an airway adjunct • Your safety must never be compromised
You Have Now Finished the Learning Please click the ‘Test’ icon in the left column of your main page.You may need to maximise the column by clicking the top left icon. Remember to click the ‘Home’ icon when you finish the Test to save your results