Download
1 / 2
20 likes | 160 Vues
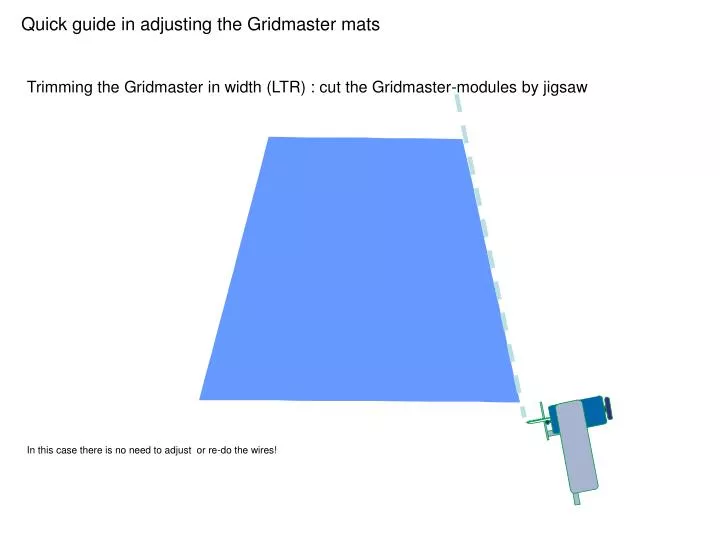
Quick guide in adjusting the Gridmaster mats. Trimming the Gridmaster in width (LTR) : cut the Gridmaster-modules by jigsaw. In this case there is no need to adjust or re-do the wires!. Quick guide in adjusting the Gridmaster mats.

E N D
Quick guide in adjusting the Gridmaster mats Trimming the Gridmaster in width (LTR) : cut the Gridmaster-modules by jigsaw In this case there is no need to adjust or re-do the wires!
Quick guide in adjusting the Gridmaster mats Trimming the Gridmaster in walklength (FTB) tools needed: cutting pliers and bending pliers Clamping screw Carefully cut the wires as shown on picture by pliers. This will cause the mat to loose its tension and you are now able to remove a set of rubber/alu profiles including the endprofile After removing a set of rubber and alu. Slide the removed end profile back on the steel wires. Put pressure on the mat by using a clamping screw or similar device Bend the wires tight in a 90 degree angle. And remove the clamping screw.