Download
1 / 14
140 likes | 239 Vues
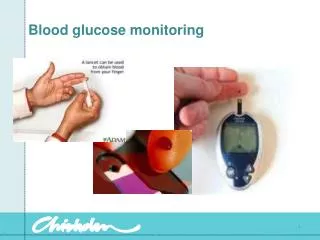
Blood Glucose Measuring Devices in the Pre-hospital Setting. Indications for BG Measuring. Signs and Symptoms consistent with Acute Stroke Altered Mental Status. Hypoglycemia. Blood glucose level of 80 or less Most calls for diabetic emergency Signs and symptoms: Hunger

E N D
Indications for BG Measuring Signs and Symptoms consistent with • Acute Stroke • Altered Mental Status
Hypoglycemia • Blood glucose level of 80 or less • Most calls for diabetic emergency • Signs and symptoms: • Hunger • Nervousness or shakiness • Perspiration • Dizziness or light-headedness • Sleepiness or weakness • Confusion • Difficulty speaking • Unresponsiveness
Hyperglycemia • Blood glucose level of 120 or higher • Most common but least calls to EMS • Signs and symptoms: • Frequent urination • Increased thirst • May lead to Ketoacidosis
Procedures • Careful attention to BSI & safety • Insert Glucometer test strip into device • Select Finger • Massage blood into distal end • Clean finger with alcohol & allow to dry • Use lancet or Auto-lancet device • Wipe first drop of blood off • Apply drop of blood onto test strip and follow individual glucometer instructions • Dispose of sharps and soiled supplies
Step 2 • Get out a lancet (prepare the lancet as needed) • Locate the place for the finger-stick: • Choose a finger… any finger (usually not the thumb) • Use the side of the pad of the finger, between the knuckle and the finger tip • If the patient has callused fingers or thick skin it maybe difficult to get blood, try to find a place with “thinner” skin • As EMT providers we are not authorized to use alternate site testing (IV starts, toes, arms, etc.) if fingers are not available, medical control must be contacted for orders to test an alternate site
Step 3 • Clean the finger tip that you will be performing the finger-stick on with an alcohol prep pad • Be sure the area dries completely, use a sterile gauze pad to dry the area if needed • Note: un-dried alcohol may skew the reading so make sure it dries completely
Step 4 • Lance the finger with the lancet • Lower the hand and squeeze the finger gently (if needed) to assist with producing a small droplet of blood
Step 6 • When the blood glucose reading appears, document it immediately on the ePCR • Ex: “blood glucose 100 at 13:57” • Continue to treat the patient per Maryland Medical Protocol
Troubleshooting • What could go wrong when using the glucometer? • Dead batteries • Always carry spare batteries in the ambulance and check the unit regularly • “Error” reading appears • Insert a new strip, re-test, check batteries • Unable to get enough blood from finger-stick • Lance a different finger, if skin is cold-try warming with a hot pack wrapped in a towel • Inaccurate reading • Why do you think it was inaccurate? Was the alcohol dried? Was the strip contaminated? Try re-testing.
Results • 80-120 • Normal blood glucose range is typically • If it reads “LO” = lower than 20 mg/dl • If it reads “HI” = higher than 500 mg/dl • If it reads “E-3” = may be too low to read • If it reads “E-4” = may be too high to read • Any of these readings could also indicate that there is a problem with the test strip. Remember to treat the patient and not the number on the meter.
Maintenance & Calibration • Techniques • Frequency • Batteries • Care & Storage • Device • Test strips • Documentation