Download
1 / 32
330 likes | 504 Vues
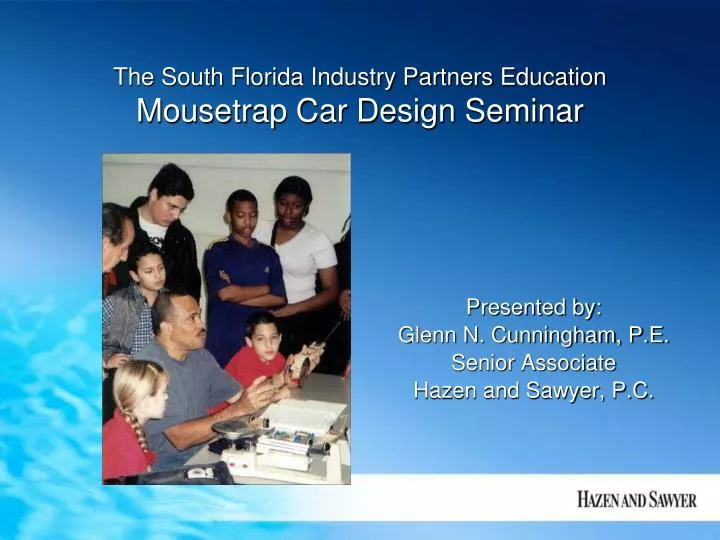
The South Florida Industry Partners Education Mousetrap Car Design Seminar. Presented by: Glenn N. Cunningham, P.E. Senior Associate Hazen and Sawyer, P.C. Develop critical thinking skills, a solid science and math foundation with practical application and competitive excitement

E N D
The South Florida Industry Partners EducationMousetrap Car Design Seminar Presented by: Glenn N. Cunningham, P.E.Senior AssociateHazen and Sawyer, P.C.
Develop critical thinking skills, a solid science and math foundation with practical application and competitive excitement Design and build a mousetrap car that satisfies the rules Know the rules and scoring formulas Know the elements of the design required The Technical Report The Technical Drawing The Competition To exchange ideas in a common forum - industry, college, coordinators, parents and students Objectives of the Design Seminar: To define and explore concepts of the SECME Mousetrap car enabling our students to:
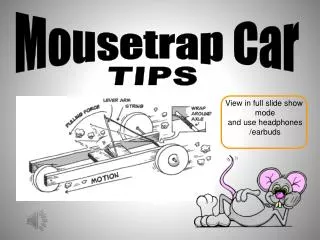
What is a mousetrap car? • Opportunity to learn elements of a good design while experiencing the thrill of competition • Car with the body of a mousetrap propelled by the force of a spring • Not a mice catcher • Economical way to complete a design for a few dollars/unit • Your ticket to Nationals…as a winner
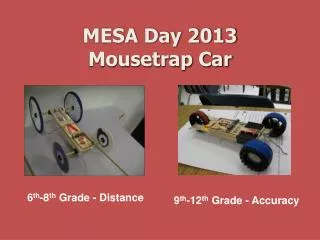
What are the components of a mousetrap car? • Victor mousetrap • Three or four wheels • Gears (driver and follower gears) • Bail and bail string • Washers and plastic tubing ends • Creativity and practice
What does the mousetrap car look like? • Mousetrap on wheels? • NASA moon buggy? • Anything your imagination wants it to look like • Your creativity will make the difference
An approved mousetrap car does not look like these: • Mousetrap base cannot be altered in any way • No batteries or external power is permitted • The VICTOR plastic model mousetrap is not allowed • Refer to the “Survival Guide”
How does the mousetrap car work? • The spring on the mousetrap car is tensioned (energized) by winding the bail-string unto the drive-shaft of the driver mechanism • When released, the tensioned spring causes angular rotation on the drive-shaft, thus turning the rear wheels and producing linear motion on the mousetrap car
What are gears? • Toothed wheels – simple machines • Most common are “spur gears” (commonly used on mousetrap cars) • Used to transfer force, increase or reduce linear distance traveled, increase or reduce speed, and change direction of rotary motion
Why do we need gears? – Consider a mousetrap car without gears • The energy stored in the spring is released into the wheels in an instant, producing a big bang, and spinning wheels trying to move the car at a high speed • The result is usually a fast start and not much distance covered
Why do we need gears? – Consider a mousetrap car with gears • The energy stored in the spring is released in a steady controlled way • The result is usually a constant speed and more distance covered
How do gears work? - Consider a design using two gears The large gear is the driver gear and is mounted on a drive-shaft The small gear is the follower gear and is mounted on the drive wheel axle
How do gears work? - Consider a design using two gears • The driver gear is a 40 tooth spur gear and the follower gear is a 8 tooth spur gear • The gear ratio is….40:8 or … 5:1 • A gear ratio of 5:1 means that every-time the bail-string turns the drive-shaft, the gears produce five revolutions on the wheels • Therefore, the car has the potential to travel five times the distance of a car designed without gears
How does gear ratio relate to distance traveled? • Consider same design using two gears: • Driver gear = 40 tooth; follower gear = 8 tooth • Total gear ratio = 5:1 • Diameter of drive wheel = 2.5-inch • Linear distance traveled / revolution = (2.5 x 3.14) = 7.85 inch/rev • Converting, 7.85 inches X (2.54 cm/inch) = 19.94 cm/rev • Target distance = 25 meters = 2500 cm • Required drive axle rotation = 2500 cm / (19.94 cm/rev x 5) = 25.0 rev
Can we calculate how our mousetrap car is likely to perform? • Yes…..We can calculate the expected performance of our car because: • We can design the length of our bail-string, gear ratio, wheel sizes, and calculate the expected distance traveled • We know the length and weight of our car • We can do the calculation !!
What about the technical drawing and report? • The Technical Drawing and Report are required as part of the submittal package – without either the entry will be disqualified • A good Technical Drawing and Report can earn 50 points each (refer to “Survival Guide”) • An entry could win the actual race, but lose the overall competition because of mediocre or poor performance in the Technical Drawing and Report • Follow the rules in the “Survival Guide” - Every point earned may make the difference between first and second place
Sample layout: What about the layout of the technical drawing?
Constructing a mousetrap car • We are confident that everyone here can build a mousetrap car • To demonstrate our confidence……… • We are asking you , everyone, to go back to your respective schools and help your students build a mousetrap car…………………. Here is HOW!!
Building a mousetrap car – materials required • Mousetrap (wood victor) • Balsa wood strips (1/4-inch sq.) • Wood glue (super glue) • Wood dowels (1/8-inch dia.) • Leggo gears (40 tooth and 8 tooth) • Wheels (2-inch and 1-inch dia.) • Washers (type No 6) • Tubing (1/8-inch inner dia.) • Grease
Tool box Hammer Small hand-saws Rulers Scissors Exacto knives (utility knives) Screw-drivers (flathead and phillips) Drill and drill-bits Drummels Pliers (needle-nose and standard) Soldering iron and solder Hot glue gun and glue sticks Tape measure Misc. attachments Building a mousetrap car – tools required
Building a mousetrap car – a basic design: • A basic design, using gears, is presented to provide hands-on instructions on building a mouse-trap car. • A basic design, not using gears, can also be completed by deleting “Step No 5, Fourth Mark”, and also noting that the “Third Mark” would become the location of the driver wheel axle
1 2 3 Building a mousetrap car – preparing the mousetrap: • Hold mousetrap firmly on hard surface • Remove all accessories not required(bait-hook, locking lever and fasteners) • Use needle-nose pliers to open gap onloop at end of bail arm. Straighten bail carefully (bail will break at weakened 90-degreebends)
Building a mousetrap car – prepare wood-frames: axles, gears: • Cut 3 pieces for axles from the 1/8-inch dowel:(two – 9 cm long and one – 10 cm long) • Cut 4 pieces for car frames from the 1/4-inch balsa:(four – 21 cm long) • Glue 2 pieces for the car frame together. Repeat this for the other 2 pieces, to form two – 1/2-inch x 1/4-inch pieces • Label each car frames as shown: T – Top, B – Bottom (on the 1/4-inch faces); and I – Inside, O – Outside (on the 1/2-inch faces)
Building a mousetrap car – mark wood-frames: axles, gears: • Holding one side of the car frame, (with O - Outside marking facing up),insert 4 markings in the following places: • First mark 1 cm from end of car frame Use an axle to make an impression into the frame, 2 mm below the center-line of the frame. (This is the location of the front wheel axle) • Second mark 12 cm from same end of car frame (This is the location of the rear-end of mousetrap) Note that the red “V” is located at the rear-end of mouse-trap
Building a mousetrap car – mark wood-frames: axles, gears: • Continued….. • Third mark 15 cm from same end of car frame Use an axle to make an impression into the frame, 2 mm above the center-line of the frame. (This is the location of the driver gear axle) • Fourth mark To complete this, place the large gear over the 15 cm mark. With the large gear held in place, engage the small gear. Use an axle to make an impression into the frame, 2 mm below the center- line of the frame. (This is the location of the follower gear mounted on the rear wheel axle)
Building a mousetrap car – tape wood-frames together: • Tape both frame pieces together, (making sure that the tape does not cover any of the impressions marked in No. 5) Both frames should be lined up with the markings,T - are together, B - are together, I - are inside, and O - are outside.
Building a mousetrap car – Putting the pieces together: • Drill holes at centers of the three impressions (front wheel axle, driver gear axle and follower gear drive wheel axle), marked in No 5. Before removing tape, examine to make sure that holes are properly aligned • Glue inside of first frame (glue on inside) to side of mousetrap • Install gears, axles and second frame (hand-held in place) to verify proper alignment. (Note that axles should be at right angles to frames) • Glue inside of second frame (glue on inside) to other side of mousetrap
Building a mousetrap car – Putting the pieces together: • Align gears, test gear rotation and glue center of gear to axle. (Carefully apply 1 drop of glue only) • Complete installation of wheels, washers and tubing ends. Test wheel rotation. • Attach bail-string to bail and bail-string attachment to the driver axle. First, attach bail-string to closed loop at end of bail and cut bail-string to proper length, depending on the option selected for bail-string attachment to the driver axle Option 1 – “String over-lapping rap method”. Holding end of string, wrap string around the driver axle,(by rotating the driver axle by hand), making sure that the succeeding wraps overlap the previous onesOption 2 - “Loop and fixed attachment method”. Form loop at end of string. Glue ¼-inch long dowel attachment to driver gear axle. Place string-loop over fixed dowel attachment and wrap string around axle,(by rotating the driver axle by hand)
Building a mousetrap car – Putting the pieces together: • Check and verify proper alignment of components • Test mousetrap car and make adjustments as necessary • Great job and see you at the competition!!!
The South Florida Industry Partners EducationMousetrap Car Design Seminar CONGRATULATIONS and THANK YOU. You are absolutely the very best. http://www.youtube.com/watch?feature=player_detailpage&v=83b3zgqTzz4#t=45s