Download
1 / 44
450 likes | 769 Vues
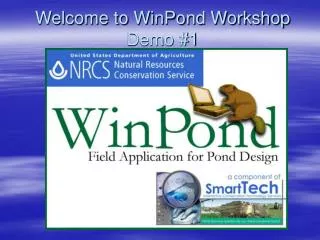
Welcome to WinPond Workshop. Workshop Objectives. Upon completion of this training you will: Be familiar with the parameters used in WinPond. Be able to set your options . Be able to develop a “default” template file to start new projects with WinPond.

E N D
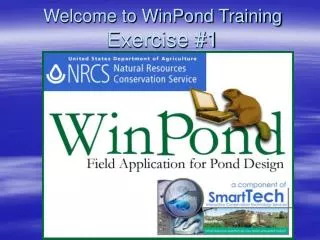
Welcome to WinPond Workshop CNTSC-WinPond Workshop
Workshop Objectives • Upon completion of this training you will: • Be familiar with the parameters used in WinPond. • Be able to set your options. • Be able to develop a “default” template file to start new projects with WinPond. • Be able to develop and enter data inputs for the WinPond program. • Be able to run the model and interpret the results. CNTSC-WinPond Workshop
AGENDA • History of WinPond • Set your options for the program • Develop default.prj file. • Complete DEMO #1 and review • Complete Exercise #1 and review • Complete Exercise #2 and review CNTSC-WinPond Workshop
History of WinPond • 2002 • Missouri’s Pond Design program selected as model for WinPond by Engineering Business Area Advisory Group (EBAAG) • Development began in July (Phase I) • Alpha version released in December CNTSC-WinPond Workshop
History of WinPond • 2003 • Alpha version tested • Beta version released in June • Beta version tested • Second beta version released in December CNTSC-WinPond Workshop
History of WinPond • 2004 • Second beta version tested • Third beta version released in July • Break team formed and met in Fort Collins to begin testing on “final” version • Continued testing; communicated problems via web-based collaboration software and email. CNTSC-WinPond Workshop
History of WinPond • 2005 • Testing continued • WinPond 2005, Version 1.0 released in September • 2006 • Beta Testing continues • New release is WinPond 2006, Version 1.5-10/2006 CNTSC-WinPond Workshop
User’s Guide for WinPond • my.NRCS -> Field Tools tab -> Click on Pond Design (WinPond) to access: USER GUIDE 210-7-6. • Users may obtain the software through State-level Information Technology Support (ITS) Managers, who have received the software and User’s Guide for distribution. A copy of the User’s Guide is also attached to this directive. Users are to discontinue using all prior versions of this software program and user guide. • Users are to direct questions or comments regarding the software or the User’s Guide to the appropriate State-level staff engineer or Agricultural Engineer, Central National Technology Support Center, by telephone, at (817) 509-3289. CNTSC-WinPond Workshop
User’s Guide for WinPond Or at eDirectives http://directives.sc.egov.usda.gov/ User Guides -> 210-7-6 CNTSC-WinPond Workshop
User’s Guide and WinPond for the Public The Public can obtain the user’s guide through the eDirectives. http://directives.sc.egov.usda.gov/ User Guides -> 210-7-6 Non-CCE installation guide, program, and training documents can be downloaded from: ftp://ftp-fc.sc.egov.usda.gov/ITC/TSPengineering/ WinPond_XP_Installation2.0.pdf ftp://ftp-fc.sc.egov.usda.gov/ITC/TSPengineering/ WinPond1.5REL3_PKG.zip ftp://ftp.ftw.nrcs.usda.gov/cntsc/WinPond/Powerpoints/ CNTSC-WinPond Workshop
Starting WinPond Start -> All Programs -> Engineering Applications -> WinPond -> WinPond FOLLOW ALONG ON YOUR COMPUTER CNTSC-WinPond Workshop
Main Program Window CNTSC-WinPond Workshop
“File” CNTSC-WinPond Workshop
“File”(Export Ground Data) Export Ground Data as *.txt, *.csv, *.prn, *.pts, *sdr, *svyImport into SET as Easting, Northing, Elevation, Description. CNTSC-WinPond Workshop
“File” Project data is now all stored in 1 single file instead of 5 separate ones. The single file will have a PRJ extension (e.g., Project123.prj ) Old projects from DOS program? The program will read data from the files in an old project (i.e., project done with the Missouri DOS Pond Design program). CNTSC-WinPond Workshop
“View” This is the principal spillway routing data or auxiliary spillway routing data. CNTSC-WinPond Workshop
“View”-Tabular Data Button Tabular Data CNTSC-WinPond Workshop
“Tools” This is basically “Change Defaults”from the DOS Program CNTSC-WinPond Workshop
“Help” CNTSC-WinPond Workshop
SETTING YOUR OPTIONSFOLLOW ALONG CNTSC-WinPond Workshop
Tools -> Options(General) C:\Documents and Settings\tony.funderburk\Local Settings\Application Data\USDA, NRCS\WinPond CNTSC-WinPond Workshop
Tools -> Options The settings entered here are stored in a file named WinPond.conf in the folder c:\Documents and Settings \user.name\Local Settings \Application Data\USDA, NRCS\WinPond\ CNTSC-WinPond Workshop
Tools -> Options (Aux. Spillway) CNTSC-WinPond Workshop
Tools -> Options (Ground) CNTSC-WinPond Workshop
Tools -> Options (Ground) CNTSC-WinPond Workshop
Tools -> Options (Earthwork) CNTSC-WinPond Workshop
Tools -> Options (Drawdown) CNTSC-WinPond Workshop
Tools -> Options (Design) Click OK to accept these options. CNTSC-WinPond Workshop
Options Your own option settings are know saved. CNTSC-WinPond Workshop
Menu Screen Tabs InputData InfoLine WinPond window Tab Advance (Ctrl Right-Left) CNTSC-WinPond Workshop
TIPS on ENTERING DATA Before you get started, keep these in mind: • ENTER key – preferred way to move between fields, rather than clicking with the mouse. • TAB key – can also use to move between fields but with no scrolling • Shift + TAB - moves cursor to the previous field • Delete or Backspace - use to delete characters in the input field CNTSC-WinPond Workshop
Creating a “default” template There are some data inputs (e.g., state, county, and designed by) that most user’s would like to come up as defaults whenever they begin a new project. This can be accomplished by creating a “default” project. CNTSC-WinPond Workshop
Creating a “default” template The first step is to select “File -> New” CNTSC-WinPond Workshop
Creating a “default” template The next step is to go through the screen tabs entering data for those fields that are fairly constant from design to design. Examples? State, county, designer; Rainfall frequencies for principal and aux. spillways; Front slope, back slope, top width; trials 1, 2, & 3; & aux spillway data. CNTSC-WinPond Workshop
Creating a “default” template (Project-T1) Location: Principal Spillway Design Storm-? yr-24 hr=?inches Freeboard Design Storm=25 yr-24 hr=?inches Allowable Velocity=5.0 fps. "NOT STAKED YARDAGE" CNTSC-WinPond Workshop
Creating a “default” template(Elevation-Storage-T2) • Elevation-storage data is normally data that will change from design to design. Data on this screen is therefore not a good candidate for a default template. To leave it blank and move to the next tab you will need to click on I am making a template project. CNTSC-WinPond Workshop
Creating a “default” template (Hydrology-T3) • Hydrology data-your Rainfall distribution type III is selected based on your State and county. You can select a typical storm frequency. CNTSC-WinPond Workshop
Creating a “default” template (Sediment-T4) Reduces the amount of storage available when the floodrouting is done Used to determine the minimum height for the inlet elevation CNTSC-WinPond Workshop
Creating a “default” template (Principal Spillway-T5) CNTSC-WinPond Workshop
Creating a “default” template (Conduit –T6) CNTSC-WinPond Workshop
Creating a “default” template (Auxiliary Spillway–T8) CNTSC-WinPond Workshop
Creating a “default” template Once you have entered all the data you want in your “default” project template, select “File -> Save As…” and save the project to default.prj in the default data path entered under Tools -> Options (for example, C:\Documents and Settings\user.name \Local Settings\Application Data \USDA, NRCS\WinPond\ CNTSC-WinPond Workshop
default.prj completed Now you have developed your “default.prj” template. It is time to do a DEMO. CNTSC-WinPond Workshop
Questions? • “The U.S. Department of Agriculture (USDA) prohibits discrimination in all its programs and activities on the basis of race, color, national origin, sex, religion, age, disability, political beliefs, sexual orientation, and marital or family status. (Not all prohibited bases apply to all programs.) Persons with disabilities who require alternative means for communication of program information (Braille, large print, audiotape, etc.) should contact USDA's TARGET Center at 202-720-2600 (voice and TDD). • “To file a complaint of discrimination write USDA, Director, Office of Civil Rights, Room 326-W, Whitten Building, 14th and Independence Avenue, SW, Washington, DC 20250-9410 or call 202-720-5964 (voice or TDD). USDA is an equal opportunity provider and employer.” CNTSC-WinPond Workshop