Download
1 / 21
210 likes | 331 Vues
The Mavica for the Maverick: A How-to Guide. Operating instructions for the Sony Mavica CD350 Digital Camera An Easy-to-Follow Guide to Everything You Need to Know to Start Shooting Photos Today Prepared by Joanne K. Hammond, based on the owner’s manual that accompanies the camera.

E N D
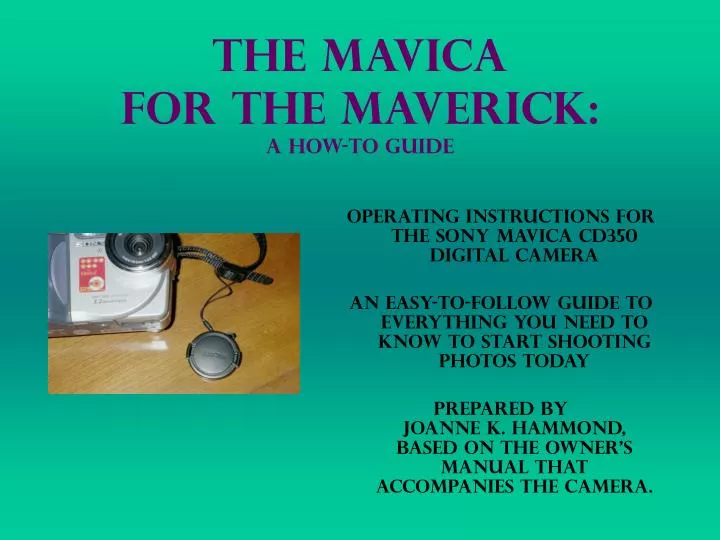
The Mavica for the Maverick:A How-to Guide Operating instructions for the Sony Mavica CD350 Digital Camera An Easy-to-Follow Guide to Everything You Need to Know to Start Shooting Photos Today Prepared byJoanne K. Hammond,based on the owner’s manual that accompanies the camera.
Meet Your Camera Let me introduce you to the digital camera that writes images to a CD-R or a CD-RW 8-cm disc. You can shoot still shots as well as video. Images can be uploaded to your computer via the CD-ROM drive or by a USB cable.
Identify the Parts: • Shutter Button • Microphone • Lens • Lens Cap • Power Button • A/V OUT Jack; USB Jack; DC IN Jack • Battery Cover • Tripod Receptacle
Identify the Parts, Continued • Access Lamp • Charge Lamp • LCD Screen • Speaker • Control Button • Menu Button • Display On/Off Button • Reset Button • Mode Dial • Zoom/Index • Image Size/Delete
Install The Battery Pack • Open the Battery Cover • With the arrow mark on the battery facing toward the battery compartment, Slide an InfoLITHIUM NP-FM50 battery pack in & close the cover.
Charge The Battery Pack • Open the “DC IN” jack cover. • connect the AC Adaptor to the “DC IN” jack. the DC plug must have the arrow mark facing forward. Insert the plug into the IN JACK. • Connect one end of the power cord to the AC Adaptor and the other end to a wall outlet. • The CHG lamp lights up while charging is going on and goes out when charging is complete. • Disconnect the AC Adaptor. DC In Jack AC Adaptor DC Plug
Battery Charge Indicator • The LCD screen has a picture of a battery that shows in black & white how much time is available to shoot pictures before the battery needs to be recharged. • Black indicates actual remaining time, with minutes shown in text • White indicates portion of battery charge already used
How Long Does the Battery Last? The chart gives an approximation of the number of still images you can shoot and the battery life that you can expect when using a fully charged battery at room temperature and shooting in normal mode.
How Long Does the Battery Last for movies? The chart shows how long the battery can be expected to last when shooting movies at 160 (Mail) image size. Both number of images and battery life will decrease with use of flash, frequent zooming, and turning the camera on and off many times.
Auto Power-Off When using the battery pack, the camera will turn itself off after 3 minutes of non-use in order to conserve the battery power.This does not apply when camera is plugged into a wall outlet.
The Control Button You will use the control button to select menu items, keep or discard images, and change the set-up. Each time, use the directional arrows to select the value wanted, then press the center bump to confirm the selection.
The clock setting You have the choice of whether to have the date & time show on the image. Turn the Mode Dial to Set-Up to access date & time options. If the battery is fully discharged, the Clock Set screen will appear and you will need to re-do this step.
Inserting & Removing a Disc • Open the disc cover • push the disc cover lever down to open • Put an 8 cm CD-R or CD-RW disc in place • Printed side up • Push down on center of disc until it clicks into place • Close disc cover *** • When ready to remove the disc: • make sure the ACCESS lamp is NOT flashing • Wait for disc to stop rotating
Initializing a Disc • Initialization is needed for a disc to record images. • When you perform finalization on a disc to view images via your computer’s CD-ROM drive, initialization will occur automatically so you can continue to record images on the disc. • When you insert a new disc and turn the Mode setting to the camera icon, an initialization wizard will guide you through the initialization process. Just follow the steps.
Set the Mode Dial to the camera icon and turn on the power. Press the Image Size button. the icon looks like a dot-filled square (next to the garbage can). Select the size of images you want to shoot. Use the Control Button to select and choose. Set the Image Size
How Many Images Fit on the Disc?Choose according to plans for use; images can be re-sized later
Confirm before write(Confirm whether or not to record images) • Set mode dial to SET UP. • Select “Disc Tool 2,” select “Confirm B. Write,” select “ON,” and press the center of the control button. • After shooting an image, use the control button to select “Record” or “Delete”, then press the center of the control button to confirm the choice.
Installing the PTP Manager: Installation is not required when using Windows XP. When using a different operating system, run the supplied CD-ROM drive to install the PTP manager. Plug the power cord to the AC Adaptor and then to a wall outlet. Turn on computer & camera. Connect USB cable to the USB jack of camera. Connect other end of USB cable to computer at a USB port. (Rear port recommended for a desktop computer.) Copying images into the computer via USB connection
After following steps on previous screen, wait for the PTP Manager to start. (This takes some time, be patient.) A wizard will begin to walk you through the process. Select the images to copy to the computer, specify copy destination (usually “My Pictures”), and click “Finish.” If the wizard does not start on its own: Go to “My Computer” on desktop or by way of start button. Select the digital camera as the device to use. Select “Copy Images to Computer.” Copying images into the computer via USB connection -- Continued
More Information onlinevisit http://www.iq.sony.com/srvs/sosdocs/default.aspEnter the model number MVCCD350 and click “search” to find the following documents: Marketing Features & Specifications,Operating Instructions (primary manual),Pocket Guide: 2004 Digital Camera (pgs.16, 19)(ThE END)