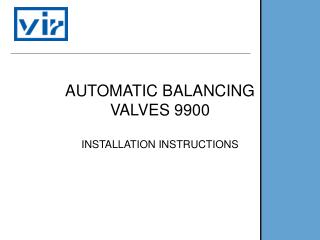
AUTOMATIC BALANCING VALVES 9900
AUTOMATIC BALANCING VALVES 9900. INSTALLATION INSTRUCTIONS. Index. Kit F99K and Kit KRR2: description and composition Installation Installation of valve body Flushing the system Installation of the regulating cartridge. Kit F99K and Kit KRR2.

AUTOMATIC BALANCING VALVES 9900
E N D
Presentation Transcript
AUTOMATIC BALANCINGVALVES 9900 INSTALLATION INSTRUCTIONS
Index • Kit F99K and Kit KRR2: description and composition • Installation • Installation of valve body • Flushing the system • Installation of the regulating cartridge
Kit F99K and Kit KRR2 • A complete automatic balancing valve 9900 is composed of two main parts: the valve body and the regulating cartridge. • These two parts come in two separate kits
Kit F99K The kit F99K includes: • Valve body • Valve brochure • Aluminum tag • Plastic tie
Kit F99K The valve body itself is composed of: • Valve housing • Two unions • Two union-nuts • Two O-rings • Laser-marked distance ring
Kit KRR2 The kit KRR2 includes: • Plastic regulating cartridge • O-ring • Adhesive data label
Installation ofValve Body • Open the kit F99K • Install union and union-nuts onto the pipes
Installation ofValve Body • Verify that the O-rings are properly mounted into the housing grooves O-ring mounted into the housing groove
Installation ofValve Body • Connect housing to the unions by means of the union-nuts ATTENTION: Pipeline sections must be parallel and co-axial The pipeline must not subject the valve to any bending or shear efforts
Installation ofValve Body • Connect the blank aluminum tag to the valve body by means of the plastic tie
Flushing the System Once all the valve bodies have been installed, flush the system. A correct flushing operation is important in order to remove any debris that could prevent a correct functioning of the regulating cartridges.
Installation of the Regulating Cartridge After flushing the system, the regulating cartridges can then be inserted into their corresponding valve bodies. • Remove the valve housing from the pipeline • Open kit KRR2
Installation of the Regulating Cartridge • Slip the O-ring onto the cartridge • Insert the cartridge with the O-ring into the housing of the valve • Insert the distance ring
Installation of the Regulating Cartridge OBS #1: • The O-ring does not need to be inserted all the way up to the cartridge shoulder • The cartridge body is slightly conical: for an easier insertion into the housing, slip the o-ring just half way up the cartridge
Installation of the Regulating Cartridge OBS #2: • A laser-marked arrow indicates the correct direction in which to insert the distance ring Laser-marked arrow indicating insertion direction
Installation of the Regulating Cartridge • Re-install the housing with the cartridge on the pipeline • ATTENTION: ensure that the arrow marked on the body is pointing in the same direction of the flow Forged arrow indicating correct flow direction
Installation of the Regulating Cartridge • Apply the adhesive label indicating the cartridge’s nominal data onto the valve’s aluminum tag, as valve identification
THE INSTALLATIONIS NOW COMPLETE! For more information on our products please contact: tcnsales@vironline.com Via Circonvallazione, 10 13018 Valduggia (VC), Italy Tel: +39 0163 47891 Fax: +39 0163 47895 www.vironline.com