Download
1 / 143
1.49k likes | 2.31k Vues
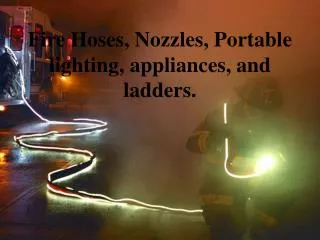
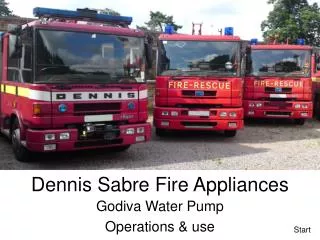
Fire Hoses and Appliances Firefighter II Module A. McHenry County College Firefighter II Class Spring Semester 2002. FIRE HOSES and APPLIANCES. See list of objectives given to you prior to class. Identify is classroom Demonstrate is “hands-on”. REFRRENCES.

E N D
Fire Hoses and AppliancesFirefighter II Module A McHenry County College Firefighter II Class Spring Semester 2002
FIRE HOSES and APPLIANCES • See list of objectives given to you prior to class. • Identify is classroom • Demonstrate is “hands-on”
REFRRENCES • IFSTA Essentials, 4th Edition, Chapter 12 • Delmar, Firefighter’s Handbook, copyright 2000, Chapter10
Fire Hoses and Appliances Identify the construction features of hose 2-7.1
Material from which hose is made: • Cotton • Nylon • Rayon vinyl • Poly-mired vinyl • Polyester
Construction methods: • Braided • Wrapped • Woven jacket • Poly-mired covered
Fire Hoses and Appliances Identify the types of fire hose. 2-7.2
Types of fire hose • Booster Line • Braided • ¾ inch and 1 inch • Attack Line • Woven-jacket or poly-mired covered • 1 ½ inch, 1 ¾ inch, 2 inch, 2 ½ inch, and 3 inch • Supply Line • Woven-jacket, poly-mired cover, rubber • 2 ½ inch, 3 inch, 4 inch, 5inch, 6 inch
Intake Line • Woven jacket, poly-mired, or wrapped • Hard suction and/or soft suction • Also know as soft or hard sleeve
Fire Hoses and Appliances Identify the types of fire hose damages and their preventions. 2-7.3
Mechanical Damage • Worn spots • Rips • Abrasions • Cracked inner lining • Crushed or damaged couplings
Mechanical Damage Prevention • Avoid laying or pulling hoses over sharp corners. • Provide warning devices to divert traffic. • Prevent vehicles from running over hoses and couplings. • Close nozzles slowly. • Change the bends in the hose when re-bedding. • Provide chaffing blocks • Avoid excessive pump pressures on hose lines.
Thermal Damage • Charring • Melting • Drying out of rubber lining
Thermal Damage Prevention • Protect hose excessive heat/fire. • Do not allow hose to remain in heated area after drying. • Use a moderate temperature for drying • Keep outer jacket dry. • Run water through hose that has not been used for some time. • Avoid drying hose on hot pavement and/or direct sunlight • Prevent hose from being laid to close or form coming in contact with vehicle exhaust. • Use hose bed covers to shield hose from elements. Freezing temperatures(snow and ice) also damage hose.
Mildew/Mold Damage(Organic) • Decay • Mold • Mildew • Deterioration
Chemical Damage • Exposure to petroleum products • Exposure to run off • Exposure to alkali and acids • Exposure to chemical materials and vapors
Organic Damage Prevention • All wet hose should be removed from apparatus, and replaced with good, dry hose. • Hose should be removed, inspected, swept, and reloaded every thirty days if not used. • Exercise hose every thirty days. • Run water through all hose every 90 days.
Chemical Damage Prevention • Thoroughly scrub all traces of acid contacts with baking soda and water. • Periodically remove hose from the apparatus, wash it, and run water through it. • Properly test hose if any suspicion of damage. • Avoid laying hose in the gutter. • Properly dispose of hose that has been exposed to hazardous materials and cannot be decontaminated.
General Care and Maintenance of Hose • Brush of loose dirt and such • broom • Washing hose • Several different ways • Wash with warm water and a mild soap • Commercial or generic hose washers • Rinse hose with water in different are than washed
General Care and Maintenance of Hose • Drying hose • Rubber jacket hose can be re-bedded wet, woven jacket and such cannot! • Use commercial hose dryer • Hang in hose tower
General Care and Maintenance of Hose • Storing • Should be stored rolled • On acceptable racks • Well ventilated room
Fire Hoses and Appliances Identify the construction features of fire hose couplings. 2-7.4
Materials • Brass alloy • Aluminum alloy • Magnesium
Types of Couplings • Threaded • Storz (pronounced stortz) • Others • Quarter turn • Oil filled rocker jug • Snap or Jones
Manufacturing Techniques of Couplings • Drop forged: hardest • Extruded: somewhat weaker than drop forged • Cast: weakest
Threaded Couplings • Three piece • Used on intake hoses • Five piece • Usually found on appliances and adapter fittings
Parts of Couplings • Shank • Swivel • Higbee cut and Indicator • Lugs
Shank • Also called tailpiece, bowl, or shell • Male has rocker lugs or pins • Female shank is smooth
Swivel • Contains female threads • Permits coupling without turning hose • Has rockers/lugs/pins • Shanks is smooth
Higbee Cut and Indicator • On both couplings • Special type thread designed to provide a positive connection between couplings • Indicator is a shallow indention of one of the lugs • Helps eliminate cross threading
Lugs • Pin • Not to common anymore, usually older hose • Tends to snag when hose is dragged • Rocker • Rounded to prevent hang ups • Found on all modern hose • Usually two to three lugs • Recessed • Usually found on booster lines
Storz Couplings • “Sexless” • No distinct male and/or female coupling • Coupled by a 1/3 turn • Newer ones have locking components to prevent water pressure spinning of hose • Grooved lugs • Insert rings built into the swivel
Care of Fire Hose Couplings • All parts of couplings are susceptible to damage • Male threads can be damaged if not protected • Female threads are not exposed, but the swivel is subject to bending damage
Care of Fire Hose Couplings • Avoid dropping and/or dragging • Do not permit vehicles to ride over them • Examine couplings when washing hose • Clean threads to remove tar, gravel, and oil • Inspect gasket, and replace if cracked or creased • Remove the gasket and twist the swivel in warm, soapy water.
Care of Fire Hose Couplings • Swivel gaskets and expansion gaskets should be tested after use and/or cleaning of the hose. • Swivel gasket- used to make the connection water tight. • Expansion Ring Gasket- used at the end of the hose where it is expanded into the shank of the coupling. See pictures. • Pinch the gasket between together between the thumb and index finger. This usually show any defects or signs of determination.
Hose Rolls Identify the uses of hose rolls. 2-7.5
Straight Roll • Placed in storage • Returned to quarters for washing • Loaded back on the apparatus
Donut Roll • Situations when it is going to be deployed directly from a roll for use. • Used when both ends to be together.
Twin Donut Roll • Used for a compartment roll which may be transported and used for high-rise operations. • Self-Locking Twin Donut • Same as above, except a carrying strap is formed.
Forward and Reverse Hose Lays Identify the difference between a forward and a reverse hose lay. 2-7.6
Hose Lays • Forward Lay • Reverse Lay • Split Lay
Forward Hose Lay • Also called a straight lay. • From the water source to the scene. • Laid form the water source to the fire.(tagging the hydrant) • Hose bed set up with female coupling coming off first. • Primary advantage is that pumper is at fire scene so hoses, tools, etc. can easily and quickly e obtained. • Operator also visual contact with crew and react better to changing conditions.
Forward Hose Lay • Disadvantage • Longs lays are near impossible and smaller diameter supply lines (21/2 and 3 inch) may need a second pumper to boost pressure. • One firefighter must be left at the hydrant to secure the water supply.
Reverse Hose Lays • Hose is laid from the fire scene to the water source. • The pumper must first stop at the scene, do a size up and drop the supply line. • Should be loaded with the male coupling coming off first. • Usually done with relay operations and/or drafting operations.
Reverse Hose Lays • Disadvantages • Essential tools and equipment are located far from the fire scene • This is also done when the initial engine attacks the fire and the second engine lays a supply to the initial attack engine.
Split Lays • Two lines laid forward • Two lines laid reverse • Reverse lay followed by a forward lay • Two lines laid forward followed by one or two lines laid reverse • Two lines laid reverse followed by the one or two lines laid forward.
Precautions while Advancing Hose Lines Identify precautions to be followed while advancing hose lines to a fire. 2-7.7
Advancing Hose Lines • Safety!!!!!!!!! Be alert for potential dangers especially of backdrafts, flashover, and potential or occurring building collapse. • All firefighters should be on the same side of the hose. • Check door for heat!, before you open it. • Bleed excess air from hose line and check nozzle pattern before entering. • STAY LOW! • Avoid blocking ventilation openings such as doors and windows.
Loading Hose Some General Guidelines.
Hose Loading • Check gaskets and swivels before connecting any hose. • When two sections are connected keep flat sides on same plane. • Hand tighten connections. • When the hose is bent to load, smooth the bend. • Avoid loading hose so that the coupling “turns”. Use a “dutchmen” to prevent this. • For LDH load all couplings in the front of the bed. • Do not pack hose tightly.