Download

1 / 10
0 likes | 3 Vues
Setek WiFi Extender setup is a quick process to boost your internet coverage and remove dead zones. By plugging in the device, connecting via Wi-Fi, and following the setup guide, you can enjoy stronger, faster signals across your home or office, ensuring seamless streaming, browsing, and gaming on all devices.

E N D
Mastering Your Setek WiFi Extender: Reset and Reconfiguration Welcome to this comprehensive guide on managing your Setek WiFi extender. We'll walk you through the essential steps to reset your device to factory settings and then efficiently reconfigure it for optimal performance. Whether you've forgotten your password, are troubleshooting persistent issues, or simply need a fresh start, this guide has you covered.
Introduction Why Reset Your Setek Extender? Forgot Password? Troubleshooting Issues Clean Start Regain access when the admin password is lost or forgotten. Resolve persistent connectivity problems or erratic behavior. Wipe all customized settings and restore factory defaults for a fresh configuration. Resetting your device is often the final, yet most effective, solution when other troubleshooting steps fail. It brings your extender back to its out-of- the-box state, ready for a new setup.
Reset Process Step-by-Step Guide to Reset Step 3: Initiate Reset Step 2: Verify Power Supply Locate the 'Reset' button on your extender. It's usually a small, recessed button inside a tiny hole. Gently press and hold this button for at least 10 seconds using a paper clip or a pin. The extender's lights will blink and then stabilize, indicating a successful reset. Step 1: Disconnect Devices Ensure your Setek extender is properly powered on. Plug it into a stable wall socket if it's not already. Look for a solid power LED indicator, which confirms the device is fully booted and ready for the reset process. Begin by disconnecting all devices connected to the extender's network. Crucially, remove any Ethernet cables linking the extender to your main router. This prevents potential conflicts and ensures a clean reset.
Impact of Reset What Happens After a Reset? When your Setek WiFi extender undergoes a reset, it reverts to its factory default settings. This means: All customized settings are erased: Any personalized Wi-Fi names (SSIDs), passwords, and security protocols you've configured will be wiped clean. Admin credentials revert: If you changed the default admin username or password for the extender's web interface, these will revert to the original factory defaults. A blank slate: The device becomes 'as good as new' from a software perspective, ready for a fresh configuration as if you just unboxed it. Essentially, the reset clears all user-defined data, allowing you to start afresh with the setup process.
Next Steps Reconfiguring Your Extender Now that your Setek extender is running on factory settings, it's essential to reconfigure it to extend your WiFi network. You have two primary methods for setup: WPS Button Method: A quick and easy way for compatible routers. Web Interface (IP Address) Method: Offers more control and is universally compatible. Both methods are straightforward. We'll detail the WPS button method in the next section for your convenience.
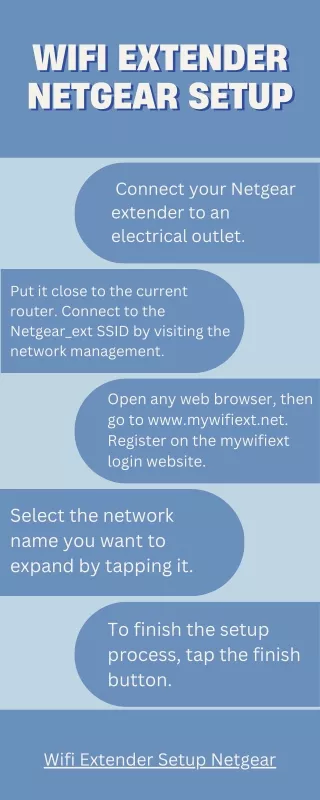
WPS Setup Setting Up with the WPS Button 01 02 03 1. Proximity is Key 2. Power Cycle Router 3. Power Up Extender Bring your Setek WiFi extender into the same room as your main host router. This ensures a strong initial signal for pairing. Temporarily power off your main router. Wait for about 5 minutes before powering it back on. This refreshes its network services. Once your router is fully booted, power on your Setek extender. Ensure both devices are connected to functional electrical sockets for a stable power supply. 04 05 4. Initiate WPS on Router 5. Initiate WPS on Extender Locate the WPS button on your main router and press it. It might be labeled 'WPS' or have an icon of two arrows chasing each other. Within two minutes of pressing the router's WPS button, find and press the WPS button on your Setek extender. Allow a few moments for the devices to establish a connection. Your extender should now be successfully set up and connected to your host router, extending your Wi-Fi coverage.
Alternative Setup Setting Up via Web Interface For a more controlled setup or if your router lacks a WPS button, you can configure your Setek extender via its web interface. This method involves connecting directly to the extender and accessing its configuration page through a web browser. 1. Connect your computer or smartphone directly to the extender's default Wi-Fi network (usually an open network like "Setek_Extender" or similar, found on the device label). 2. Open a web browser and type the default IP address (e.g., 192.168.10.1) or the web address (e.g., setekwifi.net) found on the extender's label into the address bar and press Enter. 3. Log in using the default admin credentials (often "admin" for both username and password). 4. Follow the on-screen setup wizard to select your main Wi-Fi network, enter its password, and customize your extender's network name. This method provides a more detailed overview of your extender's settings and allows for advanced customization.
Placement & Connectivity Optimizing Your Extended Network Optimal Placement Connect Devices Monitor Performance After setup, move the extender to a location roughly halfway between your main router and the Wi-Fi dead zone. Ensure it receives a strong signal from the router and can effectively transmit to the desired areas. Once positioned, connect your client devices (smartphones, laptops, smart TVs) to the extender's new Wi-Fi network. You should now experience improved coverage and signal strength in previously weak areas. Periodically check the signal indicator lights on your extender. These often tell you the strength of the signal it's receiving from your router, helping you fine-tune its placement for the best performance. Proper placement is critical for maximizing the effectiveness of your WiFi extender and achieving seamless connectivity throughout your home.
Key Takeaways Summary of Your Guide 1 2 Reset is a Solution Preparation Matters A factory reset is a powerful tool for troubleshooting and regaining access to your Setek extender. Disconnecting devices and ensuring stable power are crucial preparatory steps for a successful reset. 3 4 Simple Reconfiguration Optimize Placement Whether via WPS or web interface, setting up your extender after a reset is straightforward. Strategic positioning of your extender is key to maximizing Wi-Fi coverage. By following these steps, you can confidently manage and optimize your Setek WiFi extender for a robust and reliable home network.
Conclusion Enjoy Your Enhanced WiFi! You've successfully learned how to reset your Setek WiFi extender and get it back up and running. This knowledge empowers you to tackle common network issues and ensure seamless connectivity throughout your home. "A well-managed network brings peace of mind and effortless digital living." Feel free to bookmark this guide for future reference. For more detailed assistance or specific troubleshooting, always refer to your device's official documentation or visit the Setek support website.