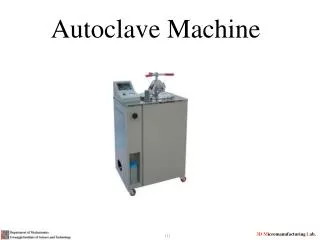
Autoclave Training Guide
Autoclave Training Guide. York University Department of Occupational Health and Safety Suite C, East Office Building, 4700 Keele St. Telephone : 416-736-5491 www.yorku.ca/dohs/biosafety. Revised: 16.November 2010. Autoclaving Training Outline. Autoclave Overview Autoclave Hazards

Autoclave Training Guide
E N D
Presentation Transcript
Autoclave Training Guide York University Department of Occupational Health and Safety Suite C, East Office Building, 4700 Keele St. Telephone : 416-736-5491 www.yorku.ca/dohs/biosafety Revised: 16.November 2010
Autoclaving Training Outline • Autoclave Overview • Autoclave Hazards • What can be Autoclaved • How to Autoclave • Cycle selection • Proper containers • Proper loading/unloading • Autoclave Performance Indicators
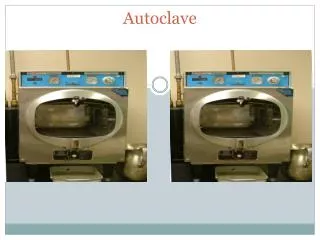
Steam Sterilization • Pressurized device that uses heat, steam and pressure to achieve sterilization or decontamination
Autoclave Overview • Typically operated at 121°C, 15psi, for 15-45 minutes. • Allows the heating of liquids above boiling point. • Uses moist heat (steam) to increase efficiency of sterilization. • Heat is used to coagulate proteins, which destroys microorganisms and any potential biohazard.
Autoclave Hazards • Tremendous pressure from steam in chamber provides explosive potential. • High temperatures creates potential for burns and scalding. • Potential exposure to hazardous fumes • Inadequate decontamination allows for the potential of biological hazards to contaminate personnel and the environment.
What you CAN autoclave Biological waste that can be autoclaved: • Microbial stocks and cultures • Items contaminated with such waste: petri dishes, eppendorf tips, pipettes, gloves, paper towel Autoclaving is also used for: • Items for sterilizations such as; glassware media, aqueous solutions
What you CAN’T Autoclave • DO NOT Autoclave: • BIOMEDICAL WASTE • Including human anatomical or blood waste, animal anatomical or blood waste, cytotoxic waste, or any waste in contact with these waste products (including sharps waste). • RADIOACTIVE WASTE • HAZARDOUS CHEMICAL WASTE • This includes anything contaminated with a toxic, volatile, corrosive, or mutagenic chemical • (e.g.) bleach, formalin, glutaraldehyde, ethidium bromide • Check MSDS beforehand
Autoclaves used to treat biohazardous waste at York • Lumbers Room 120A • Farquharson 227A • Chemistry Building 447
How to Autoclave • Preparing your items for autoclaving • Loading the autoclave • Choosing the cycle settings • Unloading the autoclave • Aborting Autoclave
Autoclaving: Preparing your items • Sign into log book • Keeps track of autoclave use for maintenance records • Use personal protective equipment! • Eye protection • Heat resistant gloves • Lab coat
Autoclaving: Preparing your items • Use a primary container • Container comes into direct contact with the contaminated or non-sterilized material or fluid • Do not fill more than 75% of holding capacity
Autoclaving: Preparing your items • Use a primary container (cont’d) • Must NOT be a tightly sealed container (might explode) • Primary container must permit heat (steam) penetration • Loosen screw caps or use self venting caps • Cap open containers with aluminum foil or muslin • If using plastic waste bags, leave a small opening Small opening Loosen screw caps
Autoclaving: Preparing your items • Use a secondary container • Used to contain any spills • The sides of the secondary container must be sufficiently high to contain any spill that may occur • Tray MUST be autoclave safe For liquids add water
Autoclaving: Preparing your items • Use temperature sensitive tape • Will indicate that high temperature has been achieved • Will not prove that decontamination or sterilization was successful • Will assist in keeping track of autoclave and non autoclaved items Before After
Autoclaving: Loading the autoclave • NEVER autoclave liquid loads using a solid load cycle • liquids will boil over • Be cautious if autoclave was recently used • Rack may be hot • Use heat protective gloves • Make sure tray is locked on dolly • Rack may slide out unexpectedly if not locked
Autoclaving: Loading the autoclave • Farquharson: • Tighten door so that prongs are fully extended • If noise and/or steam escapes, abort the cycle and tighten the door more • Lumbers • Keep the door button pushed until the ready prompt is on the screen
Autoclaving: Which cycle to use • Autoclaves run 3 types of cycle programs • The type of cycle depends on what is being autoclaved: Note: for Farquharson, use Solid/Gravity for wrapped, solid items
Autoclaving: Choosing a Cycle • For Liquids: • 20 mins / litre of liquid, 5 mins per additional litre • For Solids: • Glassware (empty): 15 mins • Instruments (utensils): 30 mins • Biohazardous Garbage: at least 30 mins per full bag • Use biological test strips to optimize duration
Unautoclaved Autoclaved (regular) Autoclaved (due to being compressed & sealed) Autoclaving: Proper loading • Autoclave biohazardous waste separately • Do not over load primary or secondary containers • Allow for sufficient steam penetration • Do not fill more than 75% to allow expansion without overflow • Do not pack or compress contents
Autoclaving: Unloading autoclave • Use PPE • Wait for autoclave to state END CYCLE before opening door • When opening, stand away from door opening • Make sure no one is standing by door opening • Farquharson: turn door knob slowly and open door slightly to allow steam to escape • Lumbers: make sure your hands are not above the top vents
How to Autoclave – Unloading autoclave • Make sure rack is locked on to dolly • Unmark any biohazard signs that may be seen on waste bags • Dispose of waste in proper bins • Please put back heat resistant gloves for other users • Keep autoclave doors shut when not in use
How to Autoclave – Aborting • Only qualified personnel should attempt to troubleshoot an autoclave • Farquharson • Large autoclave: push abort button • Small autoclave: need to manually advance through the autoclave cycle • Lumbers • Push abort button
Autoclave: Performance Indicators • How to know if autoclave is functioning correctly:
Autoclave Issues/Concerns? Contact: • Your Supervisor Farquharson and Lumbers: • Jane Grant, Biology, Lumbers 130, x22657 • Debbie Freele, Biology, Lumbers 115, x22655 • Prof. Roger Lew, Biology, Farq 230, x66114 Chemistry Building: • Philip Johnston, Chemistry Building, x33119 York Biosafety Officer: • Debbie Kolozsvari, DOHS, x44745
Autoclave Training • Completion of in-class autoclave training is included with the Biosafety Training session. • For practical, hands-on training, contact your supervisor.