Drawing Graphic Objects with PowerPoint Drawing Worksheet 2
Drawing Graphic Objects with PowerPoint Drawing Worksheet 2 13. Basic Drawing Directions include these four steps: a. Click the tool that is needed on the Drawing toolbar. b. Position the mouse where you want the shape to start. c. Hold down the left mouse button and drag to the end point.

Drawing Graphic Objects with PowerPoint Drawing Worksheet 2
E N D
Presentation Transcript
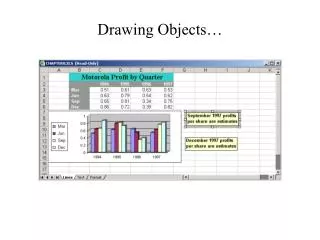
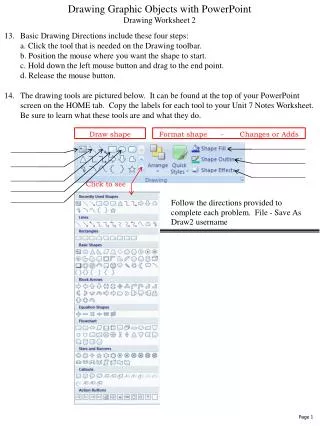
Drawing Graphic Objects with PowerPoint Drawing Worksheet 2 13. Basic Drawing Directions include these four steps: a. Click the tool that is needed on the Drawing toolbar. b. Position the mouse where you want the shape to start. c. Hold down the left mouse button and drag to the end point. d. Release the mouse button. 14. The drawing tools are pictured below. It can be found at the top of your PowerPoint screen on the HOME tab. Copy the labels for each tool to your Unit 7 Notes Worksheet. Be sure to learn what these tools are and what they do. Draw shape Format shape - Changes or Adds Click to see Follow the directions provided to complete each problem. File - Save As Draw2 username Page 1
Problem #1 (Element 1: Line) … Draw three straight lines in the space below. Click the line tool and hold the shift key as you drag the mouse in order to draw horizontal lines. After drawing the three lines, click on each line to make the following changes to it. 1st Line - Change the line style to 6 pt solid and the line color to any color besides black 2nd Line - Change the line style to 4 1/2 pt solid and the line color to any 2-color pattern 3rd Line - Change the line style to 3 pt solid, arrow style 5, and a black & white pattern Problem #2 (Elements 3, 4 and 5: Texture, Color, and Shape) … Draw five different Autoshapes - Basic Shapes. Be sure to include one rectangle and one oval. After drawing the shapes, click on the shape and make the following changes. 1st Shape - Use the 3-D tool to add any 3-D effect to the rectangle, change the color 2nd Shape - Use the Shadow tool to add any shadow to the oval 3rd Shape - Use the Fill Color tool to add the Fill Effect > Patterns > any 2-color pattern 4th Shape - Use the Fill Color tool to add the Fill Effect > Texture > choose any texture 5th Shape - Use the Fill Color tool to add the Fill Effect > Gradient > Preset > Desert Problem #3 (Element 1: Line) … Use the Autoshapes - Lines - Scribbles (bottom row, right corner) to write your name first and last names. Use your best cursive handwriting. Problem #4 (Elements 1, 3, 4, and 5: Line, Texture, Color, and Shape) … Use the Autoshapes - Lines - Curve (bottom row, left corner) to draw one hat such as a ball hat, straw hat, cowboy hat, etc. Fill the hat with solid color and a texture. HINT: to use both solid color or a texture the hat must be drawn using more than one shape. Page 2
Problem #5 … Use the WordArt tool, click on a shape and click OK. Type a title that says … Dunlap Middle School. Choose Size 28. Problem #6 … Use the Text box tool to create a text object that says … Your First and Last Name (ENTER) and Your Birthday. Make the following changes to the text. Your Name - Select your name and choose 18 pt, bold, and change the color Your Birthday - Select your birthday and choose 14 pt and change the color Problem #7 (Element 2: Space) … Draw a small circle (hold down the SHIFT key as you draw the oval) and fill it with the color red. Then draw a larger blue rectangle over the circle. The circle will be hidden by the rectangle. Choose Draw > Order > Send to Back in order to see both the red circle and the blue rectangle. This process is called layering. Problem #8 (Element 2: Space) … Click the mouse in the white area next to the house below. Now, hold down the Shift key while you click on each of the objects that make the house. Release the Shift key and choose Draw > Group. Problem #9 … Press Ctrl + D to duplicate the shape that you have just grouped. Move this new shape to the right corner of the paper (it should be to the left of the words “Page 3.” Page 3