MPFL Reconstruction - Surgical Technique Guide | MedShape
140 likes | 171 Vues
Read this file to learn about the MPFL Reconstruction u2013 surgical technique guide using MedShapeu2019s Eclipseu2122 Soft Tissue Anchor & Morphixu00ae Suture Anchor System. For more detailed information about MedShape's innovative products and our other surgical technique guides visit www.medshape.com.

MPFL Reconstruction - Surgical Technique Guide | MedShape
E N D
Presentation Transcript
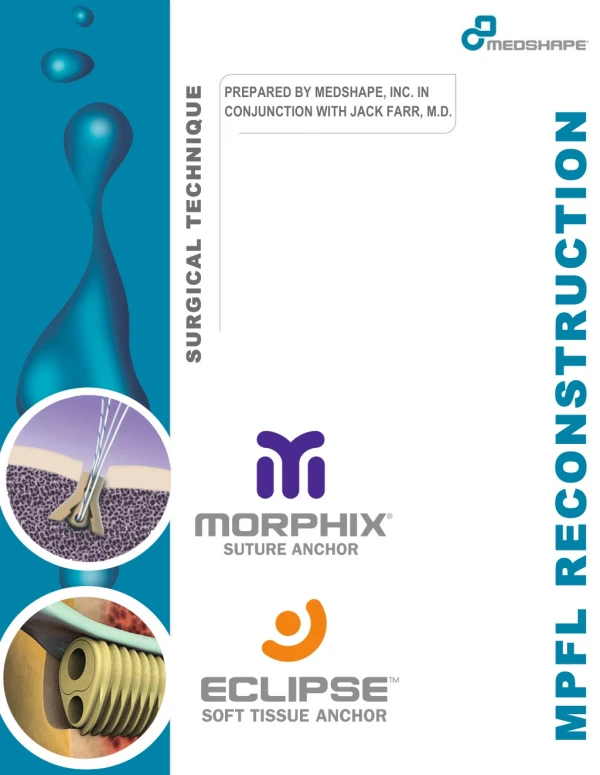
! SURGICAL TECHNIQUE SURGICAL TECHNIQUE PREPARED BY MEDSHAPE, INC. IN CONJUNCTION WITH JACK FARR, M.D. MPFL RECONSTRUCTION MPFL RECONSTRUCTION
1 MPFLRECONSTRUCTION LATERAL PATELLOFEMORAL INSTABILITY AND THE MEDIAL PATELLOFEMORAL COMPLEX SURGICAL TECHNIQUE Lateral characterized by a deficiency of the medial patellofemoral retinacular soft tissues due to ligamentous laxity and/or injury.1,2,5 These medial retinacular structures include – (1) the medial patellofemoral ligament, (2) the medial patellotibial ligament, patellomeniscal ligament, superficial medial retinaculum. However, the current body of evidence indicates that the medial patellofemoral ligament (MPFL) serves as the primary passive restraint preventing lateral displacement of the patella. Clinical studies have shown the majority of acute lateral patellar dislocations result in complete or partial tears to the MPFL.1 Likewise, conditions such as trochlear or soft tissue dysplasias can predispose a patient to recurrent patellar dislocation or subluxation and subsequent injury and hyperlaxity of the medial soft tissues.1,2,5 INDICATION FOR MPFLRECONSTRUCTION MPFL Reconstruction is indicated in patients with lateral patellar instability, caused by tears or laxity of the MPFL. The patient often has a a history of acute or recurrent patellar dislocation and/or patellar subluxation.2 AN ANATOMICAL MPFLRECONSTRUCTION patellofemoral instability is Between 0° and 70° of flexion, the native MPFL is isometric in length and tension is minimal; beyond 70° of flexion, the MPFL becomes lax and tension is negligible or zero.3 The femoral attachment site has been shown to have the greatest effect on MPFL isometry. Studies indicate that reconstruction where the graft is proximally or distally malpositioned attachment site by only 5 mm can cause significant nonisometric resulting in abnormal graft tension and elevated forces in the medial patellofemoral joint.3,4 Consequently, accurate placement of the femoral reattachment site has been identified as the most significant factor influencing surgical outcome.4 THE TECHNIQUE The following technique, developed by Dr. Jack Farr, II, reproduces the anatomy of the MPFL by ensuring placement of the femoral attachment site and allowing for fine adjustments to graft length. First, two Morphix® Suture Anchors are seated in the proximal two-thirds of the medial patellar margin, establishing the patellar fixation sites. The more sensitive femoral attachment site is determined by anatomometric testing. The doubled end of a semitendinosus autograft or allograft is fixated within the femoral bone tunnel. The unique, nonrotational deployment of the Eclipse Soft Tissue Anchor preserves the surgeon-desired precise orientation of the graft within the bone tunnel. Finally, the two ends of the graft are secured at length by the suture anchors in the patella, allowing for final fine adjustments to graft length. (3) the medial (4) a nonanatomic and the at the femoral length changes the anatomometric In light of the fact that the MPFL has been identified as the primary passive restraint to patellar lateral displacement, reconstruction of the MPFL can provide the best clinical outcomes by restoring the normal limits of patellar motion.1 Accurate reconstruction of the native anatomy and biomechanics of the MPFL is imperative to achieve an effective reconstruction.3 anatomical
2 SURGICAL TECHNIQUE MPFL RECONSTRUCTION Patellar Site Preparation 1a 1b Create a longitudinal incision over the proximal two-thirdsof the medial border of the patella, and dissect down to the intervalbetween layer two (MPFL) and layer three(capsule).! Decorticate the proximal two-thirdsof the medial patellar margin with a 4 mm round burr.! 1c Using a 2.5 mm Drill Bit and Drill Guide (from the Morphix Procedure Pack), drill two tunnels, one at the proximal end of the trough and the second at the mid-waist of the patella. Drill until the hard stop on the Drill Bit reaches the back of the Drill Guide to ensure appropriate tunnel depth.
3 SURGICAL TECHNIQUE MPFL RECONSTRUCTION Suture Anchor Deployment Implant two 2.5 mm Morphix Suture Anchors with 2 USP #2 Sutures in thedrill holes created in the patella at the proximal end of the trough and mid-waist of the patella.! 2a 2b With the Inserter Knob in the “locked” position, insert the Suture Anchor eyelet into the hole ensuring the cannula is seated on the cortex. Rotate the Inserter Knob one quarter turn counter-clockwise into the “unlocked” position, indicated by an open padlock symbol. ! Pearl #1. The wings of the Morphix Ensure that the device is inserted according to preferred orientation of the sutures and wings. Pearl #2. To prevent possible damage to the eyelet assembly, ensure that the insertion trajectory matches the trajectory of the hole created by the drill bit. Suture Anchor will deploy in the same orientation as the Inserter Handle Wings. 2c 2d Manually depress or gentlytap the Inserter Knobwith a malletto fully deploy the anchor. The anchor is fully deployed when the top of the Morphix Suture countersunk to the surface of the bone and the Inserter Knob is flush with the Inserter Handle.! Unwindthe suture from the suture slot in the Inserter Handle. Disengage the Inserter Handle using a counter-clockwise motion to disconnect the eyelet from the Inserter. Gently pull back the Inserter Handle to remove. Anchor is slightly
4 SURGICAL TECHNIQUE MPFL RECONSTRUCTION Final Suture Anchor Positioning Graft Preparation 3a 3b Harvest a portion of the semitendinosus tendon through a small incision over the pes anserinus group insertion site and double the graft back upon itself. Using the Soft Tissue Sizer, measure the diameter of the graft at the doubled end. See Appendix A: EclipseSizing Guidefor graft, bone tunnel, and Implant sizing information.!
5 SURGICAL TECHNIQUE MPFL RECONSTRUCTION Femoral Site Preparation 4a 4b Make a second, smaller incision at the femoral attachment site, located in the saddle area between the posterior border of the medial femoral epicondyle and the adductor tubercle. Place a 2.4 mm Drill-Tipped Passing Pinin the desired location in the femoral epicondyle. Confirm Passing Pin placement with fluoroscopic imaging.! 4c 4d With forceps placed between layers two and three, pull the patellar sutures out through the femoral incision. With the knee at 20of flexion, clamp the sutures around the Passing Pin so that the sutures are taut but neither tensioned nor lax. Perform anatomometric testing in extension and flexion. Reposition the Passing Pin if necessary. Once the desired location has been verified, drill over the Passing Pin with a Cannulated Reamer1 mm larger than the graft size. Drill to a depth of 25 mm, read directly off the lasermarks of the Reamer. Refer to Appendix A: Eclipse Sizing Guidefor graft, bone tunnel, and Implant sizing information.! Pearl #3. During anatomometric testing with increasing flexion, the sutures should become lax. If the sutures tension while increasing flexion, the Passing Pin is positioned too proximal on the femur. In extension, the sutures should tension only slightly. Ensure that the patella is not over-tensioned or tilted medially throughout the full range of motion. !
6 SURGICAL TECHNIQUE MPFL RECONSTRUCTION Graft Positioning 5a 5b Using the Tendon Fork, catch the doubled end of the graft and push it fully into the bone tunnel. Verify that the graft is inserted into the base of the bone tunnel by reading the lasermark measurements on the Tendon Fork.! If desired, mark the doubled end of the graft at a length equivalent to the depth of the bone tunnel. This line can then be used to indicate when the graft is fully inserted into the bone tunnel during graft positioning. ! Implant Positioning 6a 6b If necessary,mallet the metal Strike Plate on the Gun Knob to assist in advancing the Sheath into the bone tunnel. Do not twist or rotate the Deployment Gun while advancing the Implant into the bone tunnel. Position the Implant Sheath in the tunnel so that it is posterior to the graft, which exits the bone tunnel anteriorly, and the compressed profile is adjacent to the graft. Remove the Tendon Fork. Advance the Sheath into the tunnel. ! Pearl #4. Ensure the Sheath is 1-2 mm sub-flush in the bone tunnel, thereby maximizing Implant engagement with the cortex during fixation.
7 SURGICAL TECHNIQUE MPFL RECONSTRUCTION Gun Body Rotation 7a 7b If desired, push forward on the blue Knob Lock to allow free rotation of the Gun Body. The Gun Body can now rotate to the desired deployment position for surgeon comfort without disturbing Implant alignment in the tunnel. Push back on the Knob Lock to re-engage with the Gun Knob, preventing further rotation of the Gun Body. Implant Deployment 8a 8b Squeeze the Deployment Trigger while pulling down on the blue Trigger Lock to release the Deployment Trigger. While maintaining slight forward pressure on the Gun, squeeze the Trigger to advance the Bullet into the Sheath. When theTriggerno longer exhibits resistance,the Implant isfully deployed (approximately twopulls of the Trigger). Pearl #5. Be sure to apply slight forward pressure while pulling the Trigger to ensure that the Implant remains seated in the tunnel.
8 SURGICAL TECHNIQUE MPFL RECONSTRUCTION Gun Body Release Push forward on the Knob Lock. Turn the Knob counterclockwise until the Gun releases from the Implant (approximately 10 turns). 9a 9b Final Graft Fixation
9 SURGICAL TECHNIQUE MPFL RECONSTRUCTION Patellar Fixation 10a 10b For secure fixation, fold and suture the free- ends of the graft back upon themselves. Thread the free ends of the graft between layers two and threeand out through the patellar incision. With the knee in 20 degrees of flexion, knot the suture threads over the free-ends of the graft several times, cinching them into place. Pearl #6. In this position, the graft should experience neither tension nor laxity. With increasing flexion, the graft should become lax. In extension, the graft should tension only slightly. Ensure that the patella is not over-tensioned or tilted medially throughout the full range of motion. Closure Tie off and trim any remaining sutures. Close the incisions per surgeon preference.
10 APPENDIX A ECLIPSE SIZING GUIDE Eclipse Sizing Guide Measure the diameter of the doubled end of the graft using the MedShape Soft Tissue Sizer. For MPFL reconstruction procedures, MedShape recommends selecting the Implant size that matches the diameter for the graft. If the graft measures a half size, select the Implant size 0.5 mm over the size of the graft (e.g., select a 6 mm Implant for a 5.5 mm graft). The diameter of the bone tunnel should measure 1 mm larger than the diameter of the Implant. ECLIPSE SIZING GUIDE Implantand TunnelSizing Guide Graft Diameter Implant Size Tunnel Diameter Tunnel Depth 5 mm 5 x 20 mm 6 mm 25 mm 6 mm 6 x 20 mm 7 mm 25 mm 7 mm 7 x 20 mm 8 mm 25 mm 8 mm 8 x 20 mm 9 mm 25 mm
11 APPENDIX B ORDERING INFORMATION MORPHIX SUTURE ANCHOR Part No. 1000-03-225 1000-03-235 Description Morphix, 2.5 mm Diameter, 2 USP #2 Sutures Morphix, 3.5 mm Diameter, 2 USP #2 Sutures Morphix, 2.5 mm Diameter, 1 USP #0 Suture Double Armed with Tapered Needles Morphix, 3.5 mm Diameter, 2 USP #0 Sutures Double Armed with Tapered Needles Morphix, 4.5 mm Diameter, 2 USP #2 Sutures Double Armed with Tapered Needles Morphix, 5.5 mm Diameter, 2 USP #2 Sutures Double Armed with Tapered Needles ORDERING INFORMATION 1000-04-125 1000-04-235 1000-04-245 1000-04-255 SINGLE USE INSTRUMENTS Part No. 1000-10-025 1000-10-035 1000-10-045 Description 2.5 mm Procedure Pack, Single Use, Sterile 3.5 mm Procedure Pack, Single Use, Sterile 4.5 mm Procedure Pack, Single Use, Sterile Morphix Procedure Pack includes Drill Guide and 160 mm Drill Bit. ECLIPSE SOFT TISSUE ANCHOR Part No. Description 1500-00-0410 Eclipse 4 x 10 mm, with Disposable Gun 1500-00-0417 Eclipse 4 x 17 mm, with Disposable Gun 1500-00-0512 Eclipse 5 x 12 mm, with Disposable Gun 1500-00-0520 Eclipse 5 x 20 mm, with Disposable Gun 1500-00-0612 Eclipse 6 x 12 mm, with Disposable Gun 1500-00-0620 Eclipse 6 x 20 mm, with Disposable Gun 1500-00-0712 Eclipse 7 x 12 mm, with Disposable Gun 1500-00-0720 Eclipse 7 x 20 mm, with Disposable Gun 1500-00-0812 Eclipse 8 x 12 mm, with Disposable Gun 1500-00-0820 Eclipse 8 x 20 mm, with Disposable Gun 1500-00-0915 Eclipse 9 x 15 mm, with Disposable Gun 1500-00-0920 Eclipse 9 x 20 mm, with Disposable Gun SINGLE USE INSTRUMENTS Part No. 1500-02-000 1500-01-040 1500-01-050 1500-01-060 1500-01-070 1500-01-080 1500-01-090 Description Universal Tenodesis Procedure Pack, Sterile Cannulated Drill, 4 mm, Sterile Cannulated Acorn Reamer, 5 mm, Sterile Cannulated Acorn Reamer, 6 mm, Sterile Cannulated Acorn Reamer, 7 mm, Sterile Cannulated Acorn Reamer, 8 mm, Sterile Cannulated Acorn Reamer, 9 mm, Sterile Eclipse Universal Tenodesis Procedure Pack includes Soft Tissue Sizer, Lasermarked 2.4 mm SurgiBit® Drill Tipped Passing Pin, Lasermarked Tendon Fork, and 0.7 mm Suture Lasso.
12 ! Dr. Jack Farr, II (MD) is a board certified orthopaedic surgeon, clinical researcher, and leading expert in cartilage and knee restoration. He holds numerous appointments and affiliations, including a clinical professorship in Orthopaedic Surgery at Indiana University Medical and board positions with the Cartilage Research Foundation and the International Cartilage Repair Society. Dr. Farr received his medical degree from Indiana University in 1979 and completed his Orthopaedic Surgery residency at Indiana University Medical Center in 1986. He has also received an honorary doctorate of Biological Engineering from Rose Hulman Institute of Technology in Terre Haute, Indiana. References: 1. Davis DK, Fithian DC. Techniques of medial retinacular repair and reconstruction. Clin Orthop Relat Res 402:38-52, 2002. 2. Dopirak RM, Steensen RN, Maurus PB. The medial patellofemoral ligament. Orthopedics 31(4):331-38, 2008. 3. Elias JJ, Cosgarea AJ.Technical errors during medial patellofemoral ligament reconstruction could overload medial patellofemoral cartilage: a computational analysis. Am J Sports Med 34(9):1478-85, 2006. 4. Stephen JM, Lumpaopong P, Deehan DJ, Kader D, Amis AA.The medial patellofemoral ligament: location of femoral attachment and length change patterns resulting from anatomic and nonanatomic attachments. Am J Sports Med 40(8):1871-79, 2012. 5. Wijdicks CA, Griffith CJ, LaPrade RF, Johansen S, Sunderland A, Arendt EA, Engebretsen L.Radiographic identification of the primary medial knee structures. J Bone Joint Surg Am 91(3):521-29, 2009. This brochure is presented to demonstrate the surgical techniques utilized by Jack Farr, II, M.D. MedShape, as the manufacturer of this device, does not practice medicine and does not recommend this or any other surgical technique for use on a specific patient. The surgeon who performs any procedure is responsible for determining and utilizing the appropriate techniques for such procedure for each individual patient. MedShape is not responsible for selection of the appropriate surgical technique to be utilized for an individual patient. Always refer to the package insert, product label, and/or product instructions prior to using any MedShape product. For further product information or to arrange a product demonstration, please contact your local MedShape representative or call Customer Service at 877-343-7016. You can also visit www.medshape.com. MedShape, Inc. 1575 Northside Drive, NW Suite 440 Atlanta, GA 30318 T: 877-343-7016 F: 877-343-7017 CAUTION: Federal (USA) law restricts this device to sale by or on the order of a physician. ©MedShape, Inc., 2014. All rights reserved. Printed in the USA. Protected by Patent No.: US 8,069,858. Other U.S. and International Patents Pending. MK-10113 Rev 00. Issued 06/2014. Morphix is a registered trademark of MedShape, Inc. SurgiBit® Technology is protected by US Patent No.: D523313, D523398, & US 7,892,2235 B2. Foreign patents and design application pending and granted. All other trademarks are trademarks of their respective owners or holders.