Download
1 / 51
530 likes | 922 Vues
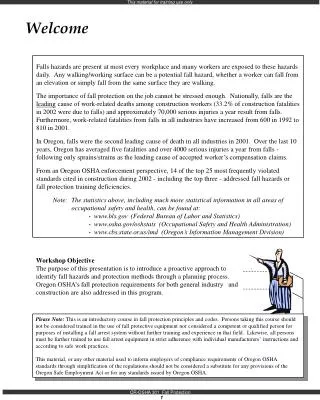
Welcome. Falls hazards are present at most every workplace and many workers are exposed to these hazards daily. Any walking/working surface can be a potential fall hazard, whether a worker can fall from an elevation or simply fall from the same surface they are walking.

E N D
Welcome • Falls hazards are present at most every workplace and many workers are exposed to these hazards daily. Any walking/working surface can be a potential fall hazard, whether a worker can fall from an elevation or simply fall from the same surface they are walking. • The importance of fall protection on the job cannot be stressed enough. Nationally, falls are the leading cause of work-related deaths among construction workers (33.2% of construction fatalities in 2002 were due to falls) and approximately 70,000 serious injuries a year result from falls. Furthermore, work-related fatalities from falls in all industries have increased from 600 in 1992 to 810 in 2001. • In Oregon, falls were the second leading cause of death in all industries in 2001. Over the last 10 years, Oregon has averaged five fatalities and over 4000 serious injuries a year from falls - following only sprains/strains as the leading cause of accepted worker’s compensation claims. • From an Oregon OSHA enforcement perspective, 14 of the top 25 most frequently violated standards cited in construction during 2002 - including the top three - addressed fall hazards or fall protection training deficiencies. • Note: The statistics above, including much more statistical information in all areas of occupational safety and health, can be found at: • www.bls.gov (Federal Bureau of Labor and Statistics) • www.osha.gov/oshstats (Occupational Safety and Health Administration) • www.cbs.state.or.us/imd (Oregon’s Information Management Division) Workshop Objective The purpose of this presentation is to introduce a proactive approach to identify fall hazards and protection methods through a planning process. Oregon OSHA’s fall protection requirements for both general industry and construction are also addressed in this program. Please Note: This is an introductory course in fall protection principles and codes. Persons taking this course should not be considered trained in the use of fall protective equipment nor considered a competent or qualified person for purposes of installing a fall arrest system without further training and experience in that field. Likewise, all persons must be further trained to use fall arrest equipment in strict adherence with individual manufacturers’ instructions and according to safe work practices. This material, or any other material used to inform employers of compliance requirements of Oregon OSHA standards through simplification of the regulations should not be considered a substitute for any provisions of the Oregon Safe Employment Act or for any standards issued by Oregon OSHA.
Fall Protection Requirements in General Industry There are two primary standards for fall protection in Oregon’s general industry workplaces: 1. OR-OSHA Division 2/Subdivision D [Walking-Working Surfaces] 29 CFR 1910.23 requires employees to be protected at wall openings or open-sided floors, platforms, and walkways when exposed to a fall hazard of falling four feet or more to a lower level. This rule also requires employees to be protected from falling and/or walking into floor openings (including stairways/ladderways, manholes, and hatchways/trapdoors). Methods of protection outlined in this rule include standard railings (with toeboard) on all exposed sides, or floor hole covers of standard strength and construction. 2. OR-OSHA Division 2/Subdivision I [Personal Protective Equipment] OAR 437-002-0125 requires employees to be protected from fall hazards when working on unguarded surfaces more than 10 feet above a lower level. 1. OR-OSHA Div 2/Sub D Walking-Working Surfaces contains • Definitions and general requirements (29 CFR 1910.21-1910.22) • housekeeping • floor loading • aisles and passageways • Guarding open-sided floors, wall openings, and holes (29 CFR 1910.23) • stairway railings • railing, cover, and falling object protection specifications • Fixed industrial stairs (29 CFR 1910.24) • Portable ladders (OAR 437-002-0026) • Fixed ladders (OAR 437-002-0027) • Safety requirements for scaffolding (29 CFR 1910.28) • guardrails and toeboards at 10 ft. • Manually-propelled mobile ladder stands and scaffolds (Towers) (29 CFR 1910.29) • Other working wurfaces (29 CFR 1910.30) • floors • provisions for window cleaners • ramps and runways • piers and wharves 2. OR-OSHA Div 2/Sub I Personal Protective Equipment contains • Oregon rules for fall protection (OAR 437-002-0125)
Fall Protection Requirements in General Industry OR-OSHA’s “four foot rule” applies to open-sided floors, platforms, runways, and wall openings. Platform - A working space for persons, elevated above the surrounding floor or ground; such as a balcony or platform for the operation of machinery and equipment. Runway - A passageway for persons, elevated above the surrounding floor or ground level, such as a footwalk along shafting or a walkway between buildings. Wall opening - An opening at least 30 inches high and 18 inches wide, in any wall or partition, through which persons may fall; such as a yard-arm doorway or chute opening. All floor openings and holes must be guarded or covered, regardless of fall distance. Floor hole - An opening measuring less than 12 inches but more than 1 inch in its least dimension, in any floor, platform, pavement, or yard, through which materials but not persons may fall; such as a belt hole, pipe opening, or slot opening. Floor opening - An opening measuring 12 inches or more in its least dimension, in any floor, platform, pavement, or yard through which persons may fall; such as a hatchway, stair or ladder opening, pit, or large manhole. Floor openings occupied by elevators, dumb waiters, conveyors, machinery, or containers are excluded from this subpart. Note: Every skylight floor opening and hole must be guarded by a standard skylight screen or a fixed standard railing on all exposed sides. Open-sided platform Floor opening And… Every employee must be protected from falls into or onto dangerous equipment - regardless of height!
Fall Protection Requirements in General Industry • Stairways having four or more risers and less than 44 inches wide must be equipped with standard stair railings or handrails as follows: • must have at least one handrail (preferably right-side descending) if both sides enclosed • must have at least one stair railing on open side if one side open • must have one stair railing on each side if both sides open • Stairways having four or more risers and more than 44 inches wide, but less than 88 inches wide, must have one handrail on each enclosed side and one stair railing on each open side. • Stairways having four or more risers and more than 88 inches wide must have one handrail on each enclosed side; one stair railing on each open side; and one intermediate stair railing located approximately midway of the width. • A stair railing is a vertical barrier erected along exposed sides of a stairway with construction similar to a standard railing (defined on p. 15). A stair railing must have a vertical height no more than 34 inches nor less than 30 inches from the upper surface of the top rail to the surface of the tread. • Other general industry standards that include specific provisions for fall protection and/or personal fall arrest systems, and falling object protection include: • OR-OSHA Div 2/Sub F • 29 CFR 1910.66 Powered platforms for building maintenance • 29 CFR 1910.67 Vehicle-mounted elevating and rotating work platforms • 29 CFR 1910.68 Manlifts (A manlift is a device consisting of a power-driven endless belt moving in one direction only, and provided with steps or platforms and handholds attached to it for the transportation of personnel from floor to floor) • OR-OSHA Div 2/Sub N • 29 CFR 1910.176 & OAR 437-002-0221 Handling materials • OAR 437-002-0223 Commercial and industrial vehicles • OAR 437-002-0227(4) Personnel platforms on industrial trucks (forklifts) • OR-OSHA Div 2/Sub R • OAR 437-002-0301 Tree & Shrub Services • OAR 437-002-0312 Pulp, Paper & Paperboard Mills • 29 CFR 1910.265 Sawmills • OAR 437-002-0314Veneer & Plywood Machinery • OAR 437-002-0315 Shake & Shingle Machinery • 29 CFR 1910.268 Telecommunications • 29 CFR 1910.269 Electric Power Generation, Transmission & Distribution • 29 CFR 1910.272 Grain Handling Facilities
Fall Protection Requirements in Construction • There is one primary standard for fall protection in Oregon’s construction industry: • 1. OR-OSHA Division 3/Subdivision M [Fall Protection] OAR 437-003-1501 requires employers to ensure that fall protection systems are provided, installed, and implemented when employees are exposed to a hazard of falling 10 feet or more to a lower level. • Fall protection must be provided when employees are exposed to the hazard of falling six feet or more • through holes (including skylights) • through wall openings • from established floors, mezzanines, balconies, & walkways • into excavations • Fall protection systems must meet the criteria in OR-OSHA Div 3/Sub M 29 CFR 1926.502 Fall Protection Systems Criteria and Practices. 1. OR-OSHA Div 3/Sub M Fall Protection contains • Scope, application, and definitions (29 CFR 1926.500) • Duty to have fall protection (29 CFR 1926.501) • general fall protection (OAR 437-003-1501) • Fall protection systems criteria and practices (29 CFR 1926.502) • guardrails • safety nets • personal fall arrest system • personal fall restraint system • positioning device system • warning line systems • safety monitoring systems • slide guard systems • covers • falling object protection • Training Requirements (OAR 437-003-0503) • Non-mandatory Guidelines (Appendices) • determining roof widths • complying with guardrail systems • complying with personal fall arrest systems • complying with positioning device systems
Fall Protection Requirements in Construction • OR-OSHA’s “six foot rule” applies to holes, wall openings, established floors, and excavations. • Hole -A gap or void 2 inches or more in its least dimension, in a floor, roof, or other walking/working surface. • Each employee on walking/working surfaces must be protected from falling through holes (including skylights) more than six feet above lower levels • Each employee on a walking/working surface must be protected from tripping in or stepping into or through holes (including skylights) by covers • Each employee on a walking/working surface must be protected from objects falling through holes (including skylights) by covers • Smoke domes or skylight fixtures are not considered covers unless they are capable of supporting, without failure, at least twice the weight of employees, equipment, and materials that may be imposed on it at any one time • Wall openings - An opening in a wall or other partition where the outside bottom edge of the wall opening is six feet or more above lower levels and the inside bottom edge of the wall opening is less than 39 inches above the walking/working surface. • Each employee working on, at, above, or near wall openings (including those with chutes attached) must be protected from falling Established floors, mezzanines, balconies and walkways • Each employee on established floors, mezzanines, balconies and walkways, with an unprotected side or edge six feet or more above a lower level, must be protected from falling Excavations • Each employee at the edge of a well, pit, shaft, or excavation (not apparent due to plant growth or other visual barrier) six feet or more in depth must be protected from falling And… Every employee must be protected from falls into or onto dangerous equipment - regardless of height! • uncapped rebar • debris • machinery • tanks
Fall Protection Requirements in Construction A stairway or ladder shall be provided at all personnel points of access where there is a break in elevation of 19 inches or more, and no ramp, runway, sloped embankment, or personnel hoist is provided. Stairways having four or more risers or rising more than 30 inches (whichever is less) must be equipped with at least one handrail and one stair railing system along each unprotected side or edge.Winding and spiral stairways must be equipped with a handrail offset sufficiently to prevent walking on those portions of the stairways where the tread width is less than 6 inches. Stair railings must be not less than 36 inches from the upper surface of the stair railing system to the surface of the tread, in line with the face of the riser at the forward edge of the tread. Stair railings have construction similar to a standard railing (guardrail) as defined on p. 15. • Fall Protection for the following areas is not covered in OR-OSHA Div 3/Sub M because they’re covered elsewhere: • Requirements when working on scaffolds are in Div 3/Sub L • Requirements for certain cranes and derricks are in Div 3/Sub N • Requirements for steel erection activities are in Div 3/Sub R • Requirements for certain equipment in tunneling operations are in Div 3/Sub S • Requirements when engaged in the construction of electrical transmission and distribution lines and equipment are in Div 3/Sub V • Requirements when working on stairways and ladders are in Div 3/Sub X • For more information on ladders, scaffolds, and steel erection, please check out the following websites. Resources include interpretations, directives, publications, checklists, training guides, slide presentations, etc. • www.orosha.org (Oregon OSHA) • www.osha.gov (OSHA) • www.cdc.gov/niosh (National Institute of Occupational Safety & Health) • www.cdc.gov/elcosh (Electronic Library of Construction Occupational Safety & Health) When there is a hazard of falling objects, each employee must wear a hardhat plus one of the following measures must be implemented: • toeboards, screens, or guardrail systems erected to prevent objects from falling from higher levels • canopy structure erected in addition to keeping potential falling objects far enough from the edge • barricade the area and prohibit employees from entering the area in addition to keeping potential falling objects far enough from the edge
Planning to Prevent Falls One of the most important aspects of fall hazard prevention is planning. An assessment of all fall hazards, even potential fall hazards, must be done before appropriate corrective measures are considered. Furthermore, a fall hazard assessment can also determine training needs and fall rescue methods. If proper planning isn’t done at the onset, time and materials will be wasted and, consequently, unexpected costs will rise. More importantly, fatalities and severe injuries have resulted from simply not making the time or effort to effectively identify fall hazards. A simple planning process can include the following elements: • Evaluate the work site • Identify fall hazards • Identify who is exposed to fall hazards • Evaluate the process to be done and the needs to complete the task • Identify what method of fall protection will be used for each hazard identified • Educate and train the workers With the above planning elements in mind, the following eight step approach not only focuses on actual or potential fall hazards we might anticipate but also allows us to strive for a strategy of fall prevention rather than fall protection. An Eight Step Approach to Fall Protection Step 1 Determine walking/working surfaces are structurally safe Step 2 Conduct a fall hazard assessment Step 3 Eliminate the need for fall protection, if possible Step 4 Select the appropriate type of fall protection system Step 5 Develop rescue/retrieval procedures Step 6 Develop an equipment inspection, maintenance and storage program Step 7 Provide fall protection training Step 8 Monitor the fall protection program
Planning to Prevent Falls Step 1 Determine walking/working surfaces are structurally safe Does the walking/working surface have the strength and structural integrity to safely support all employees and their equipment? • consider older buildings or buildings with wooden roofs • consider during demolition work Employees should not be permitted to work on building roofs and other walking/working surfaces until the employer has determined the surfaces are structurally safe. Significant construction failures Commonwealth Avenue, Boston, January 1970. A 17-story reinforced concrete apartment building collapsed, killing four construction workers and injuring 20 others. Bailey’s Crossroads, Fairfax County, Va., March 1973. Progressive collapse of a 26-story reinforced concrete residential tower killed 14 construction workers and injured 35. Cooling tower scaffold collapse, Willow Island, W.Va., April 1978. Premature loading of cast-in-place concrete resulted in the deaths of 51 construction workers, the most lethal construction accident since the 1907 collapse of the Quebec Bridge over the St. Lawrence River took 74 lives. Rosemont (Illinois) Horizon Arena, August 1979. Glued-laminated timber roof arches spanning 288 feet collapsed, killing five workers and injuring 16. Harbour Cay Condominium, Cocoa Beach, Fla., March 1981. A five-story, cast-in-place reinforced concrete building collapsed due to design and construction deficiencies, killing 11 construction workers and injuring 23. East Chicago, Ind., highway ramp accident, April 1982. Thirteen construction workers were killed and 17 injured when the temporary falsework collapsed. L’Ambiance Plaza, Bridgeport, Conn., April 1987. A 16-story post-tensioned prestressed concrete lift-slab apartment project collapsed suddenly during construction, resulting in 28 deaths. Information from “Why Buildings Fail” by Ken Carper, Professor School of Architecture and Construction Management, Washington State University kcarper@arch.wsu.edu (www.arch.wsu.edu/~kcarper)
Planning to Prevent Falls Step 2 Conduct a fall hazard assessment Fall hazards are present everywhere simply because any walking or working surface can provide them. In addition, many workers are working at various levels of elevation increasing the severity of injury. Knowing what can immediately contribute to a fall can help in assessing the risk. Working near unguarded edges, roofing on a steep pitch, lacking safe access, or walking on a slippery surface are some common examples. A fall hazard assessment greatly helps identify and evaluate these physical fall hazards. • Determine which specific jobs, activities or areas expose employees to fall hazards • Determine the type of work performed • Determine if employees will be exposed to any of the following: • Unprotected sides and edges • leading edges • Floor holes • Wall openings and hoisting areas • Slippery surfaces • Formwork or reinforcing steel • Ramps, runways& other walkways • Portable ladders and stairways • Excavations • Working above dangerous equipment • Obstructions (materials) • Overhand bricklaying and related work • Roofing work (low-slope and steep) • Precast concrete erection • Aerial lifts • Scaffolds • Determine the frequency the work is being performed • Determine if workers require horizontal and/or vertical movement • Determine the number of workers exposed to a fall hazard (other trades) • Determine the type of walking/working surface • Determine the distance to lower levels • Determine if the edge of the building or the working surface is protected by a guardrail system or parapet wall • if yes, is it adequate? • Determine if employees could be exposed to other types of health and/or safety hazards • can it affect selection or use of fall protection systems?
Hazard? _______________ Hazard? _____________ Hazard? _______________ Hazard? _______________ Hazard? _______________ Hazard? ______________
Planning to Prevent Falls Step 2 Conduct a fall hazard assessment The person conducting the assessment should have some education and/or relevant experience in order to recognize and evaluate all fall hazards. Furthermore, this person should also have practical knowledge and understanding of the fall protection standard (OR-OSHA Div 3/Sub M) and other related fall protection requirements. So who better than a Competent Person? A “Competent Person” is someone who is capable of identifying existing and predictable hazards in the surroundings or working conditions which are hazardous or dangerous to employees, and has authorization to take prompt corrective measures to eliminate them. What “qualifications” would you consider when determining a competent person? ________________ ________________ ________________ ________________ ________________ ________________ • Various sources of information can be used when conducting this hazard assessment • survey employees exposed to the fall hazards • survey affected supervisors & managers • review previous inspections • OSHA 300 & 801 records • injury & incident reports • safety committee minutes • Remember - involving employees and supervisors in the hazard assessment is essential. They can provide valuable information about where and when fall protection is necessary and ideas to possibly eliminate or better prevent fall hazards. • Obtaining their input will also encourage employees and supervisors to take ownership!
Planning to Prevent Falls Step 3 Eliminate the need for fall protection, if possible If the hazard assessment indicates the need for fall protection, the next step is to determine if the fall hazard(s) can be eliminated through engineering controls and/or alternative work methods. • Redesign the process or job task • Work at lower heights • Use equipment that prevents fall hazards • platforms that provide built-in fall protection • Use tool extensions and work from ground level • Lower equipment and tools to ground level • Use appropriate aerial lifts • Design buildings and other walking/working surfaces to eliminate/reduce exposure • Use equipped contractors Could these exposures be prevented? Planning Comes First! • Eliminate • work from ground • walls/enclosures • covers • Prevent • railings • aerial lifts • fences/barricades • parapets • Arrest • personal fall arrest systems • personal fall restraint systems • nets • positioning devices • roof brackets/slide guards • Control • safety monitors • warning lines • controlled decking zones
Planning to Prevent Falls Step 4 Select the appropriate type of fall protection system Prevention v. Protection A textbook definition of fall protection could read: “A method to prevent a person from falling or by reducing the distance of a fall to limit physical damage.” Most would agree the first part of the above definition addresses fall preventionand is the more preferred strategy. However, reality shows us prevention methods are not always available and in many situations fall protection is our only option. If the fall hazards cannot be eliminated, the next approach is to select the appropriate fall protection system. Of course, no single fall protection system provides adequate fall protection for all job activities. As the type of system will vary from job to job, we must always assess each job and activity to determine the proper type of fall protection. • Consider the following factors when selecting fall protection systems: • the distance to lower levels • the type of activities requiring fall protection and the specific requirements of each activity • the specific types of equipment and components needed with each fall protection system • how much vertical and horizontal movement employees will need to perform each activity • environmental conditions (i.e. wind, rain, extreme heat/cold) in which fall protection equipment will be used • the potential difficulty of using fall protection systems to perform normal and/or non-routine job activities • the need for anchorage points of suitable design and strength • the presence of chemical, electrical, and welding hazards • how employees will recover or be rescued from fallen positions • the presence of sharp or rough surfaces and edges Note: The following pages review common fall protection methods found in both construction and general industries. Warning lines, safety monitoring, and slide guard systems, used primarily in construction, are included on pages 33 - 34 in the Reference section.
Planning to Prevent Falls Step 4 Select the appropriate type of fall protection system • There are two major categories or systems of fall protection: • Passive fall protection systems • Active fall protection systems • Passive systems are designed to provide fall protection without any action by employees • guardrails • nets • covers • aerial lifts • Active fall protection includes components and systems that must be connected or otherwise activated by employees • personal fall arrest systems • personal fall restraint systems • work positioning Passive Systems • Guardrail Systems • Toprail at 42 inches (+/- 3 in.) from working surface • midrail halfway between toprail and surface • Toprail must withstand 200 lbs. (midrail 150 lbs.) • Surfaced to prevent cuts and must not project over posts • Chain, gate, or removable section across openings at hoisting areas • Erected around all sides of a hole • More specifics at OR-OSHA Div 2/Sub D and Div 3/Sub M • Covers • Capable of supporting at least two times the weight of employees, equipment, and materials that may be imposed on the cover at any one time (don’t forget skylights) • Must be secured to prevent accidental displacement by the wind, equipment, or employees • Must be color coded or marked “HOLE” or “COVER” • Capable of supporting at least two times the maximum axle load of the largest vehicle expected to cross over • Safety Nets • OR-OSHA Div 3/Sub M 29 CFR 1926.502(c) DBI/SALA
Planning to Prevent Falls Step 4 Select the appropriate type of fall protection system Active Systems • Positioning Device System • Must prevent a free fall of no more than two feet • Must be secured to an anchorage capable of supporting at least twice the potential impact load of a fall or 3000 lbs. (whichever is greater) • Connectors and connecting components must be in accordance with Div 3/Sub M 29 CFR 1926.502(d) DBI/SALA • Personal Fall Restraint System (PFRS) • Must be rigged to prevent the user from falling any distance! • Comprised of a full body harness, anchorage, and connectors (e.g. lanyard, snaphooks, etc.) • in accordance with Div 3/Sub M 29 CFR 1926.502(d) • Anchorages used for attachment must be capable of supporting 3000 lbs. per employee attached, or • be designed, installed, and used as part of a complete personal fall restraint system which maintains a safety factor of at least two • under the supervision of a qualified person (defined on p. 17) Personal Fall Arrest System (PFAS) • Reduces injury sustained in a fall by reducing the distance of the fall and absorbing the arresting forces • Must limit the maximum arresting force on an employee to 1800 lbs. • Must be rigged such that an employee • cannot free fall more than six feet • not contact a lower level • limit deceleration distance to 3.5 ft. • Anchorages used for attachment must be capable of supporting 5000 lbs. per employee attached, or • be designed, installed, and used as part of a complete personal fall arrest system which maintains a safety factor of at least two • under the supervision of a qualified person (defined on p. 17) • A rescue system must be in place that provides for prompt rescue of employees in the event of a fall or shall assure that employees are able to rescue themselves.
Protecta International R rescue plan Would you suspend your truck from this anchor point? If not, don’t use it! Personal Fall Arrest Systems The ABCs!…er, and R Anchorage An anchorage pointis a secure point of attachment for lifelines, lanyards, deceleration devices, or self retracting lanyards. DBI/SALA The anchorage point can be a single attachment to a substantial structure above the surface from which the employee is working, or it can be one to two attachments used to anchor a vertical or horizontal lifeline. Remember - The anchorage point for fall arrest systems must be capable of supporting 5000 lb. for each worker or used as part of a complete PFAS which maintains a safety factor of at least two and under the supervision of a qualified person. A qualified person is defined as one who, by possession of a recognized degree, certificate, or professional standing, or who by extensive knowledge, training and experience, has successfully demonstrated his/her ability to solve or resolve problems relating to the subject matter, the work, or the project.
Protecta International R rescue plan Personal Fall Arrest Systems The ABCs!…er, and R Full Body Harness The impact of the fall is imposed on the trunk of the body which distributes the MAF to a larger area than the safety belt, reducing the potential for damage to the body. OR-OSHA Div 3/Sub M allows a maximum of 1800 lbs. of maximum arresting force (MAF) when using a full body harness. OR-OSHA prohibits the use of a safety belt for personal fall arrest. MSA The attachment point (D-Ring) must be located in the center of the wearer’s back near shoulder level. MAF can be reduced through the use of deceleration devices, or by reducing the fall distance under the guidance of a Qualified person. Qualified person is defined on page 17.
Protecta International R rescue plan Personal Fall Arrest Systems The ABCs!…er, and R Connector Connectormeans a device which is used to connect parts of the PFAS and positioning devices together. Everything between your harness and anchor. DBI/SALA Connectors include lanyards, snaphooks, carabiners, D-Rings, lifelines, and deceleration devices. • Lanyards are devices which connect the worker to the anchorage point • used to connect the two front D-Rings to the anchorage point for positioning • secured at one end to the worker’s harness D-Ring and the other end to the anchorage point for fall arrest • Lanyards must be made from synthetic material and have a minimum breaking strength of 5000 lbs. • Only locking-type snaphooks and carabiners can be used • The following connections are prohibited (unless the locking-type snaphook is designed for it): • engaged directly to webbing, rope, or wire rope • engaged to another snaphook • engaged to a D-Ring to which another snaphook/carabiner is attached • engaged to a horizontal lifeline • engaged to any object which is incompatibly shaped or dimensioned such that unintentional disengagement can occur (roll out)
Protecta International R rescue plan Personal Fall Arrest Systems The ABCs!…er, and R Deceleration Device Deceleration device means any mechanism which dissipates a substantial amount of energy imposed on an employee during fall arrest. DBI/SALA Deceleration devices include rope grabs, rip-stitch/tearing lanyards, and self-retractable lanyards. Remember - maximum arresting forces on a employee during a fall arrest must be less than 1800 lbs. Lifelines are flexible lines which connect to an anchorage point at one end to hang vertically, or at both ends to stretch horizontally. DBI/SALA Vertical lifelines are designed to be used by only one person and with a rope grab. Horizontal lifelines can be used only as part of a complete PFAS which maintains a safety factor of at least two, and when designed, installed, and used under the supervision of a qualified person.
Personal Fall Arrest Systems The Fall We have all heard the expression - ‘it’s not the fall that’s hurts but the sudden stop at the end’. Think of a fall as “…a sudden, unanticipated descent in space driven by gravity”. Although this may not sound severe, the consequences are often disabling - or deadly. The free fall velocity at impact when falling 12 feet is nearly 20 mph. Put another way, a person will hit the ground in just under one second after falling this distance. A ____ ____ is defined as the act of falling before a personal fall arrest system begins to apply force to arrest the fall. When a fall is experienced using a PFAS, the fall is referred to as a free fall up until the system ______ to stop the fall (starts to arrest the fall). OR-OSHA rules allow no more than a six foot free fall distance. …just like a parachute When the fall does come to a complete stop, the action is referred to as the fall arrest. Tremendous force is imposed on the body during the fall arrest. This force imposed during the arrest is known as the arrest force. Forces imposed in a fall greatly depend on the type of system you are using and the free fall distance. For example: A 220 lb. worker: free falling 2 ft. using a wire rope lanyard (without a deceleration device) = approx. 3917 lbs. free falling 4 ft. using a nylon rope lanyard (without a deceleration device) = approx. 2140 lbs. free falling 6 ft. using a synthetic web lanyard (with a deceleration device) = <900 lbs. OR-OSHA Div 3/Sub M sets limits on the Maximum Arrest Force (MAF). The law prohibits the use of a safety belt for fall arrest and allows a maximum of 1800 lbs. when using a full body harness. ARREST FORCE = The force imposed when the stop occurs. Calculating The Fall Distance We all know a fall starts from the moment your feet leave the surface you were working on. However, when using PFAS, the fall distance is measured from your shoulder (D-Ring location) to the working surface and any distance below the surface. When anchored above your shoulder, the fall is measured from the anchorage point to the end of the lanyard when the fall is completely stopped. Any additional distance the person falls beyond the free fall is added to the free fall distance and referred to as the total fall distance. This is the measurement of the fall from start to stop.
Let’s calculate the fall distance using a six foot, shock absorbing lanyard, when the anchorage is at shoulder (D-Ring) height. Distance below the working surface until the free fall stops and fall arrest begins = __ ft. Distance from the anchorage/ D-Ring to the working surface = 5 ft. 5 ft. ? Free fall distance = __ ft. 5 ft. from the anchorage/ D-Ring to the working surface + __ ft. below the working surface = __ ft. free fall 3.5 ft. from shock absorber elongation __ ft. - you came down too! + + = 14.5 ft. Total Fall Distance 22
Personal Fall Arrest Systems Calculating The Fall Distance Remember: The free fall is the distance you fall before the fall arrest system begins to stop (arrest) the fall. OR-OSHA Div 3/Sub M requires a maximum free fall distance of __ feet. If the anchorage is at shoulder/D-Ring level, as in the previous diagrams, the free fall distance includes the area from the D-Ring location between the shoulders to the surface (approx. 5 ft.) plus the remaining one foot of lanyard falling below the surface. This gives us a total free fall distance of six feet. In this case, the worker would maintain the maximum allowable free fall of six feet. If the anchorage were two feet above shoulder level, the free fall would only be four feet. Any additional distance the worker falls beyond the free fall is added to the free fall distance and referred to as the total fall distance. When the anchorage is at your feet, as in the upcoming diagrams, the free fall still includes the area from the D-Ring location between the shoulders to the surface (approx. 5 ft.) plus the remaining length of lanyard below the surface. And remember - the additional distance the worker falls beyond the free fall is added to the free fall distance and referred to as the total fall distance. Let’s take a look
Let’s calculate the fall distance using a six foot, shock absorbing lanyard, when the anchorage is at your feet. 5 ft. Distance below the working surface until the free fall stops and fall arrest begins = __ ft. Distance from the D-Ring to the working surface = 5 ft. ? Free fall distance = __ ft. 5 ft. from the D-Ring to the working surface + __ ft. below the working surface = __ ft. free fall 3.5 ft. from shock absorber elongation __ ft. - you came down too! + + = 19.5 ft. Total Fall Distance 24
R rescue plan Planning to Prevent Falls Step 5 Develop rescue/retrieval procedures When using a personal fall arrest system, employers must provide for prompt rescue in case of a fall or assure that employees are able to rescue themselves. What does “prompt” rescue mean? What can be used to rescue a person? How can you assure self rescue? Should rescue be considered when using other fall protection methods (i.e. nets)? ____________ ____________ ____________ ____________ ____________ ____________ Rescue comes down to planning and preparing. Some important points to consider: • Train your rescuers in rescue techniques and practice rescue attempts • Ensure available equipment is readily available • Arrange and communicate with other contractors on site • Arrange and communicate with outside services, if available • Designate someone to summon them upon arrival • Plan a route and establish lines of communication Don’t always assume the Fire Dept. will be available/equipped More information on the importance of rescue can be found on page 41.
Planning to Prevent Falls Step 6 Develop an equipment inspection, maintenance and storage program First and foremost, when it comes to equipment inspection and maintenance - follow manufacturer’s recommendations! All fall protection equipment, including harnesses, lanyards, and other connectors must be visually inspected before each use. Inspect for • cuts, tears, rips, snags, punctures, abrasions, mold, or stretching • alterations or additions which might effect the system’s efficiency • damage caused by acids, corrosives • distorted hooks or faulty hook springs • cracked, broken, or deformed D-Ring, carabiners, grommets, and snaphooks • loose, damaged or non-functioning mountings and parts • wearing or any internal deterioration in the ropes • color fading possibly indicating UV exposure Periodic inspections by a competent person for wear, damage, or corrosion should be a part of your safety inspection program. Defective equipment must be immediately taken out of service and tagged/marked as unusable, or destroyed. Do not return to use until a competent person determines no damage was done. Best Practice - Destroy when subjected to any significant damage or loading. Basic care of the equipment will prolong the durable life and will contribute toward the performance of its vital safety function. Proper storage and maintenance after use are as important as the pre-use inspections. Clean the equipment of dirt, corrosives, or other contaminants. Storage areas should be clean, dry, and free from exposure to fumes or corrosive elements. Synthetic materials should always be away from strong sunlight and extreme temperatures which could degrade the materials (color fading may indicate UV exposure). Should inspections be documented?
Planning to Prevent Falls Step 7 Provide fall protection training Each employee who may be exposed to fall hazards must be trained on how to recognize fall hazards and the procedures they need to follow to minimize these hazards. Fall hazards include… _______________ _______________ _______________ _______________ _______________ _______________ _______________ _______________ _______________ _______________ _______________ _______________ Identify the fall hazards in these four photos
Planning to Prevent Falls Step 7 Provide fall protection training The construction standard requires the person providing the training be a “competent person” qualified in the following: A Competent Person is someone who is capable of identifying existing and predictable hazards in the surroundings or working conditions which are hazardous or dangerous to employees, and has authorization to take prompt corrective measures to eliminate them. • Nature of fall hazards in work area • Correct procedures for erecting, maintaining, disassembling, and inspecting fall protection systems • Use and operation of guardrail systems, PFAS, safety nets, warning lines, safety monitoring system, PFRS, slide guards, positioning devices, etc. • Correct procedures for the handling and storage of equipment and materials and the erection of overhead protection • ...and anything else in the code! Bottom line: The trainer must be knowledgeable of fall protection systems and his/her ability to train employees on how to recognize fall hazards and how to properly use, inspect and maintain fall protection equipment. • Training must be provided whenever • employees are assigned to work where fall hazards exist • responsibilities change or new methods are used • there is a new fall hazard • the fall protection program is inadequate • additional training is necessary • employees have not acquired or retained adequate understanding DBI/SALA • The standard does not specify the required length or format of the training program. Consider both classroom instruction and hands-on training on the proper use of the fall protection equipment. • Documentation must contain • name of the employee(s) • date(s) • signature of the trainer or employer What’s missing? _____________________________________________ Sample certification on page 29.
SAMPLE Training Certification Fall Protection training Date _________ Location _______________ Trainee certification.I have received training on the subjects listed below: This training has provided me adequate opportunity to ask questions and practice procedures to determine and correct skill deficiencies. I understand that performing these procedures/practices safely is a condition of employment. I fully intend to comply with all safety and operational requirements discussed. I understand that failure to comply with these requirements may result in progressive discipline (or corrective actions) up to and including termination. Employee Name Signature Date ______________________________ ______________________________ _________ The following instruction was conducted: __ Overview of the company’s fall protection requirements & purpose of the fall protection program __ Anticipated fall hazards expected in my task/work area __ Calculating fall distances using a personal fall arrest system __ Rescue methods when using personal fall arrest The following procedures were practiced: __ Donning and doffing a full body harness __ Inspecting full body harness, lanyards, lifelines, anchor points __ Selecting, inspecting, and maintenance of personal fall arrest and position devices __ Use and operation of guardrail systems, personal fall arrest, safety nets, warning lines, safety monitoring system, personal fall restraint, slide guards, positioning devices, etc. __ Correct procedures for the handling and storage of equipment and materials and the erection of overhead protection Trainer certification. I have conducted instruction/on-the-job training to the employee listed above. I have explained related procedures, practices and policies. He/She was given the opportunity to ask questions and practice procedures taught under my supervision. Based on his/her performance, I have determined that he/she has adequate knowledge and skill to safely perform these procedures/practices. ______________________________ ______________________________ _________ Trainer Name Signature Date Training Validation. On __________(date), I have observed the above employee successfully applying the knowledge and skills learned during the training. ______________________________ ____________________________ _________ Supervisor Name Signature Date
Planning to Prevent Falls Step 8 Monitor the Fall Protection Program • Continuously monitor the effectiveness of the program to ensure that the required elements are being followed by supervisors and employees at the jobsite. • The following are suggested ways to monitor a fall protection program: • Conduct periodic inspections to ensure that employees are properly using fall protection • Take immediate corrective action including the use of disciplinary action • Conduct a formal audit of the entire fall protection program at least annually • document and communicate the results of the audit to everyone • compare the results with previous audits • Conduct periodic inspections of equipment storage areas • Require employees to notify their supervisor if they have any problems with the use and/or maintenance of their equipment • Require employees to notify their supervisor if they are involved in any fall incident/accident • promptly and thoroughly investigate and document • Hold managers/supervisors accountable for their crew • Reward your efforts - Promote your fall protection plan! • Managers, supervisors, and other staff personnel need to actively promote the proper use of fall protection equipment and encourage employee involvement and support of the program. • The following are suggested ways to promote a fall protection program • Provide positive feedback to employees who use fall protection equipment properly • Display posters and distribute information sheets to employees that reinforce the importance of fall protection • Conduct safety meetings with employees about fall protection • Respond in a timely manner to suggestions for improving the program and/or equipment • Encourage union representatives and safety committee members to actively support the program • Collect and distribute "success stories" about injuries prevented by the use of fall protection • Formally recognize employees, supervisors, and all involved!
Reference • Other Types of Fall Protection • Slide guard system • Safety monitoring system • Warning line system • Fall Protection Equipment Inspection & Maintenance Guidelines • OSHA Safety & Health Information Bulletins • Compatibility of Personal Fall Protection System Components • Suspension Trauma/Orthostatic Intolerance • Preventing Slips & Trips
Planning to Prevent Falls Step 4 Select the appropriate type of fall protection system • Slide Guard Systems • Installed under Competent Person supervision • Cannot be used on roofs with ground/eave height of 25 ft. or more • Cannot be used as fall protection on roofs with a slope less than 3:12 nor greater than 8:12 • Roofs with slopes greater than or equal to 3:12 to and including 6:12 • minimum of one slide guard placed below the work area • no closer than 6” from the eave • Roofs with slopes greater than 6:12 to and including 8:12 • multiple slide guards must be used • spaced 8’ apart, vertically • lower slide guard must be placed no closer than 6” from eave • Lowest slide guard must be 90 degrees to the roof surface • Upper slide guards cannot be less than 60 degrees to the roof surface • Slide Guard Systems - Manufactured Roof Brackets • Installed according to manufacturer’s specs • Minimum 6” brackets must be used • All brackets must bear on a solid surface • Brackets must not be spaced greater than 8’ apart horizontally, or according to manufacturer’s specs (whichever is less) • Nominal 2”X6” material must be used for slide guards • must be secured to the brackets or otherwise protected against cantilevering and failure due to material flex • Manufacturer’s specs must be available for review • More specifics at Div 3/Sub M OAR 437-003-3502, including job-made slideguards
Planning to Prevent Falls Step 4 Select the appropriate type of fall protection system • Safety Monitoring System • Only for roofing work on roof slopes of 2:12 or less • A safety monitoring system alone can be the only fall protection for roofs 50’ wide or less • OR-OSHA Div 3/Sub M Appendix A provides more info • A safety monitor • must be competent to recognize fall hazards • must warn employees when it appears they are unaware of the fall hazard • must be on the same surface and within visual distance of the employees • must be close enough to communicate • must not have other responsibilities which could take away their attention • More specifics at Div 3/Sub M OAR 437-003-2502 • Warning Line Systems • For roofing work • must not be used as fall protection on slopes greater than 2:12 • employees performing roofing work between a roof edge and a warning line must be protected by guardrails, nets, PFAS, PFRS, or safety monitoring system • Must be erected around all open sides of the roof work area no less than 6’ from the roof edge • When mechanical equipment is being used, the warning line must be erected • no less than 6’ from the roof edge which is parallel and no less than 10’ from the roof edge which is perpendicular to the direction of the mechanical equipment operation • Points of access and material handling areas must be connected to the work area by an access path formed by two warning lines • close access/offset when not in use • Warning lines must consist of ropes, wires, or chains, and • flagged every 6’ w/ high-visibility material • rigged and supported that its lowest point (including sag) is no less than 34” and its highest point is no more than 39” • stanchions must be capable of resisting at least 16 lbs. of force • warning line must have a minimum tensile strength of 500 lbs. • Employees are not allowed between the roof edge and warning line unless performing roofing work
Fall Protection Equipment Inspection & Maintenance BODY BELT/HARNESS INSPECTION Belts and rings: Starting at one end, hold the body side of the belt toward you. Grasp the belt with your hands 6 to 8 inches apart. Bend the belt in an inverted “U”. The surface tension resulting makes damaged fibers or cuts easier to see. Follow this procedure the entire length of the belt or harness. D-Rings: D-Rings and the metal wear pad should be checked for distortion, cracks, breaks, and rough or sharp edges. The D-Ring bar should be at a 90 degree angle with the long axis of the belt and should pivot freely. Attachment of buckles: Special attention should be given to the attachment of buckles and D-Rings. Note any unusual wear, frayed or cut fibers, or distortion of the buckles or D-Rings. Rivets should be tight and immovable with fingers. Body side rivet base and outside rivet burr should be flat against the material. Bent rivets will fail under stress. Frayed or broken strands: Broken webbing strands generally appear as tufts on the webbing surface. Any broken, cut, or burned stitches will be readily seen. Tongue or billet: The tongue and billet receives heavy wear from repeated buckling and unbuckling. Inspect for loose, distorted, or broken grommets. Belts should not have additional punched holes. Tongue buckle: Buckle tongues should be free of distortion in shape and motion. They should overlap the buckle frame and move freely back and forth in their socket. The buckle roller should turn freely on the frame. Check for distortion or sharp edges. Friction buckle: Inspect the buckle for distortion. The outer bars must be straight. Pay special attention to corners and attachment points of the center bar.
Fall Protection Equipment Inspection & Maintenance LANYARD INSPECTION When inspecting the lanyard, begin at one end and work to the opposite end. Slowly rotate the lanyard so that the entire circumference is checked. Pay particular attention to splices area. Hardware should be examined under procedures below: Snaps: Inspect closely for hook and eye distortions, cracks, corrosion, or pitted surfaces. The keeper (latch) should seat into the nose without binding and should not be distorted or obstructed. The keeper spring should exert sufficient force to firmly close the keeper. Keeper locks must prevent the keeper from opening when the keeper closes. Thimbles: The thimble must be firmly seated in the eye of the splice and the splice should have no loose or cut strands. The edges of the thimble must be free of sharp edges, distortion, or cracks. Web lanyard: While bending webbing over a pipe or mandrel, observe each side of the webbed lanyard. This will reveal any cuts or breaks. Swelling, discoloration, cracks, charring are obvious signs of chemical or heat damage, or UV degradation. Observe closely for any breaks in the stitching. Rope lanyard: Rotation of the rope lanyard while inspecting from end-to-end will show any fuzzy, worn, broken, or cut fibers. Weakened areas from extreme loads will appear as a noticeable change in original diameter. The rope diameter should be uniform throughout, following a short break-in-period. CLEANING FALL PROTECTION EQUIPMENT Nylon and polyester: Wipe off all surface dirt with a sponge dampened in plain water. Squeeze the sponge dry. Dip the sponge in a mild solution of water and commercial soap or detergent. Work up a thick lather using a vigorous back and forth motion. Then wipe the belt dry with a clean cloth. Hang freely to dry, but away from excessive heat. NEVER put the equipment in a dryer to dry. Belts and other equipment should dry thoroughly without close exposure to heat, steam, or long periods of sunlight.
U. S. Department of LaborOccupational Safety and Health AdministrationDirectorate of Enforcement ProgramsOffice of Health Enforcement Compatibility of Personal Fall Protection System Components Safety and Health Information Bulletin (SHIB 09-22-03 (A)) This Safety and Health Information Bulletin is not a standard or regulation, and it creates no new legal obligations. The Bulletin is advisory in nature, informational in content, and is intended to assist employers in providing a safe and healthful workplace. The Occupational Safety and Health Act requires employers to comply with hazard-specific safety and health standards. In addition, pursuant to Section 5(a)(1), the General Duty Clause of the Act, employers must provide their employees with a workplace free from recognized hazards likely to cause death or serious physical harm. Employers can be cited for violating the General Duty Clause if there is a recognized hazard and they do not take reasonable steps to prevent or abate the hazard. However, failure to implement these recommendations is not, in itself, a violation of the General Duty Clause. Citations can only be based on standards, regulations, and the General Duty Clause. Purpose The purpose of this safety and health information bulletin is to alert users of personal fall protection systems that: 1. Personal fall protection components made by different manufacturers may not be compatible. Components made by the same manufacturer also may not be compatible if they are not sized properly; 2. In some situations, large snap hooks may be susceptible to roll out; and 3. To remind users of OSHA’s standard on personal fall arrest systems and its requirements for snaphooks. Background The Methuen Area Office recently investigated an accident that involved a non-fatal fall of an ironworker from a steel beam onto the metal decking below. At the time of the fall, the ironworker was wearing personal fall arrest equipment. A 2 1/4 -inch gate snap hook (Figure 1) on the end of his lanyard was connected to the D ring on a beamer (a portable anchorage connector that rolls along the upper or lower flange of the beam, figures 2 and 3) that was attached to the top flange of the beam on which he was walking. This snap hook was the locking type that requires at least two consecutive, deliberate actions to open. When the ironworker fell, the snap hook rolled out of its attachment.
Incident Description The lanyard and snap hook were owned by the ironworker and were manufactured by the same personal fall arrest system manufacturer, while the beamer that was attached to the beam was supplied by the ironworker’s employer and was manufactured by a different fall protection equipment manufacturer. The worker’s lanyard had a large hook on one end with a 2 1/4-inch gate. Apparently, the ironworker did not know that the snap hook of the personal fall arrest system he was using was compatible with the beamer’s D ring ONLY when the beamer is attached to an overhead beam, rather than to the beam on which he was working. While working on the cross beam, the ironworker lost his balance and fell. Due to the nature of the fall, the snap hook experienced a side load which caused the hook’s keeper to fail, and the snap hook rolled out of its attachment. It is not known whether the side load exceeded the 350 pound side load requirements of ANSI A 10.14 and Z 359.1 standards for the snap keeper. The ironworker fell to the metal decking 16 feet below and sustained non-fatal injuries. OSHA Standards29 CFR 1926.502(d)(5) states in relevant part, that "snaphooks shall be a locking type snaphook designed and used to prevent disengagement of the snaphook by the contact of the keeper by the connected member." 29 CFR 1926.502(d)(6)(v) states "snaphooks shall not be engaged to any object which is incompatibly shaped or dimensioned in relation to the snaphook such that unintentional disengagement could occur by the connected object being able to depress the snaphook keeper and release itself." ANSI Standard ANSI A10.14, 1991, American National Standard for Construction and Demolition Operations - Requirements for Safety Belts, Harnesses, Lanyards and Lifelines for Construction and Demolition Use, paragraph 4.2.2.4, states that "snap-hooks with throat opening larger than 5/8" (1.6 cm) shall have a label attached." The label shall indicate the minimum size diameter to which the snap-hook shall be attached.1 "The snap keeper shall be retained by the nose of the snap and shall be capable of withstanding a minimum 350 pound (159 kg) side load." Paragraph 4.2.3.4, states "[t]he snap-hook for attachment of D-rings and O-rings shall be designed to minimize the possibility of accidental disengagement from the D-ring." ANSI Z 359.1, 1992, American National Standard Safety Requirements for Personal Fall Arrest Systems, Subsystems and Components, paragraph 3.2.1.4 states "[w]hen tested in accordance with 4.3.1.1.3, the gate of the snaphook or carabineer shall be capable of withstanding a minimum side load of 350 pounds (1.55 kN) applied to a point midway between the nose and gate hinge without breaking, permanent deformation greater than 0.125 inches (3.1 mm), or separating from the nose of the snaphook or carabineer body by more than 0.125 inches (3 mm)." 1 For example on a rebar snap-hook with a 1-5/8" (4.1 cm) throat opening, the warning might read "Warning: Do not use on attachments less than 1-1/4” (3.2 cm) in diameter."
Other Information After the accident, it was learned that both the lanyard and the beamer manufacturers had stated that the large snap hook (2 1/4-inch gate opening) on the lanyard was not compatible with the beamer’s D ring, unless the beamer is attached to an overhead beam. The lanyard manufacturer explained that the snap hook on this lanyard is designed for connection to large, continuous objects such as horizontal rebar, horizontal tower bracing or other structural steel that will not press against the gate of the hook when the hook rotates, twists or turns. During the investigation, it was established that lanyards with this type of large hook are prevalent in the steel erection industry. They are popular in part because, given the larger hook’s gate opening, they offer greater versatility because they can be connected to a greater number of possible anchorage points. This lanyard and hook design are popular not only with employers, but also are selected by many ironworkers who purchase and use their own personal fall arrest systems. Conclusions Personal fall arrest systems must be designed and used in accordance with the provisions set forth in 29 CFR 1926.502(d)(1) through (d)(24). 29 CFR 1926.502(d)(5) & 29 CFR 1926.502(d)(6)(v) require employers to determine whether the snaphooks on the personal fall arrest systems used by their employees are compatible with the members to which they are connected in order to prevent unintentional disengagement of the snaphook. Also, employers must ensure that the snaphooks on the personal fall arrest systems that their employees use are not engaged to any object which is incompatibly shaped or dimensioned in relation to the snaphook. OSHA reminds all employers that they must evaluate the compatibility of all fall arrest systems and anchorage devices used on the job site before they are used to protect employees. Employers should review carefully manufacturer instructions and warnings, and should be particularly vigilant when components are manufactured by different entities and not sold as a complete system since such components are more likely to be incompatible for use together. Figure 3 Figure 2 Occupational Safety & Health Administration200 Constitution Avenue, NWWashington, DC 20210 www.osha.gov Figure 1
U. S. Department of LaborOccupational Safety and Health AdministrationDirectorate of Science, Technology, and MedicineOffice of Science and Technology Assessment • Suspension Trauma/Orthostatic Intolerance • Safety and Health Information Bulletin (SHIB 03-24-2004) • This Safety and Health Information Bulletin is not a standard or regulation, and it creates no new legal obligations. The Bulletin is advisory in nature, informational in content, and is intended to assist employers in providing a safe and healthful workplace. The Occupational Safety and Health Act requires employers to comply with hazard-specific safety and health standards. In addition, pursuant to Section 5(a)(1), the General Duty Clause of the Act, employers must provide their employees with a workplace free from recognized hazards likely to cause death or serious physical harm. Employers can be cited for violating the General Duty Clause if there is a recognized hazard and they do not take reasonable steps to prevent or abate the hazard. However, failure to implement these recommendations is not, in itself, a violation of the General Duty Clause. Citations can only be based on standards, regulations, and the General Duty Clause. • Purpose This Safety and Health Information Bulletin provides employees and employers with important information about the hazards of orthostatic intolerance and suspension trauma when using fall arrest systems. This bulletin: • describes the signs and symptoms of orthostatic intolerance; • discusses how orthostatic intolerance can occur while workers are suspended following a fall; and • outlines recommendations for preventing orthostatic intolerance, as well as recommendations for worker training and rescue. • Background Orthostatic intolerance may be defined as "the development of symptoms such as light-headedness, palpitations, tremulousness, poor concentration, fatigue, nausea, dizziness, headache, sweating, weakness and occasionally fainting during upright standing" [1,2]. While in a sedentary position, blood can accumulate in the veins, which is commonly called "venous pooling," and cause orthostatic intolerance [3]. Orthostatic intolerance also can occur when an individual moves suddenly after being sedentary for a long time. For example, a person may experience orthostatic intolerance when they stand up quickly after sitting still for a long time.
A well-known example of orthostatic intolerance is that of a soldier who faints while standing at attention for long period of time. The moment the soldier loses consciousness, he or she collapses into a horizontal position. With the legs, heart, and brain on the same level, blood is returned to the heart. Assuming no injuries are caused during the collapse, the individual will quickly regain consciousness and recovery is likely to be rapid. Venous pooling typically occurs in the legs due to the force of gravity and a lack of movement. Some venous pooling occurs naturally when a person is standing. In the veins, blood normally is moved back to the heart through one-way valves using the normal muscular action associated with limb movement. If the legs are immobile, then these "muscle pumps" do not operate effectively, and blood can accumulate. Since veins can expand, a large volume of blood may accumulate in the veins. An accumulation of blood in the legs reduces the amount of blood in circulation. The body reacts to this reduction by speeding up the heart rate and in an attempt to maintain sufficient blood flow to the brain. If the blood supply is significantly reduced, this reaction will not be effective. The body will abruptly slow the heart rate and blood pressure will diminish in the arteries. During severe venous pooling, the reduction in quantity and/or quality (oxygen content) of blood flowing to the brain causes fainting. This reduction also can have an effect on other vital organs, such as the kidneys [3]. The kidneys are very sensitive to blood oxygen, and renal failure can occur with excessive venous pooling. If these conditions continue, they potentially may be fatal [3]. Description of Hazard Orthostatic intolerance may be experienced by workers using fall arrest systems. Following a fall, a worker may remain suspended in a harness. The sustained immobility may lead to a state of unconsciousness. Depending on the length of time the suspended worker is unconscious/immobile and the level of venous pooling, the resulting orthostatic intolerance may lead to death. While not common, such fatalities often are referred to as "harness-induced pathology" or "suspension trauma." Signs & symptoms that may be observed in an individual who is approaching orthostatic intolerance: • Nausea • Dizziness • Unusually low heart rate • Unusually low blood pressure • “Greying” or loss of vision • Faintness • Breathlessness • Sweating • Paleness • Hot flashes • Increased heart rate References: Seddon, Paul. Harness Suspension: review and evaluation of existing information. Health and Safety Executive. Research Report 451/2002. 104 pp. Sheehan, Alan. Suspension Trauma. Training handout.
Factors that can affect the degree of risk of suspension trauma: • Hypothermia • Shock • Cardiovascular disease • Respiratory disease • Blood loss • Inability to move legs • Pain • Injuries during fall • Fatigue • Dehydration References: Seddon, Paul. Harness Suspension: review and evaluation of existing information. Health and Safety Executive. Research Report 451/2002. 104 pp. Sheehan, Alan. Suspension Trauma. Training handout. Unconscious/immobile workers suspended in their harness will not be able to move their legs and will not fall into a horizontal position, as they would if they fainted while standing. During the static upright position, venous pooling is likely to occur and cause orthostatic intolerance, especially if the suspended worker is left in place for some time. Venous pooling and orthostatic intolerance can be exacerbated by other circumstances related to the fall. For example, shock or the experience of the event that caused the fall, other injuries, the fit/ positioning of the harness, the environmental conditions, and the worker’s psychological state all may increase the onset and severity of the pooling and orthostatic intolerance [3,5]. Unless the worker is rescued promptly using established safe procedures, venous pooling and orthostatic intolerance could result in serious or fatal injury, as the brain, kidneys, and other organs are deprived of oxygen [3]. The amount of time spent in this position, with the legs below the heart, affects the manner in which the worker should be rescued [3]. Moving the worker quickly into a horizontal position - a natural reaction - is likely to cause a large volume of deoxygenated blood to move to the heart, if the worker had been suspended for an extended period. The heart may be unable to cope with the abrupt increase in blood flow, causing cardiac arrest [3,5]. Rescue procedures must take this into account. Recommended rescue procedures are outlined below in the Conclusions and Recommendations section. Conclusions and Recommendations Prolonged suspension from fall arrest systems can cause orthostatic intolerance, which, in turn, can result in serious physical injury, or potentially, death. Research indicates that suspension in a fall arrest device can result in unconsciousness, followed by death, in less than 30 minutes [4]. To reduce the risk associated with prolonged suspension in fall arrest systems, employers should implement plans to prevent prolonged suspension in fall protection devices. The plan should include procedures for: preventing prolonged suspension, identifying orthostatic intolerance signs and symptoms, and performing rescue and treatment as quickly as possible.
OSHA recommends the following general practices/considerations: • Rescue suspended workers as quickly as possible. • Be aware that suspended workers are at risk of orthostatic intolerance and suspension trauma. • Be aware of signs and symptoms of orthostatic intolerance. • Be aware that orthostatic intolerance is potentially life threatening. Suspended workers with head injuries or who are unconscious are particularly at risk. • Be aware of factors that can increase the risk of suspension trauma. • Be aware that some authorities advise against moving the rescued workers to a horizontal position too quickly. • Training OSHA requires employers to train workers to use fall arrest systems and other personal protective equipment correctly while performing their jobs, in accordance with standards 29 CFR 1910.132 (Personal Protective Equipment) 29 CFR 1915.159 (Personal Fall Arrest Systems) and 29 CFR 1926.503 (Training Requirements for Fall Protection). Workers who wear fall arrest devices while working, and those who may perform rescue activities, should also be trained in: • How to ascertain whether their personal protective equipment is properly fitted and worn, so that it performs as intended; • How orthostatic intolerance/suspension trauma may occur; • The factors that may increase a worker’s risk; • How to recognize the signs and symptoms identified in this bulletin; and • The appropriate rescue procedures and methods to diminish risk while suspended. • Rescue ProceduresUnder 29 CFR 1926.502 (d) (Fall Protection Systems Criteria and Practices), OSHA requires that employers provide for "prompt rescue of employees in the event of a fall or shall assure that employees are able to rescue themselves." This should include identifying rescue procedures that address the potential for orthostatic intolerance and suspension trauma. Rescue procedures also should address how the rescued worker will be handled to avoid any post-rescue injuries.
Rescue procedures should include the following contingency based actions: • If self-rescue is impossible, or if rescue cannot be performed promptly, the worker should be trained to "pump" his/her legs frequently to activate the muscles and reduce the risk of venous pooling. Footholds can be used to alleviate pressure, delay symptoms, and provide support for "muscle pumping." • Continuous monitoring of the suspended worker for signs and symptoms of orthostatic intolerance and suspension trauma. • Ensuring that a worker receives standard trauma resuscitation1 once rescued. Some authorities recommend that the patient be transported with the upper body raised. • If the worker is unconscious, keeping the worker’s air passages open and obtain first aid. • Monitoring the worker after rescue, and ensuring that the worker is evaluated by a health-care professional. The worker should be hospitalized when appropriate. Possible delayed effects, such as kidney failure, which is not unusual in these cases, are difficult to assess on the scene. • References • Robertson, David. Orthostatic Intolerance. Vanderbilt University, Nashville, Tennessee. • New York Medical College. Orthostatic Intolerance. Vahalla, New York. • Seddon, Paul. Harness Suspension: Review and evaluation of existing information. Health and Safety Executive. Research Report 451/2002. 104 pp. • Sheehan, Alan. Suspension Trauma. Training handout. • Weems, Bill and Bishop, Phil. Will Your Safety Harness Kill You? Occupational Health & Safety. 72(3): 86-88, 90, March, 2003. • 1National Association of Emergency Medical Technicians (NAEMT). Provider Textbook section in: PHTLS Basic and Advanced Prehospital Trauma Life Support Fifth Edition St. Louis, MO: Mosby; 2003: Section 1. Summary available at: http://phtls.org/datafiles/ PHTLS%205ed%20Compendium.pdf Occupational Safety & Health Administration200 Constitution Avenue, NWWashington, DC 20210 www.osha.gov Page last updated 03/25/04
Preventing Slips & Trips • Slips and trips are often seen as a joke; however, reality proves nothing could be further from the truth. Slips and trips are one of the most common causes of major injury at work. They occur in almost all workplaces and most major slips result in broken bones. Slips and trips can also be the initial cause for a range of other accident types such as falling from height. • Slips and trips occur for many reasons. Many occur when people are in a hurry - whether it’s taking short cuts or simply not paying attention to what they’re doing. Slips happen when there is too little friction or traction between the footwear and the walking surface. Trips happen when your foot collides (strikes, hits) with an object causing you to lose balance and fall. • Most slips occur on wet or contaminated surfaces caused by spills, loose or unanchored rugs and mats, weather hazards, or by the nature of the work environment (e.g. wet areas in a kitchen, waxing/polishing a floor, oily surfaces in a shop, etc.). Most trips are due to poor housekeeping such as, but not limited to clutter in a walkway, wrinkled carpeting, uncovered cables, bottom drawers not being closed, uneven surfaces (e.g. steps, thresholds, depressions, etc.), and surface encumbrances (e.g. railroad track, sprinkler head, etc.). Also, poor lighting or anything else that can obstruct your vision (carrying large or bulky items) can influence a trip hazard. • Both slips and trips result from some a kind of unintended or unexpected change in the contact between the feet and the ground or walking surface. This shows that good housekeeping, quality of walking surfaces (flooring), selection of proper footwear, and appropriate walking pace are critical for preventing these fall exposures. • Housekeeping • Good housekeeping is the first and the most important (fundamental) level of preventing falls due to slips and trips. It includes: • proper design or methods to prevent slick surfaces (grates, drainage, mats, de-icing) • cleaning all spills immediately • marking spills and wet areas • continual facility maintenance and cleaning regimes • choice of suitable footwear • sweeping debris from floors/ground • removing obstacles from walkways and always keeping them free of clutter • securing (tacking, taping, etc.) mats, rugs and carpets that do not lay flat • always closing file cabinet or storage drawers • covering cables that cross walkways • keeping working areas and walkways well lit • replacing used light bulbs and faulty switches • effective maintenance of stairways, walkways, ladders, etc.
Preventing Slips & Trips • Without good housekeeping practices, any other preventive measure such as installation of sophisticated flooring, specialty footwear, or a safe walking pace will never be fully effective. • Flooring • Changing, modifying, or repairing/refinishing walking surfaces is the next level of preventing slip and trips. Recoating or replacing floors and/or tiles, installing mats, pressure-sensitive abrasive strips or abrasive-filled paint-on coating and metal or synthetic decking can further improve safety and reduce the risk of falling. However, it is critical to remember that high-tech flooring requires good housekeeping as much as any other flooring. In addition, resilient, non-slippery flooring prevents or reduces foot fatigue and contributes to slip prevention measures. • Footwear • In workplaces where floors may be oily or wet or where workers spend considerable time outdoors, prevention of fall accidents should also focus on selecting proper footwear. Since there is no footwear with anti-slip properties for every condition, consultation with manufacturers' is highly recommended. • Properly fitted footwear increases comfort and prevents fatigue which, in turn, improves safety for the employee. • Other preventative measures include: • taking your time and paying attention to where you are going • adjusting your stride to a pace that is suitable for the walking surface and the tasks you are doing • walking with the feet pointed slightly outward and making wide turns at corners • always use sufficient lighting • using a flashlight if you enter a dark room where there is no light • don’t carry or push anything that prevents you from seeing any obstructions, spills, etc. • effective education, training, and supervision • Solutions are often simple and cost effective. Involving workers and assessing slip and trip risks should identify the necessary controls and precautions needed. Lessening the chance of personal injury plus avoiding the financial expenses associated with an injury is not only necessary - it’s smart. Sources of the above information: http://www.hse.gov.uk/slips/index.htm (Health & Safety Executive) http://www.cdc.gov/nasd (National Agriculture Safety Database) http://www.ccohs.ca/oshanswers/safety_haz/falls.html (Canadian Centre for Occupational Health & Safety)
OR-OSHA 301 Introduction to Fall Protection An introduction to basic fall protection principles and codes related to fall protection used in construction and general industries. Illustration courtesy of Klein Tools Presented by the Public Education Section Department of Business and Consumer Business Oregon OSHA 1005
OR-OSHA Mission Statement To advance and improve workplace safety and health for all workers in Oregon. • Consultative Services • • Offers no-cost on-site safety and health assistance to help Oregon employers recognize and correct safety and health problems in their workplaces. • • Provides consultations in the areas of safety, industrial hygiene, ergonomics, occupational safety and health programs, new-business assistance, the Safety and Health Achievement Recognition Program (SHARP), and the Voluntary Protection Program (VPP). • Enforcement • • Offers pre-job conferences for mobile employers in industries such as logging and construction. • • Provides abatement assistance to employers who have received citations and provides compliance and technical assistance by phone. • • Inspects places of employment for occupational safety and health rule violations and investigates workplace safety and health complaints and accidents. • Appeals, Informal Conferences • • Provides the opportunity for employers to hold informal meetings with OR-OSHA on workplace safety and health concerns. • • Discusses OR-OSHA’s requirements and clarifies workplace safety or health violations. • • Discusses abatement dates and negotiates settlement agreements to resolve disputed citations. • Standards & Technical Resources • • Develops, interprets, and provides technical advice on safety and health standards. • • Provides copies of all OR-OSHA occupational safety and health standards. • • Publishes booklets, pamphlets, and other materials to assist in the implementation of safety and health standards and programs. • • Operates a Resource Center containing books, topical files, technical periodicals, a video and film lending library, and more than 200 databases. • Public Education & Conferences • • Conducts conferences, seminars, workshops, and rule forums. • • Presents many workshops that introduce managers, supervisors, safety committee members, and others to occupational safety and health requirements, technical programs, and safety and health management concepts. • Additional Public Education Services • Safety for Small Business workshops • Interactive Internet courses • Professional Development Certificates • On-site training requests • Access workshop materials • Spanish training aids • Training and Education Grants • Continuing Education Units/Credit Hours For more information on Public Education services, please call (888) 292-5247 Option 2 Go online to check out our Professional Development Certificate Program! Portland Field Office (503) 229-5910 Salem Field Office (503) 378-3274 Eugene Field Office (541) 686-7562 Medford Field Office (541) 776-6030 Bend Field Office (541) 388-6066 Pendleton Field Office (541) 276-9175 Salem Central Office: (800) 922-2689 or (503) 378-3272 Web Site: www.orosha.org