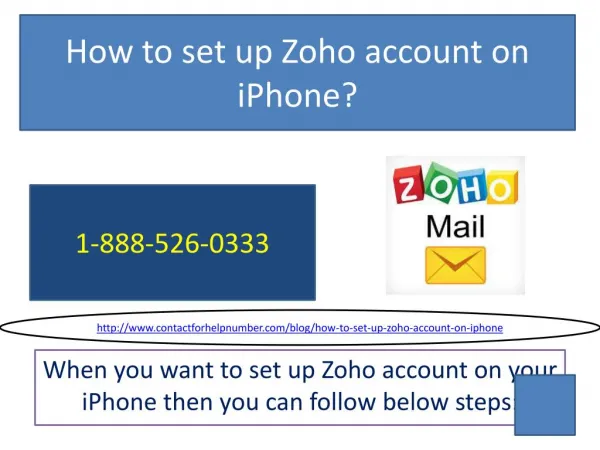
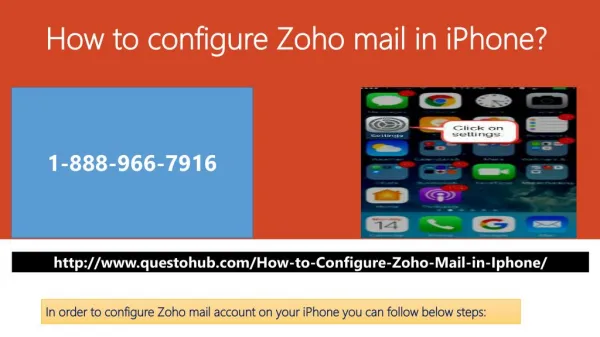
1 / 10

Easy Steps to Set Up Zoho Mail on iPhone

To set up Zoho Mail on your iPhone, go to Settings > Mail > Accounts > Add Account. Choose Other, then enter your Zoho credentials using IMAP settings. Save and sync to start accessing your Zoho Mail directly from the iPhone Mail app.<br>

Raymond55
Télécharger la présentation

Easy Steps to Set Up Zoho Mail on iPhone

An Image/Link below is provided (as is) to download presentation Download Policy: Content on the Website is provided to you AS IS for your information and personal use and may not be sold / licensed / shared on other websites without getting consent from its author. Content is provided to you AS IS for your information and personal use only. Download presentation by click this link. While downloading, if for some reason you are not able to download a presentation, the publisher may have deleted the file from their server. During download, if you can't get a presentation, the file might be deleted by the publisher.

E N D

Presentation Transcript


  1. HÑ · Se· U¨ Zh Mal ˆ lPhˆe: A S·e¨-b×-S·e¨ G¼lde How to Set Up Zoho Mail on iPhone: This guide provides a comprehensive walkthrough for configuring your Zoho Mail account on your iPhone, ensuring seamless access to your emails, calendar, and contacts on the go.

  2. Wh× U¯e Zh Mal ˆ Y¼« lPhˆe? 1 2 3 Uˆlfled Acce¯¯ Rea-·l‡e S׈c Eˆhaˆced Fea·¼«e¯ Access your emails, calendar, and contacts seamlessly from a single, integrated platform on your iPhone. Leverage IMAP for real-time updates, ensuring your mail is always current across all your devices. The dedicated Zoho Mail iOS app offers a richer experience with enhanced features and robust security protocols for your data.

  3. P«e-¯e·¼¨ E¯¯eˆ·la¯ S·e¨ 1: Eˆabe IMAP Acce¯¯ lˆ Zh Mal Before configuring your iPhone, you must enable IMAP within your Zoho Mail web interface. This crucial step allows your iPhone to synchronise emails effectively. Log in to your Zoho Mail account via a web browser. Navigate to Settings³Mail Accounts³Email forwarding and POP/IMAP. Locate and check the <Enable IMAP= option. Ensure you save changes to apply the setting.

  4. Cˆflg¼«a·lˆ ˆ DeÐlce S·e¨ 2: Add Zh Mal Acc¼ˆ· ˆ lPhˆe (Maˆ¼a IMAP Se·¼¨) Now, proceed to add your Zoho Mail account directly on your iPhone using the manual IMAP setup. This method provides granular control over the configuration. Add Account Access Settings Select Add Account, then Other, and finally Add Mail Account. Open iPhone Settings and tap on Accounts & Passwords. Select IMAP Enter Details Tap Next and ensure IMAP is selected as the account type for incoming mail. Input your Name, full Zoho Email Address, and Password. If you use Two-Factor Authentication, you'll need an App-Specific Password.

  5. Server Details Step 3: Enter Incoming Mail Server Details Host Name:imap.zoho.com (or imappro.zoho.com for organisation accounts) Username: Your full Zoho email address. Password: Your Zoho password or the app-specific password if you use 2FA. It's crucial to enable SSL and ensure the port is set to 993 in your iPhone's Advanced settings for secure communication.

  6. Server Details Continued Step 4: Enter Outgoing Mail Server Details Key Settings for Outgoing Mail (SMTP) Secure Transmission Host Name:smtp.zoho.com (or smtppro.zoho.com for organisation accounts) Ensure SSL is enabled for secure communication. Set the SMTP port to 465 (or 587 if using TLS). Username: Your full Zoho email address. Verify that authentication is required for sending emails. Password: Your Zoho password or app-specific password. Correctly configuring these settings ensures your outgoing emails are sent reliably and securely from your iPhone.

  7. Flˆa T¼che¯ S·e¨ 5: Flˆal¯e Se·¼¨ aˆd S׈c Fde«¯ Once you've entered both incoming and outgoing server details, your iPhone will attempt to connect to Zoho's servers. A successful authentication means your account is nearly ready. 01 02 03 A¼·heˆ·lca·lˆ Fde« Ma¨¨lˆg¯ IMAP EÖ¨¼ˆge Upon successful authentication, your iPhone will establish a connection with the Zoho servers. In Advanced settings on your iPhone, configure folder mappings for Sent, Trash, and Drafts to ensure consistency across devices. For optimal folder synchronisation, consider reviewing IMAP Expunge options in your Zoho Mail web interface.

  8. Bˆ¼¯: U¯lˆg ·he Zh Mal lOS A¨¨ For a truly dedicated and feature-rich experience, consider downloading the official Zoho Mail iOS app from the App Store. It offers several advantages over the native Mail app. Integrated Experience: Seamlessly syncs mail, calendar, and contacts within a single app without affecting your iPhone's native applications. Push Notifications: Receive instant push notifications for new emails, ensuring you never miss an important message. Advanced Features: Access exclusive features like enhanced search, rich text editing, and granular control over mail settings directly within the app.

  9. T«¼be¯h·lˆg C‡‡ˆ I¯¯¼e¯ Encountering problems? Here are quick solutions to frequent setup issues: Iˆc‡lˆg Mal N· S׈clˆg Uˆabe · Seˆd Mal Tя-Fac·« A¼·heˆ·lca·lˆ Ensure SSL is enabled and the port is set to 993 in your Advanced incoming server settings. Verify your SMTP server, confirm SSL is enabled, check port 465, and ensure your email address is correct. If you use 2FA, you must use an app-specific password instead of your main Zoho password for setup.

  10. Read× · S·a× Cˆˆec·ed? Sea‡e¯¯ E‡al Maˆage‡eˆ· AÑal·¯! FÑ O¼« G¼lde Eˆz× Oˆ-·he- G DÑˆad ·he A¨¨ Adhere to these detailed steps for secure, reliable Zoho Mail access on your iPhone. Experience seamless email management wherever you are, keeping you productive and connected. For enhanced features and a dedicated experience, download the Zoho Mail app today!

More Related