Organic Solar Cells
Organic Solar Cells. Greg Smestad ( http://www.solideas.com/solrcell/cellkit.html ) developed this experiment. . Goal.

Organic Solar Cells
E N D
Presentation Transcript
Organic Solar Cells Greg Smestad(http://www.solideas.com/solrcell/cellkit.html) developed this experiment.
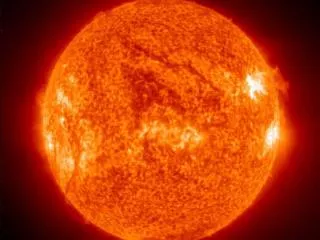
Goal • In the past year the price of fossil fuels has increased more than anytime in recent memory. Because of this fact, the race for alternate energy sources to replace or lessen the use of fossil fuels has risen. This activity of creating electricity through the use of organic solar cells is an example of one way scientists are trying to alleviate some of the dependence on non-renewable resources. It is the purpose of this activity for students to see that with a little human ingenuity, other ways to create energy can be attained.
Safety • In the initial stages of this lab, when using the powered TiO2care should be taken not to inhale this compound. Massing, grinding, and heating should be done in a fume hood or a well ventilated area. If this is not possible, a ventilation mask should be worn. • Goggles and gloves are also recommended throughout the lab.
ProcedurePrepare the TiO2 Suspension • In 1 mL increments, add 9 mL of very dilute acetic acid solution (0.1 mL concentrated acetic acid to 50 mL of distilled or deionized water.) to 6 g of TiO2 powder in a mortar and pestle while grinding. • The grinding process mechanically separates the aggregated TiO2 particles due to the high shear forces generated. • Add each 1 mL addition of the dilute acid solution only when the previous mixing and grinding has produced a uniform and lump-free suspension with a consistency of a thick paint. • The grinding process requires about 30 minutes and should be done in a well-ventilated area. (a Fume hood if you have one)
ProcedurePrepare the TiO2 Suspension • To the TiO2 paste, add a drop of Triton X or two drops of clear dish washing detergent, and swirl. • This allows the final suspension to more uniformly coat the glass plates. So as not to produce foam, the TiO2 suspension should not be ground or agitated after the surfactant is added. • Transfer half of the TiO2 suspension in to each of the 2 provided small dropper bottles and allow it to equilibrate for at least 15 minutes (if not overnight) for best results. These bottles will need to be shared with the entire class.
ProcedurePreparation of the TiO2 slide • Obtain 2 glass plates and clean with ethanol. Do not touch the faces of the plates once they are cleaned! • Determine which side of each glass plate is conducting with a multimeter (set it to measure resistance). • Put the glass plates side by side with one conducting side up and one conducting side down. • Cover 1mm of each long edge of the plates with Scotch tape. • Cover 4-5 mm of the short edge of the conductive side up with Scotch tape. Add 2 drops of the white TiO2 solution on the conductive side up glass. • Quickly spread the white TiO2 solution evenly with a glass pipette, sweeping first away from the second slide, then sweeping the extra TiO2 onto the second glass slide.
ProcedurePreparation of the TiO2 slide • Obtain 2 glass plates and clean with ethanol. Do not touch the faces of the plates once they are cleaned! • Determine which side of each glass plate is conducting with a multimeter (set it to measure resistance). • Put the glass plates side by side with one conducting side up and one conducting side down. (A) • Cover 1mm of each long edge of the plates with Scotch tape. (set it to measure resistance). (set it to measure resistance). (B) • Cover 4-5 mm of the short edge of the conductive side up with Scotch tape. (C) • Add 2 drops of the white TiO2 solution on the conductive side up glass. (D) • Quickly spread the white TiO2 solution evenly with a glass pipette, sweeping first away from the second slide, then sweeping the extra TiO2 onto the second glass slide. (E)
ProcedurePreparation of the TiO2 slide • Remove the tape and place the TiO2-coated glass on the hot plate, keeping track of where your plate is. • Clean the TiO2 from the other glass plate with ethanol and save it for the next part of the lab. • Heat the glass on a hotplate turned to high in a hood for 10-20 minutes. • The surface turns brown as the organic solvent and surfactant dries and burns off to produce a white or green titanium dioxide coating.(Note: this requires a plate that gets quite hot.) • Allow the glass to slowly cool by turning off the hotplate.
ProcedureStaining the TiO2 slide • Crush fresh or frozen raspberries, blackberries, pomegranate seeds, bing cherries, or red Hibiscus tea into a Petri dish. • Pour part of the crushed berries into a coffee filter and with gloves on squeeze the bottom of the filter so the juice goes into the Petri dish. • There should be enough juice in the Petri dish to cover the TiO2 slide when placed face down to soak.
ProcedureStaining the TiO2 slide • Soak the slide (face down) for 10 minutes in this liquid to stain the slide to a deep red-purple color. If the slide is not uniformly stained, then put it back in the liquid for 5 more minutes. • Wash the slide first with distilled water then ethanol and gently blot it dry with a tissue. • While the TiO2 slide is soaking in the liquid, use this time to prepare the graphite slide. (Do not remove the TiO2 slide from the liquid until you have finished the graphite slide.)
ProcedurePreparation of the graphite slide • Pass the other slide of tin oxide glass, conducting side down, through a candle flame to coat the conducting side with carbon (soot). • For best results, pass the glass piece quickly and repeatedly through the middle part of the flame. • Wipe off the carbon along the perimeter of three sides of the carbon-coated glass plate using a cotton swab.
ProcedureAssembling the Solar Cell • Place the carbon-coated glass plate face down on the TiO2-coated glass plate. • The two glass plates must be slightly offset (5 mm) . • Hold the plates together with binder clips on each side of the longer edges. • Add 2 drops of the iodide solution on an offset side and allow it to soak through. • Alternately open and close each side of the solar cell by releasing and returning the binder clips to help the iodide solution move through. • Make sure that all of the stained area is contacted by the iodide solution. • Wipe off excess iodide solution on the exposed area (important) with tissue paper.
ProcedureAssembling the Solar Cell • Connect a multimeter using an alligator clip to each plate (the negative electrode is the TiO2 coated glass and the positive electrode is the carbon coated glass). • Make sure the light is shining through the TiO2 coated glass first. • Test the current and voltage produced by solar illumination, or an overhead projector.
Data • Using your readings from the multimeter complete the following table.
Solar Cell Mechanism • Dye Molecule – absorbs a photon of light, exciting an electron from its ground-state orbital into an excited-state orbital, making it easy for the electron to come free from the molecule and travel through the electrical circuit • TiO2Nanocrystals – are very small, so they have a high surface area. When annealed (cooked) they fuse to form a very rough (and therefore very large) surface area. The dye molecules react with this surface, forming bonds so that they can stick to it. The larger the surface area, the more dye molecules can be attached to the surface and therefore the more electrons can be excited at any given time. The TiO2 is a semi-conductor, so it enables the electrons to move away (conduct) from the dye molecules and into the circuit • Electrodes – conduct the electrons from the cell into the electrical circuit. This allows the electrons to flow through the circuit (in our case, a multimeter). Flowing electrons are called electricity! Tin oxide (SnO2) coated glass is used because it is both conductive and transparent, and we want light to pass through the electrodes into the solar cell. • Electrolyte – when the dye loses an electron, it becomes positively charged, and needs obtain another electron to be re-neutralized. (It will then be able to react again when another photon comes along!) The iodide ion (I–) is able to provide the required electron, thereby neutralizing both the iodide and the dye molecule. Iodine is not stable as a single neutral atom, so two neutral atoms of iodine react with an additional iodide ion to form triiodide (I3–). • Carbon – Recall that electrons are flowing OUT through the TiO2-coated electrode and IN through the carbon-coated electrode. The carbon acts as a catalyst, allowing two incoming electrons to react with one molecule of triiodide to form three iodide ions, thus completing the cycle.
Materials • Reusable Supplies • Plates of Conductive Glass • Mortar & Pestle • Dropper Bottles for TiO2 • Dropper Bottles for Iodide Solution • Petri Dishes with Lids • Pasteur Pipettes • Multimeter • Alligator Clips • Binder Clips • Coffee filter (for squeezing raspberry juice) • Hot Plate • Overhead Projector • Consumable Supplies • nanocrystalline TiO2 • Triton X or clear liquid dish soap • Aqueous Acetic Acid Solution • Iodide Solution • Frozen Raspberries (allow to thaw in refrigerator overnight) • Ethanol (Rubbing Alcohol may be substituted) • Distilled or Deionized Water • Scotch Tape • Absorbent Tissue or Cotton Swabs Most of these can be purchased in a classroom kit at http://ice.chem.wisc.edu/catalogitems/ScienceKits.htm#SolarCell
Conclusion • Is making Organic solar cells a viable alternate to fossil fuels? • What is the efficiency of your solar cell? (hint, Estimate the efficiency of your solar cells. Measure the power they produce while driving a motor by measuring the voltage across the terminals and the current through the solar cell. Multiply the voltage times the current to get the power of the solar cell Po. Po = V x I Now estimate the power from the sun which hits the solar cell. To do this multiply the area of the solar cell, A, in square meters times the power of sunlight ,Ps, which is about 1000 watts per meter squared, W/m2. If your solar cell is 4 cm by 6 cm then its area is 0.04 m x 0.06 m = 2.4 x 10⁻³ m2. So the power input is Pi = A * Ps = 2.4 x 10-3 * 1000 = 2.4 watts The ratio of the power delivered by the solar cell to the power input from the sun is the efficiency of the solar cell, e, which is usually expressed as a percent. e = (Po/Pi) * 100 • Can you think of any ways to change the solar cell to make it more efficient?
Resources Websites for more ideas and activities with Solar Cells: Nanocrystalline Solar Cell Kit- place to purchase prepared kits for lab. Clean Energy: Converting Light to Energy- contains a similar solar cell lab, and power points and videos to support alternate energies. Titanium Dioxide Raspberry Solar Cell- Instructions , pictures and video clips for making organic solar cell. Solar-energy research heats up- interview with Greg Smestad, the developer of the Ti02 solar cell kit. SOL IDEAS- Greg Smestad’s web site. Organic Solar Cells- 7 minute video using carbon nanotubes to build cells. Solar Cells- shows how solar cells can be connected in Series and parallel. How Solar Cells Work – HowStuffWorks, lots of information.