Ceramic Etching
Ceramic Etching. Using Wax Resist. Step 1. Create a your form: Bowl Plate Vase Ect. . Step Two. Think in Reverse. Begin with a leather hard to bone dry, completed form . This process requires a bit of thinking in reverse. Protect the parts of the piece that are not to be altered.

Ceramic Etching
E N D
Presentation Transcript
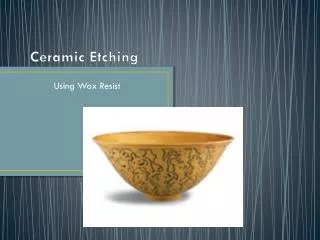
Ceramic Etching Using Wax Resist
Step 1 • Create a your form: • Bowl • Plate • Vase • Ect
. Step Two Think in Reverse • Begin with a leather hard to bone dry, completed form. This process requires a bit of thinking in reverse. • Protect the parts of the piece that are not to be altered. • The first layer of waxresist applied to the piece, because it covers the clay before any abrasion takes place, end up being the topmost layer, or highest relief area at the end of the process. • Apply resist to both the rim and the foot to preserve their integrity throughout the process
. Step Three Apply the first (and ultimately foreground) layer of resist for your chosen design
Step Five • Adding Linear Elements • Since more (or even most) of the surface is covered by resist at this point, you don’t have to thoroughly rinse the sponge out quite as frequently. When you notice a slurry developing, rinse the sponge to avoid abrading the edges of the resisted areas, otherwise your lines may have jagged rather than crisp edges. • Since the area being dissolved now is linear as opposed to large planes, moving in a circular motion with the sponge this aids in getting a uniform depth to the etching • The resist will eventually burn out in the bisque and only then is the depth and uniformity of the etching revealed • You may carve into the resist with a needle tool to add extra detail
Step Six • Adding Color • Let the piece dry completely then brush a dark slip or underglaze suitable for use on greenware over the entire surface. • With a sponge, wipe off any slip that is not in between the etched lines before it dries. • Bisque Fire
Step Seven • Glazing Strategies • When the bowl is bisque fired, you’ll finally be able to see how the decoration looks, from the subtleties of the etched layers to the contrast between the dark and light tones of the slipped and bare areas. • When glazing transparent or translucent glazes, or glazes that break over texture and edges, works the best. If the colored slip is dark (like this black one), a darker glaze cuts way down on the contrast. • Note: Since the relief is low, a thin glaze application works better since a thicker glaze on the finished piece will soften the etched effect.