Download
1 / 28
280 likes | 471 Vues
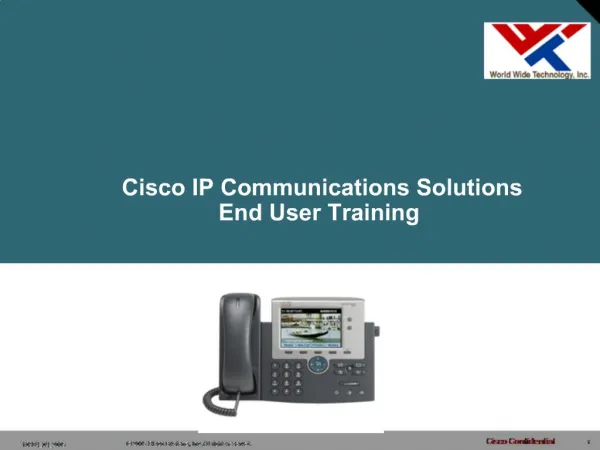
RSCCD Cisco IP Communications Solutions End User Training May 20, 2009. Course Overview. The Cisco IP Communications Training Course explains how to use the basic features of the District’s IP Communications System. Using Common IPC Features.

E N D
RSCCD Cisco IP Communications Solutions End User Training May 20, 2009
Course Overview • The Cisco IP Communications Training Course explains how to use the basic features of the District’s IP Communications System.
Using Common IPC Features • By the end of this training you will be able to complete the following: • Place, transfer, forward, park and pick up a call • Set voice mail passwords • Retrieve, play, save, and delete voice mail
Line Buttons Speaker Handset Headset Placing a Call There are many ways to place a phone call. You can simply: • Lift the handset • Dial the phone number Other ways include the following: • Dial the phone number • Do one of the following: • Lift the handset • Press the line button for the line you wish to call on (Speaker button lights) • Press the Speaker button • Press the Headset button
Dialing the Number Inside Calls: Dial 5 digit extension number New 5 digit extension is the last number of your prefix and last 4 digits of your phone number. Example :714-564-5420 = Ext. 45420 Outside Calls: Dial “9” + the number Note: 1. Dial “9” + 10-digit number --- Dialing from New System to Old System 2. Dial “9” + ”1” + the number + Long Distance Access Code --- Dialing long distance number * ** Old system will be removed once everybody is transported to the new system.
Dialing Emergency 911 Emergency Calls: Dial “911” or “9911” to reach the Public Safety Answering Point A Site Administrator will also be notified that a 911 call has been placed. This will help ensure that the First Responders have access to the location of the 911 caller.
Speaker Handset Softkeys Headset Answering an Incoming Call • Lift the handset • Or, answer with the speakerphone; either: • Press the Speaker button • Press the Answer softkey • Press the line button for the incoming call • Or, answer with a headset; either: • Press the Headset button(If not lighted) • If lighted, either: • Press the Answer softkey • Press the line button for the incoming call • Press the Mute button to mute a call or to disengage mute. • * iidivert – during a call, direct an incoming call straight to voicemail
Speaker Handset Softkeys Headset Ending a Call • Depending on how the call was placed (or accepted), do one of the following: • Hang up the handset • Press the Speaker button • Press the Headset button • Press the EndCall softkey
Softkeys Scroll Putting a Call on Hold • Press the Hold softkey. • To return to the call, press the Resume softkey. • If you have multiple calls on hold: • Use the Scroll key to select the call to resume • Press the Resume softkey
Softkeys Scroll Answering a Second Call • While on the first call: (Manage 4 calls per phone line.) • If necessary, press the Scroll key to highlight the second call • Then, press the Answer softkey. This places the first call on hold. • To resume either call: • Press the Scroll key to select the desired call • Then, press the Resume softkey • To end either call: • Press the Scroll key to select the call • Then, press the EndCall softkey • After ending either call, press the Resume softkey to resume the other call.
Softkeys Transferring an Incoming Call • Answer the call. • Press Transfer softkey. This places the call on hold. • Dial the number that the call will be transferred to. • When the dialed number rings, either: • Press the Transfer softkey again, or • Wait for the party to answer so you can announce the call, and then press the Transfer softkey. • Or direct to VM, dial *XXXXX • If the party refuses the call, or the call does not complete successfully, press the Resume softkey to re-join the original call.*Default 3 rings
Softkeys Forwarding all Calls • To forward all incoming calls to another extension: • Press the CFwdAll softkey. • Enter the telephone number to which you want to forward all your incoming calls. A flashing right arrow appears next to your telephone number on the LCD to indicate that all incoming calls are being forwarded. The number calls are forwarded to appear near the bottom of the display. • To Cancel, press the CFwdAll softkey.
Softkeys Forwarding All Calls to Voicemail • To forward all incoming calls to voicemails: • Press the CFwdAll softkey. • Press the Messages softkey The number calls are forwarded to appears near the bottom of the display. • To Cancel, press the CFwdAll softkey.
Softkeys Parking and Retrieving a Call Park an active call on one phone and retrieve the call on another phone. • Use verbal examples (lab) • During a call, press the more softkey, then the Park softkey. • Note the Call Park number displayed on the screen (displays for ~10 seconds). • Hang up. • From any IP phone, press # and dial the Call Park number. • You have two (2) minutes to answer the call, then it starts ringing at the original phone.
Softkeys Making Conference Calls • Place the first call and wait for it to be answered. • Press the more softkey, then, press the Confrn softkey. This selects a new line and places the first call on hold. • Dial another telephone number. • When the next call is answered, press the Confrnsoftkey to add this person to the conference call. You should now be able to speak to both called parties • Repeat step 4 to a total of 8 including yourself. • Max participants is 8 (7 other lines and yourself)
Softkeys Scroll Settings Changing Phone Settings 1) Press the Settings button, using Softkeys select User Preference then Rings. Press the Scroll key to highlight Ring Type; press the Select Softkey. • Press the Scroll key to highlight either a line or the default ring setting (these work the same), the press the Select softkey. • Use the Scroll key to highlight a ring type. • Press the Play softkey to hear the highlighted ring type. • To select a ring type, press the Select softkey and then press the SAVE softkey. • Press the Exit softkey twice to exit.
Voicemail • Press the Messages button. • Enter your password (first time access use 123987#). • Listen carefully to the prompts and respond as prompted: • Following directions • Record your name • Record a greeting that outside callers will hear when you do not answer your phone • Change your phone password • If you hang up before finishing, you will be prompted the next time you press Messages to repeat the above steps.
Accessing Voicemail from Another Phone Dial 1-714-564-5500 outside of District, dial 45500 within District. • When prompted for an ID, enter your extension number and press #. • Enter your vm password and press #. • Follow the voice instructions.
Messages Saving/Deleting Voice Messages by Phone • Press the Messages button. • Enter your password. • Press 1 to hear new messages • To save during or after playback, press 2. To delete, press 3
Rancho Santiago District Cisco IP Phone Personal FAQ Sheet. Rancho Santiago District Cisco IP Phone Personal FAQ Sheet. Voicemail Playback – Microsoft Windows Media Player
Rancho Santiago District Cisco IP Phone Personal FAQ Sheet. OutlookE-Mail Retention Reminder • All employees have 500 MB of space. • Mail Retention Guarantees: • 1. Maintain Inbox messages up to 120 days old. • 2. Maintain Sent Messages up to 90 days old. • 3. Maintain Deleted Items up to 5 days old. • 4. Calendar, Contacts, Notes, and Tasks are not affected by age limits. • 5. Old messages are cleared on a regular basis to mitigate available storage being consumed.
Accessing The CCMUser Page This page allows you to create Speed dials and Abbreviated dials. Use your internet web browser to go to the following address: https://10.180.20.10/ccmuser • Enter your WebAdvisor ID in the “Username” field. • Enter your network password in the ”Password” filed(Password you use to login to your computer each morning.) • Click the “Login” button • A Certificate window appears. Select the RED Shield with X (not recommended). • Disregard not recommended.
Setting Speed Dials • Under “User Options” select Device. • Select the “Speed Dials” button. • Enter your speed dial contact information in the fields • Save changes using DISK icon. • Then select ReSET button, then Restart button. • Phone LCD screen blinks after some delay. Changes are then made. • Close window, Log Off from CCMUser Page.
Setting Abbreviated Dials Log in same as Speed Dial. Log in same as Speed dial, go to Abbreviated dials On a two in phone you begin with Code 2 Abbreviated Dial # OR Code 3 Abbreviated Dial #Code 4 Abbreviated Dial # Code 5 Abbreviated Dial # Continue adding numbers until you reach Code 99. • Save changes using DISK icon. • Then select ReSET button, then Restart button. • Phone LCD screen blinks after some delay. Changes then made. • Close window, Log Off from CCMUser Page • To dial abbreviated code. Select code number on key pad then third soft key AbbrDial.
Important Numbers To Remember • 333 Campus - Safety Non-Emergency Number • 911 or 9911 - Emergency Dial Number • 1-714-564-5500 – To Access Unity Voicemail System Externally
Ongoing Support • For your Cisco IP Phone: • Quick Reference Guide – < link to the 7942 / 7962 IP phone quick reference guide> • For Cisco Unity • Use the ? Key between the four button keys. (messages, directories, settings, & services) • Where to get support • District Office IT Help Desk 714-480-7427 • SAC IT Help Desk 714-564-4357 • SCC IT Help Desk 714-628-4999 • RSCCD Intranet web site • Online Training <link to the IP phone flash training slides>