Download
1 / 27
300 likes | 985 Vues
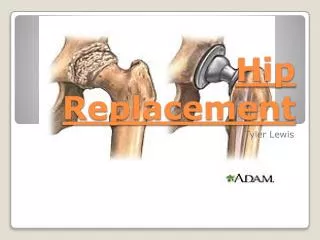
Total Hip Replacement. Education Workshop (click to go to the desired section) Introduction to Workshop/Instructions Evidence-Based Care Program Total Hip Replacement Workshop. Next. Back. Introduction.

E N D
Total Hip Replacement Education Workshop (click to go to the desired section) • Introduction to Workshop/Instructions • Evidence-Based Care Program • Total Hip Replacement Workshop
Next Back Introduction • This interactive workshop is designed to go along with a copy of the pathway. Keep it handy as you go through the workshop to engage in the required activities. • This is a web-based workshop, and thus has links throughout each page to enable you to move throughout the workshop. Whenever you see words underlined like this, you can click on that area to go to another section or to find more information on a topic. • At the bottom of each page are navigational buttons to help you move through the workshop. • You can go through as much or as little of the workshop as you like at a time. • If you have any questions about how to use this workshop or the individual pathways, feel free to ask the Evidence-Based Care Program or your Site Champion. Back to Start of Workshop
Next Back Evidence-Based Care Program These pathways have been developed as a part of the Evidence-Based Care Program, which is Schedule 6 in the agreement of the Grey Bruce Health Network. The intent is to develop regional pathways and other evidence-based tools that flow across all hospitals and community services in Grey and Bruce (including Grey Bruce Health Services, Hanover and District Hospital, South Bruce Grey Health Centre, and the Community Care Access Centre). It is hoped that these pathways will improve: • Coordination of care through more communication across professions; • Continuity of care, through increased linkages among hospitals and the CCAC; • Clinical outcomes, through increased usage of best practices; and • Patient satisfaction, through linked expectations and increased patient teaching at our agencies. Back to Start of Workshop
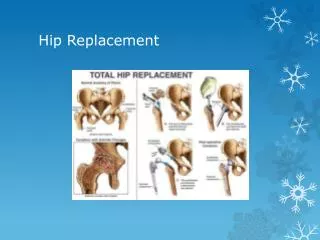
Next Back Total Hip Replacement Pathway • The Total Hip Replacement pathway is intended for all patients who are booked for an elective total hip replacement. • The pathway package includes a clinical practice guideline and two stages: Acute Stage: • Pre-Admission package • Acute Stage package Community Care Stage: • Community Care Stage Pathway Back to Start of Workshop
Next Back THR Clinical Practice Guideline In most cases, when developing a pathway we will come across the most accepted published clinical practice guideline for the patient population. However, because total hip replacements are a procedure, not a condition, there were no clinical practice guidelines published. Thus a development team from GBHS - Owen Sound and GBHS – Markdale helped in the creation of one based on the available evidence and issues we faced for this procedure. The THR clinical practice guideline can be found on the GBHN website at www.gbhn.ca Back to beginning of THR section Back to Start of Workshop
Next Back Pre-Admission Package • Each elective THR patient is to go to a Pre-Admit clinic 2-4 weeks before having surgery. This is where our Acute Stage of the clinical pathway begins. • When the surgeon books a patient, a patient education booklet along with the patient pathway is given to him/her that day. Thus, when the patient arrives in the Clinic, he/she should already have these materials. However, if these have been lost or were not given, copies are available in the Clinic to be sure the patient has this information. • There are two forms we need the patient to fill out before leaving the Clinic. There is the LEFS functional assessment tool (see a sample), and the Orthopedic Functional Questionnaire (see a sample), which are used by the Pre-Admit team to determine if CCAC services will be required post-operatively. Back to beginning of THR section Back to Start of Workshop
Next Back Pre-Admission • During the Clinic, the Acute Stage Clinical Pathway is started. It is put on the chart, and the appropriate staff initial as tasks are completed during the Clinic. • There is an algorithm to follow the activities of the Pre-Admit Clinic. It can be found by clicking here. • When the Pre-Admit Clinic is finished, the pathway remains on the chart in preparation for the day of surgery. Back to beginning of THR section Back to Start of Workshop
Next Back Pre-Printed Orders • The pre-printed orders are post-operative orders for total hip replacement patients. • They can be found in the Operating Room area of the hospital and are available at www.gbhn.ca. (see a sample) • There are also sets of pre-printed orders for receiving hospitals that have been developed for those patients that are transferred out of GBHS – Owen Sound (see a sample). • These can be found in the medical/surgical units in each community hospital and at www.gbhn.ca. Back to beginning of THR section Back to Start of Workshop
Next Back THR Acute Stage Pathway • The Acute Stage of the THR pathway is a day-style pathway, meaning that each page outlines tasks for one 24 hour period, beginning at the start of the day shift and ending at the end of the night shift. (See a sample) • It should be on the chart when the patient arrives for surgery, with the pre-admit page filled out. • The “Smiley Face” tool is taped to the wall in the patient’s room, and filled in by the physiotherapy department as exercise and mobility milestones are achieved post-operatively. All disciplines can refer to this tool when caring for the patient as a quick reference as to the abilities of the patient. (see a sample Smiley Face Tool) Back to beginning of THR section Back to Start of Workshop
Next Back THR Acute Stage Pathway • At the right hand side of the sheet is a place to enter the date. There are also three columns, these are the time frames for the shifts working during that day. Indicate the time you are working with the patient in the appropriate column. • Then, using the column for your shift, initial tasks as they are completed, or enter N/A and initial if they are not applicable to the patient. For example, if it is the night shift and you are not doing any patient teaching, indicate N/A and initial in the section for Psychosocial/Education under “Review Patient Pathway” and “Review Total Hip Precautions”. (see sample) • This is repeated for each day of the pathway. Back to beginning of THR section Back to Start of Workshop
Next Back THR Acute Stage Pathway • On a daily basis, the Discharge Criteria, the last page of the pathway, should be checked and dated/initialed if any of the criteria have been met. The patient is ready for discharge when these criteria have been met. • Post-Op Day 1 at the top of the page has one of the Performance Indicators for this pathway, “ Antibiotics discontinued within 24 hours of surgery”. This should be inputted as “Met” or “Not Met”. • Take a look at the pathway by clicking here. Back to beginning of THR section Back to Start of Workshop
Next Back Transferred Patients • Approximately 50% of patients in for a THR will be transferred to a community hospital following surgery. If a patient is transferred to a hospital within Grey and Bruce counties, a copy the following information must be sent to the receiving facility: • Smiley Face Tool • Discharge Criteria • Physio Database • Teaching Checklist • Discharge Planning Tool • MAR sheet (and anticoagulant record ) • The patient should also arrive with the patient education materials and patient pathway that can be referred to for patient teaching. If not, there are extra copies of the education materials on each unit. • The Acute Stage of the pathway will be continued at the new site until the patient is discharged and/or the discharge criteria have been met. • The Acute Stage Post-op Orders for Transferred patients can be used at the receiving facility, making any necessary changes depending on the day the patient is transferred. Back to beginning of THR section Back to Start of Workshop
Next Back Ongoing Post-Op Care • If a patient remains in hospital beyond 5 days post-op, regardless of whether he/she was transferred or not, the page entitled “Ongoing Post-Op Care” in the pathway can be started. These patients may have other comorbidities and will remain in hospital for further convalescence. • This page of the pathway is a phase-type pathway, as the patients that remain in hospital longer than 5 days are variable and difficult to estimate a length of stay. It is expected that patients will remain on this stage of the pathway until all the discharge criteria are met. • There are three columns on the right hand side -one for each day the patient remains in hospital. Blank copies of this page can be inserted if the patient remains beyond the three day period. • (see sample) Back to beginning of THR section Back to Start of Workshop
Next Back Community Care Stage • The Community Care Stage of the pathway is used for both outpatient physiotherapy or CCAC services following discharge. • The Community Care Stage includes the following pieces: • Clinical pathway – one page with admission and discharge goals, used as a charting tool for documentation • Client pathway – to be given to the patient to align expectations • Patient Communication Form – for the patient to bring to follow up appointments with the surgeon. Has a list of common questions that the therapist and patient need answered • LEFS Functional Assessment Tool – to be filled in by the patient at the end of services. Score can be compared to expected goals to determine success of therapy. • When the patient finishes services either from CCAC or Outpatient Physiotherapy, a copy of the clinical pathway is copied and sent to the Evidence-Base Care Program for evaluation purposes. Back to beginning of THR section Back to Start of Workshop
End of THR Section • This is the end of the general information for the THR pathway. • To get further information by trying the pathway on a sample patient, move to the Simulation portion of the THR workshop. • Test your knowledge of THR by doing the THR quiz.
Next Back Simulation • Try it! • Joe has had painful osteoarthritis and his surgeon has determined the best solution is a total hip replacement. Joe is booked for surgery, and given his patient education package, including the patient pathway, two months in advance. His pre-admit clinic appointment is scheduled for two weeks before surgery. Joe arrives to the Pre-Admit clinic, however has lost his patient education package. There are extra packages in the clinic – find out where these are stored. Give Joe a new package, and ask him to fill out two forms: • LEFS Functional Assessment Tool • Orthopedic Functional Questionnaire Once these are filled out, they are used by physio along with the Blaylock Discharge Planning Tool to score and determine the most likely destination for Joe following discharge. It is determined that Joe is a high needs patient and requires an Occupational Therapy Home visit before surgery, so the CCAC Case Manager needs to be called in to visit Joe before he leaves today to assess his needs. Back to beginning of THR section Back to Start of Workshop
Next Back Simulation cont’d Take a look at the pre-admit clinic algorithm to familiarize yourself with the process. (see algorithm) and patient flow sheet • Joe has four places to go today – he will have some blood work done, have a nursing orientation, a physiotherapy assessment and orientation, and an occupational therapy orientation. • Take a look at the clinical pathway. The first page contains some basic instructions and a master signature sheet (If sites have a master signature sheet for your facility, this is not included in your pathways). Each page needs to have a patient ID sticker. The next page for the pre-admit clinic to fill in. In the first few lines, list any comorbid conditions Joe has, to aid health records in coding for Joe’s condition. • On the right hand side of the page is a column. At the end of each of these visits, each health care provider will initial tasks they completed on the first page of the pathway. • Review the clinical pathway by clicking here Back to beginning of THR section Back to Start of Workshop
Next Back Simulation cont’d • At the end of the clinic, look at the performance indicator for this day of the pathway (first row on the page). Joe attended the physio portion of the clinic, so this is dated, initialed and indicated as “Met” . • Joe should leave with his patient education materials, patient pathway, and instructions on what to do before surgery. The clinical pathway will remain on the chart for when he returns for surgery. • When Joe returns on the day of surgery, the pathway will continue to the next page. It should be started in the day surgery department. There are post-op pre-printed orders that can be found in the OR , the GBHN website and the Order sets website. Back to beginning of THR section Back to Start of Workshop
Next Back Simulation cont’d • When Joe finishes surgery, he will spend some time in the recovery room and then move to the surgical unit. Each care provider that cares for Joe will need to fill in the tasks completed through this process. Take a look at that page, “Post-Op Day of Surgery” to familiarize yourself with the tasks. • Once Joe is moved to the surgical unit, the “Smiley Face Tool” needs to be taped to the wall in his room. This is used by the physiotherapy department to track milestones with respect to mobility and exercises. Each milestone will be circled and dated as it is achieved. This helps all health care providers know Joe’s status at any given time. (see sample) • On each page of the pathway, you will notice a few consistent tasks. One is under Discharge Planning –“Assess Discharge Criteria Daily”. Each day, look at these goals – the Discharge Criteria are the second last page of the pathway. If any have been met, initial and date them. Once they have been met, Joe should be ready for discharge. Back to beginning of THR section Back to Start of Workshop
Next Back Simulation cont’d • Another consistent task is under Psychosocial Support/Education. Each day you are asked to “Review the patient pathway” and “Review Hip Precautions”. You can use Joe’s patient education materials and patient pathway to help you with this, to ensure Joe understands what is happening in hospital, aligning expectations, and he is aware of the hip precautions he has following surgery. • Not all tasks are applicable for all patients, or for all shifts. For example, during the night shift, you may not be teaching Joe. Thus, under “Review Patient Pathway”, you can indicate N/A and initial. This is the case for any tasks that are not applicable for Joe. At the end of a day, there should be no blank boxes on the pathway page. • The second indicator we are tracking for this pathway is also on this page –“Antibiotics discontinued 24 hours post-op”. Joe’s antibiotics were discontinued at 48 hours, it should be inputted at “Not Met” . Back to beginning of THR section Back to Start of Workshop
Next Back Simulation cont’d • Each day, the Discharge Criteria need to be assessed to see if they have been met. If they have, Joe should be ready for discharge. Let’s assume Joe has not met the Discharge Criteria by the end of 4 days post-op, and so cannot go home. He does not have independent transfers yet, nor can he ambulate independently on level ground. Back to beginning of THR section Back to Start of Workshop
Next Back Simulation cont’d Since Joe is from Durham, it is determined he should be transferred to the SBGHC – Durham hospital site. When Joe is transferred, the following information needs to go with him to the transfer site: • A copy of the Physio Database • A copy of the Teaching checklist • Original of the Smiley face tool • Copy of Discharge Criteria • Copy of Discharge Planning Tool • Copy of the MAR sheet (including anticoagulant record) When Joe arrives in Durham, the pathway will be continued. If Joe remains in hospital beyond 5 days, staff in the Durham site will use the Ongoing Post Op Care phase of the pathway until Joe has met all the Discharge Criteria which are on the last page of the clinical pathway. Back to beginning of THR section Back to Start of Workshop
Next Back Simulation cont’d • If Joe remains in hospital beyond the three days listed on the pathway page, insert a new Ongoing post-op Care page behind this page and continue using the pathway until discharge criteria have been met or Joe is discharged home. • Let’s assume that Joe is discharged home, but requires outpatient physiotherapy services. In this case, the Community Care Stage of the pathway begin. See workflow • The therapist in the Durham site will use the Community Care Stage clinical pathway to aid in the care for Joe. She/he will assess him at admission to services and at discharge to determine if he has met the goals on the pathway. Back to beginning of THR section Back to Start of Workshop
Next Back Simulation Community Care Stage Cont’d • She/he will give Joe the client pathway to help explain to Joe what the goals are for therapy. • When it is time for Joe’s follow up appointment at 6 and 12 weeks, the Client Communication Form will be given to Joe to give to the surgeon and get important questions answered about his status. He needs to return this form to the therapist so therapy can be adjusted accordingly. • Finally, when Joe is discharged from outpatient services, the LEFS tool will be repeated and scored to see how Joe has improved functionally. The pathway needs to be completely filled in and a copy sent to the Evidence-Based Care Program • If Joe were to go to CCAC services, the same process would be followed, and started again if Joe is transferred to outpatient physiotherapy. Back to beginning of THR section Back to Start of Workshop
Back THR Quiz • There are 2 stages to the THR pathway – what are they? • What are the inclusion criteria for this pathway? • What is the LEFS functional assessment tool? What is it used for? • What type of a pathway is this pathway? A) Day B) Phase • What is the Smiley Face Tool? Where does it go? • What goes with the patient if he/she is transferred? • When is the Ongoing Post Op Care phase used? What do you do if the patient remains in hospital beyond the first 3 days in this phase? • What is the Community Care Stage used for? Back to beginning of THR section Back to Start of Workshop Answers
Next Back THR Quiz - Answers • There are 2 stages to the THR pathway – what are they?Acute Stage, Community Care Stage • What are the inclusion criteria for this pathway? Patients undergoing an ELECTIVE total hip replacement • What is the LEFS functional assessment tool? What is it used for?It is an assessment of the patient’s function before surgery. It is used to determine how well the patient progresses following surgery. It is filled in at the pre-admit clinic and also at the end of outpatient physiotherapy • What type of a pathway is this pathway? A) Day B) Phase – This pathway is both a day and a phase pathway. The first four days are a day pathway, which means each page is for one day in hospital. The Ongoing Post-Op Care phase is a phase type pathway, where the patient stays in this phase until all variances are resolved. • What is the Smiley Face Tool? Where does it go?The Smiley Face Tool should be taped to the patient’s wall and show all health care providers how far progressed the patient is with respect to mobility and exercise. • What goes with the patient if he/she is transferred?The Physio Database should be copied, and the Discharge Criteria, the Discharge Planning Tool, the MAR sheet (including anticoagulant record), the original of the Smiley Face Tool should go with the patient along with any other documentation that would help in the transition of care. Back to beginning of THR section Back to Start of Workshop
Back THR Quiz - Answers 7. When is the Ongoing Post Op Care phase used? What do you do if the patient remains in hospital beyond the first 3 days in this phase?This is used if the discharge criteria have not been met at 5 days post –op and the patient needs to stay in hospital longer. It is a phase type pathway with one phase, and the patient remains on this phase until all discharge criteria have been met. If this is longer than 3 days, blank photocopied sheets can be inserted and used until the variances have been resolved. 8. What is the Community Care Stage used for?This is used for outpatient physiotherapy or CCAC services the patient receives following hospital discharge. If you have had difficulty with any of these questions, go back through the material on this pathway and/or the general pathway information in this workshop, or contact the Evidence-Based Care Program Back to beginning of THR section Back to Start of Workshop