Download
1 / 19
190 likes | 413 Vues
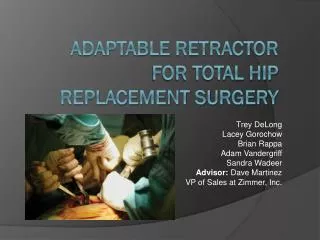
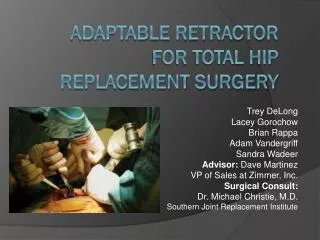
Trey DeLong Lacey Gorochow Brian Rappa Adam Vandergriff Sandra Wadeer Advisor: Dave Martinez VP of Sales at Zimmer, Inc. Surgical Consult: Dr. Michael Christie, M.D. Southern Joint Replacement Institute. Adaptable Retractor for Total Hip Replacement Surgery. Problem Statement.

E N D
Trey DeLong Lacey Gorochow Brian Rappa Adam Vandergriff Sandra Wadeer Advisor: Dave Martinez VP of Sales at Zimmer, Inc. Surgical Consult: Dr. Michael Christie, M.D. Southern Joint Replacement Institute Adaptable Retractor for Total Hip Replacement Surgery
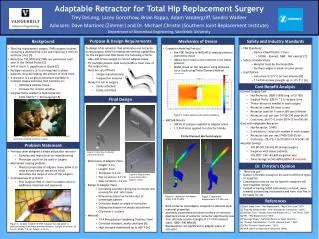
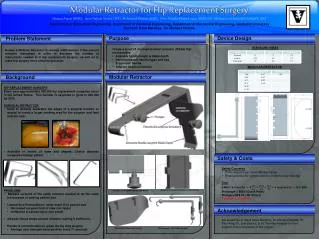
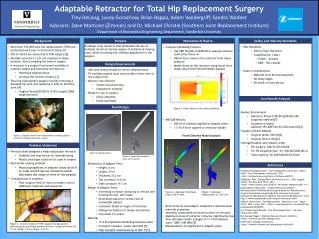
Problem Statement • Current tissue retractors are narrow, multiple retractors are required especially in obese patients • NY times reports 34% adults are obese • +Surgical Techs($20.00/hr*2-4hr/surgery*200k surgeries/year) • Time of surgery increases as well • Previous team designed an adjustable retractor • Complex and impractical for industrial production • Prototype could not be used in surgery
Mechanism & Consequences • Mechanism causing the problem Physical properties of adipose tissue allow it to wrap around narrow retractors • Consequences of unresolved problem Poor surgical field of vision Increase cost for additional materials and personnel
Surgery Experience 4-5 in (6 in in bigger patient) Depth can range from 1-6 inches depending (Patient Size) 3 in wide Fat tissue getting in the way
Dr. Christie’s Perspective • Functions of retractor: • Orient the incision • Keep tissue from falling into surgical window • Disposabile vs. Non • Not “green” • Strength concerns • Ideal Device: • Robust • Simple • Movable window
Design Requirements & Objectives • Keep back adipose tissue • Fit multiple patient sizes and provide a clear view of the surgical site • Must be cost efficient • Simple manufacturing • cheap material • Ready for use in surgery • Easily attached • Easily sterilized • Strong enough to hold back fat tissue
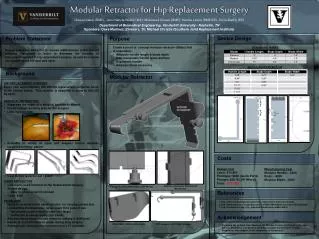
Design • Lofted feature-rounded to keep back tissue • Curvature based on angle of known measurements in surgery video
Material of Attachment Piece • 17-4 Precipitation Hardening Stainless Steel • Composition: 15.5% Chromium, 4.5% Nickel, 3.5%Copper • Ultimate Tensile Strength: 1000-1340 Mpa • High strength maintained up to 600°F • Corrosion resistance superior • Readily welded-preheating not usually required
Stainless Steel Model • Weld rods onto existing retractor to provide rails • Attachment made in machine shop using CAD design
Goals • Reduce total hip replacement surgery cost • Less personnel in the operating room • Less retractors needed for surgery • Increase vision and work room for the surgeon • Increase efficiency of the surgery • Reduce surgery time
Performance Metrics • Retractor system work on 95% of patients • Different size attachments for non-disposable. • Costs • Keep production costs minimal • Mass production • Readily machined • Predicted to be ~$300 for retractor and attachments (non-disposable)
System and Environment • Role in surgery • Increase view of region and allows access • Why its beneficial to the surgeon • Reduce people near patient • Reduce number of retractors • Make surgery easier
Testing Methods • Verification and Validation • Hardware Testing • Stress Testing • Sterilization Testing
Verification and Validation • Verification: ensuring that all of the parts of the device work together • Obtained a model made of ABS plastic made from an FDM process • Validation: making sure that the device satisfies specified requirement • Taking the actual prototype into surgery for Dr. Christie to use
Hardware Testing Protocol • Use of mechanical equipment to test strength of device • Take retractor with similar properties to testing labs • Apply a load using a compression/ tensile machine to the device • Hold the load over the device for several minutes • Observe the deformation of the device over time • Mechanically test ability of steel to get the properties
Stress Testing Protocol • Computer Modeling • Use PDE Toolbox (MATLAB) to analyze tissue • Obtain force load on the retractor from tissue data • Model stress on the retractor using force loads • Analyze model during normal use
Sterilization Testing • Use in surgery • Run through Autoclave to test resilience and observe any remaining tissue • Run through multiple cycles and observe the number of cycles until completely clean.
Next Steps… • Obtain a completed prototype to be shown in the final presentation • Conduct testing methods • Verification • Validation • Hardware Testing • Stress Testing • Sterilization Testing • Present our final project
References • http://www.bls.gov/bls/blswage.htm • http://www.innomed.net/hip_rets_mis.htm#Anchor-APC-49575 • http://www.nytimes.com/2010/01/14/health/14obese.html • http://www.orthosupersite.com/view.aspx?rid=1889 • http://www.zimmer.com/z/ctl/op/global/action/1/id/8140/template/PC/navid/10427