Chapter 10 Getting Started with GUI Programming
Chapter 10 Getting Started with GUI Programming. GUI Class Hierarchy Frames Creating frames, centering frames, adding components to frames Layout Managers FlowLayout, GridLayout, BorderLayout Drawing on Panels The paintComponent method Using Colors, Fonts, and Font Metrics

Chapter 10 Getting Started with GUI Programming
E N D
Presentation Transcript
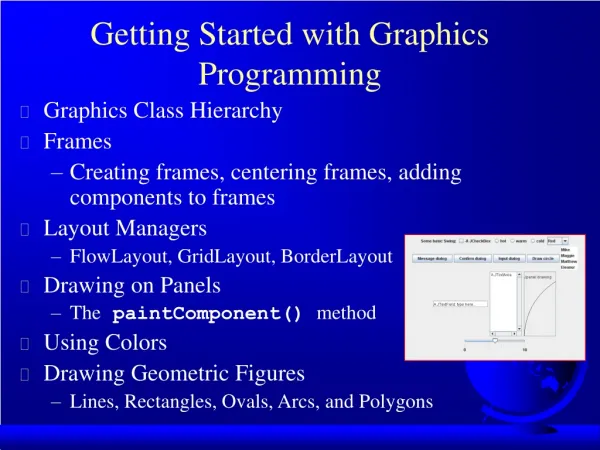
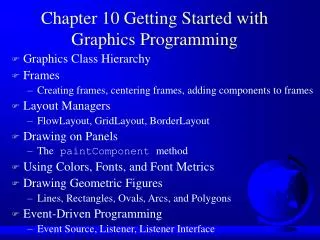
Chapter 10 Getting Started with GUI Programming • GUI Class Hierarchy • Frames • Creating frames, centering frames, adding components to frames • Layout Managers • FlowLayout, GridLayout, BorderLayout • Drawing on Panels • The paintComponent method • Using Colors, Fonts, and Font Metrics • Drawing Geometric Figures • Lines, Rectangles, Ovals, Arcs, and Polygons • Event-Driven Programming • Event Source, Listener, Listener Interface
Frames • Frame is a window that is not contained inside another window. Frame is the basis to contain other user interface components in Java GUI applications. • The Frame class can be used to create windows. • For Swing GUI programs, use JFrame class to create widows.
Creating Frames • import javax.swing.*; • public class MyFrame { • public static void main(String[] args) { • JFrame frame = new JFrame("Test Frame"); • frame.setSize(400, 300); • frame.setVisible(true); • frame.setDefaultCloseOperation( • JFrame.EXIT_ON_CLOSE); • } • } NOTE: You must have JDK 1.3 or higher to run the slides. Run
Centering Frames By default, a frame is displayed in the upper-left corner of the screen. To display a frame at a specified location, you can use the setLocation(x, y) method in the JFrame class. This method places the upper-left corner of a frame at location (x, y).
Centering Frames, cont. CenterFrame Run
Adding Components into a Frame • // Add a button into the frame • frame.getContentPane().add( • new JButton("OK")); MyFrameWithComponents Run
NOTE The content pane is a subclass of Container. The statement in the preceding slide can be replaced by the following two lines: Container container = frame.getContentPane(); container.add(new JButton("OK")); You may wonder how a Container object is created. It is created when a JFrame object is created. A JFrame object uses the content pane to hold components in the frame.
Layout Managers • Java’s layout managers provide a level of abstraction to automatically map your user interface on all window systems. • The UI components are placed in containers. Each container has a layout manager to arrange the UI components within the container.
Kinds of Layout Managers • FlowLayout (Chapter 10) • GridLayout (Chapter 10) • BorderLayout (Chapter 10) • CardLayout (Chapter 12) • GridBagLayout (Chapter 12)
Example 10.1Testing the FlowLayout Manager The components are arranged in the container from left to right in the order in which they were added. When one row becomes filled, a new row is started. ShowFlowLayout Run
FlowLayout Constructors • public FlowLayout(int align, int hGap, int vGap) Constructs a new FlowLayout with a specified alignment, horizontal gap, and vertical gap. The gaps are the distances inpixel between components. • public FlowLayout(int alignment) Constructs a new FlowLayout with a specified alignment and a default gap of five pixels for both horizontal and vertical. • public FlowLayout() Constructs a new FlowLayout with a defaultcenter alignment and a default gap of five pixelsfor both horizontal and vertical.
Example 10.2Testing the GridLayout Manager The GridLayout manager arranges componentsin a grid (matrix) formation with the number ofrows and columns defined by the constructor. The components are placed in the grid from left to right starting with the first row, then the second, and so on. ShowGridLayout Run
GridLayout Constructors • public GridLayout(int rows,int columns) Constructs a new GridLayout with the specified number of rows and columns. • public GridLayout(int rows, int columns, int hGap, int vGap) Constructs a new GridLayout with thespecified number of rows and columns,along with specified horizontal andvertical gaps between components.
Example 10.3Testing the BorderLayout Manager The BorderLayout manager divides the container into five areas: East, South, West, North, and Center. Components are added to a BorderLayout by using the add method. add(Component, constraint), where constraint is BorderLayout.EAST, BorderLayout.SOUTH, BorderLayout.WEST, BorderLayout.NORTH, or BorderLayout.CENTER. ShowBorderLayout Run
Example 10.3, cont. ShowBorderLayout Run
Using Panels as Containers • Panels act as smaller containers for grouping user interface components. • It is recommended that you place the user interface components in panels and place the panels in a frame. You can also place panels in a panel.
Example 10.4 Testing Panel This example uses panels to organize components. The program creates a user interface for a Microwave oven. TestPanels Run
Drawing on Panels JPanel can be used to draw graphics (including text) and enable user interaction. To draw in a panel, you create a new class that extends JPanel and override the paintComponent method to tell the panel how to draw things. You can then display strings, draw geometric shapes, and view images on the panel.
Drawing on Panels, cont. public class DrawMessage extends JPanel { /** Main method */ public static void main(String[] args) { JFrame frame = new JFrame("DrawMessage"); frame.getContentPane().add(new DrawMessage()); frame.setDefaultCloseOperation(JFrame.EXIT_ON_CLOSE); frame.setSize(300, 200); frame.setVisible(true); } /** Paint the message */ public void paintComponent(Graphics g) { super.paintComponent(g); g.drawString("Welcome to Java!", 40, 40); } }
NOTE The Graphics class is an abstract class for displaying figures and images on the screen on different platforms. The Graphics class is implemented on the native platform in the JVM. When you use the paintComponent method to draw things on a graphics context g, this g is an instance of a concrete subclass of the abstract Graphics class for the specific platform. The Graphics class encapsulates the platform details and enables you to draw things uniformly without concerning specific platforms.
NOTE Whenever a component is displayed, a Graphics object is created for the component. The Swing components use the paintComponent method to draw things. The paintComponent method is automatically invoked to paint the graphics context when the component is first displayed or whenever the component needs to be redisplayed. Invoking super.paintComponent(g) is necessary to ensure that the viewing area is cleared before a new drawing is displayed.
NOTE To draw things, normally you create a subclass of JPanel and override its paintComponent method to tell the system how to draw. In fact, you can draw things on any GUI component.
The Color Class Color c = new Color(r, g, b); r, g, and b specify a color by its red, green, and blue components. Example: Color c = new Color(128, 100, 100);
Setting Colors You can use the following methods to set the component’s background and foreground colors: setBackground(Color c) setForeground(Color c) Example: setBackground(Color.yellow); setForeground(Color.red);
The Font Class Font myFont = Font(name, style, size); Example: Font myFont = new Font("SansSerif ", Font.BOLD, 16); Font myFont = new Font("Serif", Font.BOLD+Font.ITALIC, 12);
Finding All Available Font Names GraphicsEnvironment e = GraphicsEnvironment.getLocalGraphicsEnvironment(); String[] fontnames = e.getAvailableFontFamilyNames(); for (int i = 0; i < fontnames.length; i++) System.out.println(fontnames[i]);
Setting Fonts public void paint(Graphics g) { Font myFont = new Font("Times", Font.BOLD, 16); g.setFont(myFont); g.drawString("Welcome to Java", 20, 40); //set a new font g.setFont(new Font("Courier", Font.BOLD+Font.ITALIC, 12)); g.drawString("Welcome to Java", 20, 70); }
The FontMetrics Class public void paint(Graphics g) { g.getFontMetrics(Font f); or g.getFontMetrics(); }
Get FontMetrics • public int getAscent() • public int getDescent() • public int getLeading() • public int getHeight() • public int stringWidth(String str)
Example 10.5Using FontMetrics • Objective: Display “Welcome to Java” in SansSerif 20-point bold, centered in the frame. TestFontMetrics MessagePanel Run
Drawing Geometric Figures • Drawing Lines • Drawing Rectangles • Drawing Ovals • Drawing Arcs • Drawing Polygons
Drawing Lines drawLine(x1, y1, x2, y2);
Drawing Rectangles • drawRect(x, y, w, h); • fillRect(x, y, w, h);
Drawing Rounded Rectangles • drawRoundRect(x, y, w, h, aw, ah); • fillRoundRect(x, y, w, h, aw, ah);
Drawing Ovals • drawOval(x, y, w, h); • fillOval(x, y, w, h);
Drawing Arcs • drawArc(x, y, w, h, angle1, angle2); • fillArc(x, y, w, h, angle1, angle2);
Drawing Polygons int[] x = {40, 70, 60, 45, 20}; int[] y = {20, 40, 80, 45, 60}; g.drawPolygon(x, y, x.length); g.fillPolygon(x, y, x.length);
Example 10.6Drawing a Clock • Objective: Use drawing and trigonometric methods to draw a clock showing the specified hour, minute, and second in a frame. DrawClock DisplayClock Run
Drawing Clock xEnd = xCenter + handLength sin() yEnd = yCenter - handLength cos() Since there are sixty seconds in one minute, the angle for the second hand is second (2/60)
Drawing Clock, cont. xEnd = xCenter + handLength sin() yEnd = yCenter - handLength cos() The position of the minute hand is determined by the minute and second. The exact minute value comined with seconds is minute + second/60. For example, if the time is 3 minutes and 30 seconds. The total minutes are 3.5. Since there are sixty minutes in one hour, the angle for the minute hand is (minute + second/60) (2/60)
Drawing Clock, cont. xEnd = xCenter + handLength sin() yEnd = yCenter - handLength cos() Since one circle is divided into twelve hours, the angle for the hour hand is (hour + minute/60 + second/(60 60))) (2/12)
Event-Driven Programming • Procedural programming is executed in procedural order. • In event-driven programming, code is executed upon activation of events.
Events • An event can be defined as a type of signal to the program that something has happened. • The event is generated by external user actions such as mouse movements, mouse button clicks, and keystrokes, or by the operating system, such as a timer.
Event Information • id: A number that identifies the event. • target: The source component upon which the event occurred. • arg: Additional information about the source components. • x, y coordinates: The mouse pointer location when a mouse movement event occurred. • clickCount: The number of consecutive clicks for themouse events. For other events, it is zero. • when: The time stamp of the event. • key: The key that was pressed or released.